Avoid Over-Tightening: Master How to Set a Torque Wrench
Knowing how to set a torque wrench is essential for anyone working with mechanical systems. Whether you’re tightening lug nuts, assembling engine parts, or installing bike components, using the correct torque ensures safety and performance. Too little force can lead to loose fasteners. Too much can damage threads or break bolts.
Moreover, a properly set torque wrench delivers consistent results every time. It prevents over-tightening and under-tightening. This makes it a must-have tool in garages, workshops, and repair shops. As more DIYers take on home projects, learning how to set a torque wrench becomes even more valuable.
 What is a Torque Wrench
A torque wrench is a tool used to apply a specific amount of torque to a bolt or nut. Torque, in simple terms, is the rotational force applied to an object. Proper torque ensures bolts or nuts are neither too loose nor too tight. This prevents damage and ensures safety.
Torque wrenches are essential for precise assembly, particularly in mechanical or automotive work. They maintain accuracy and secure fittings as specified by manufacturers. The use of a torque wrench minimizes risks caused by under-torqued or over-torqued bolts.
Torque wrenches come in various types, including click-type, beam-type, and digital torque wrenches. Each serves unique purposes but shares the goal of ensuring proper tightness. They often feature calibrated scales for exact torque settings.
Knowing how to set a torque wrench correctly is vital for efficiency and effectiveness. Proper settings prevent tool wear and ensure accurate results. Investing in the right torque wrench and learning its operation benefits anyone involved in technical or mechanical tasks.
Importance of Setting a Torque Wrench Correctly
Setting a torque wrench correctly is crucial for safety and precision. Proper torque ensures bolts are tightened accurately as per specifications. Incorrect torque can lead to loose or overly tight bolts, causing damage or safety risks.
Prevent Damage and Ensure Integrity
Using the correct torque prevents damage to bolts, threads, and connected parts. Over-torquing can strip threads, break bolts, or deform components. Under-torquing can result in loose fittings, reduced functionality, or safety hazards.
Maintain Manufacturer Specifications
Many equipment manufacturers specify torque requirements for components. Following these specifications ensures optimal performance and safety. Proper torque protects both the tool and the connected assembly. Ignoring these guidelines creates potential risks in mechanical systems.
Extend Tool Life
Correctly setting the torque minimizes wear on the wrench itself. Improper settings can cause excessive strain on the tool or inaccurate readings. Regular and accurate use extends the wrench’s lifespan and decreases repair or replacement costs.
Enhance Precision in Work
Precise torque settings provide consistent and accurate results during assembly. This is especially vital in technical or automotive applications. It ensures each bolt is tightened uniformly, maintaining overall function and safety.
Learning how to set a torque wrench properly benefits professionals and DIY users. It ensures safety, prevents damage, and supports efficient mechanical work.
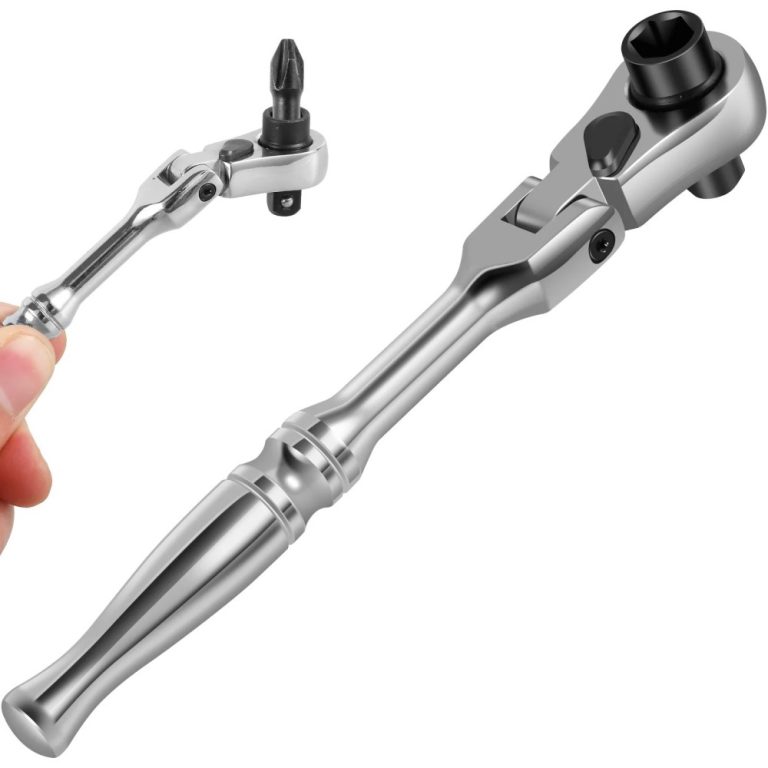
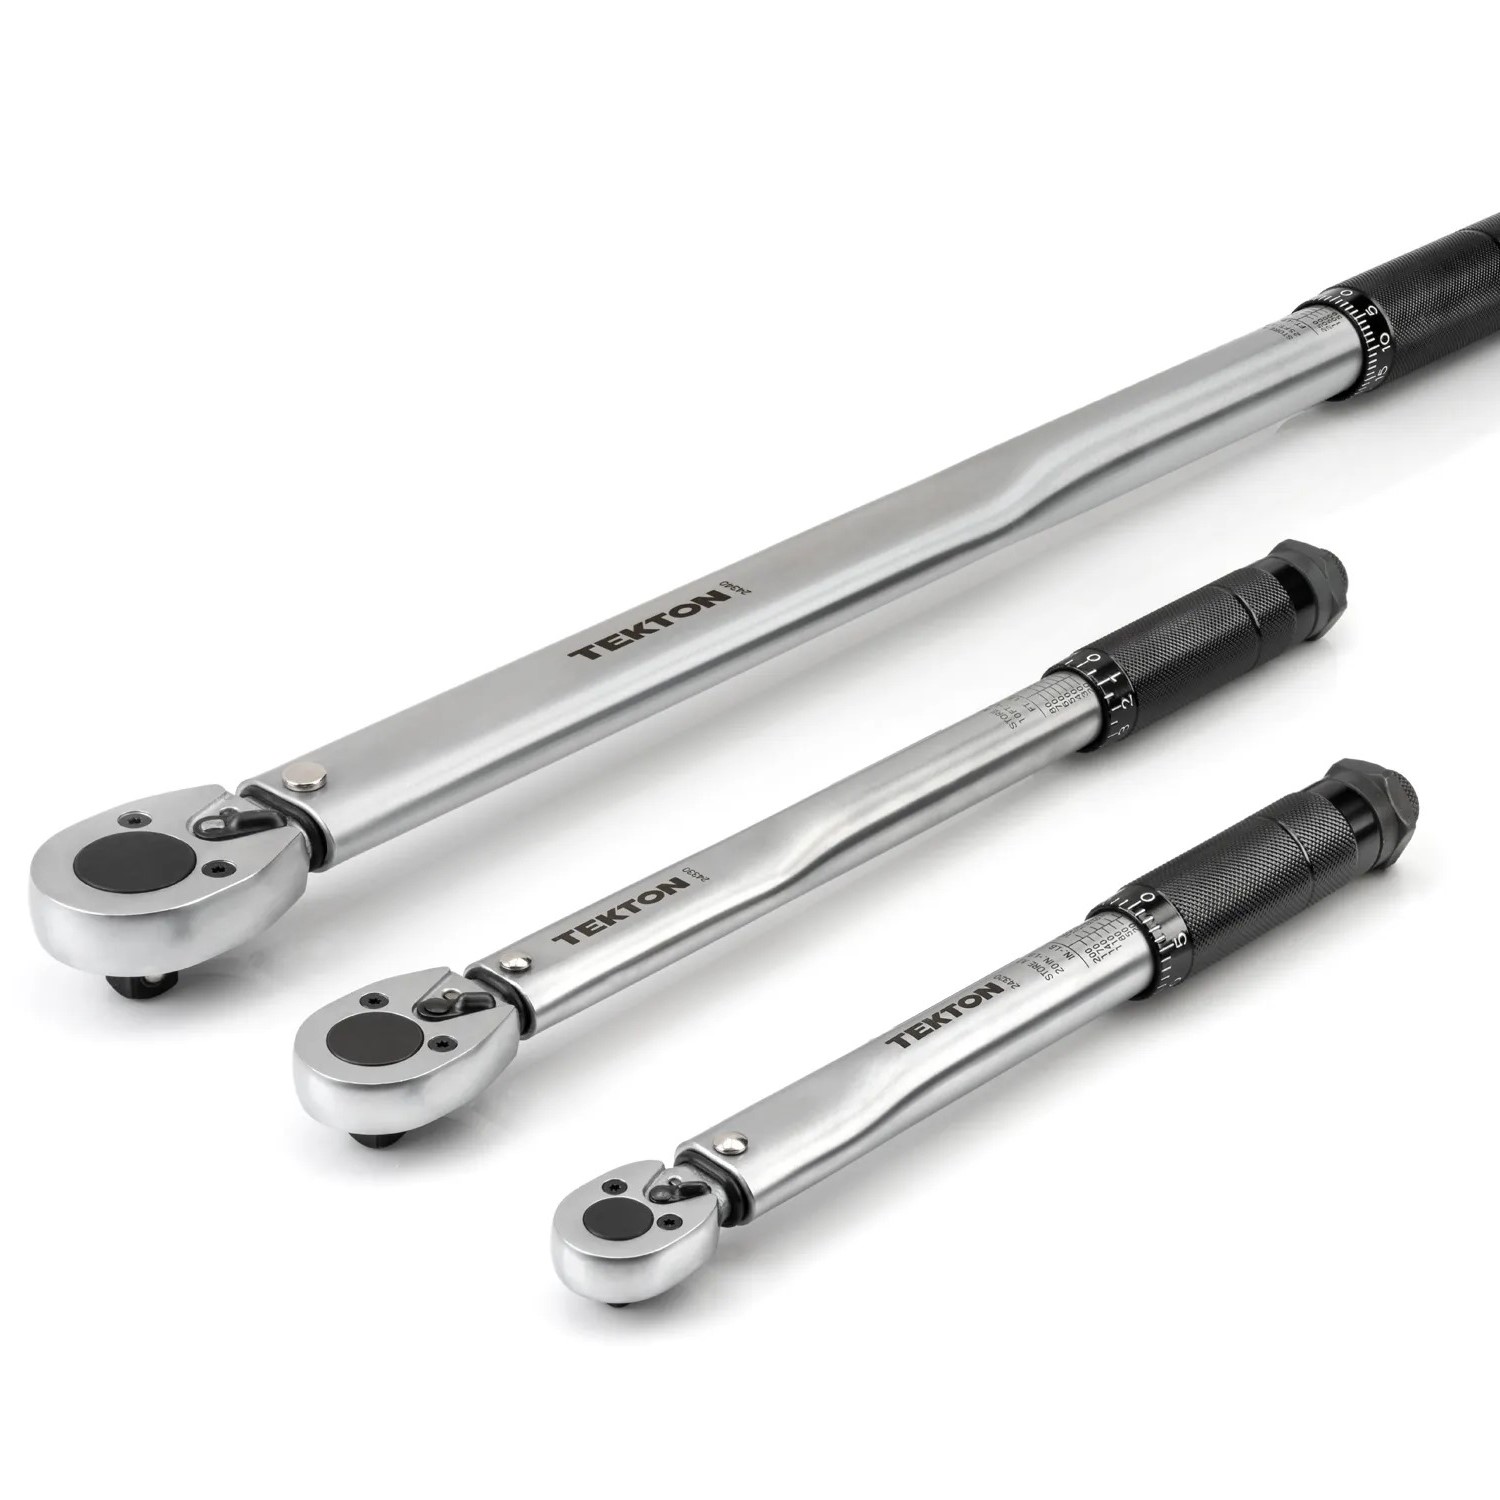 Types of Torque Wrenches
Torque wrenches come in various types, each suited for specific applications. Choosing the right type ensures accurate and safe results.
Click-Type Torque Wrench
The click-type wrench is widely used for its precision. It produces a click sound on reaching the set torque level. This feature alerts the user when the required torque is achieved, reducing the risk of over-tightening.
Beam-Type Torque Wrench
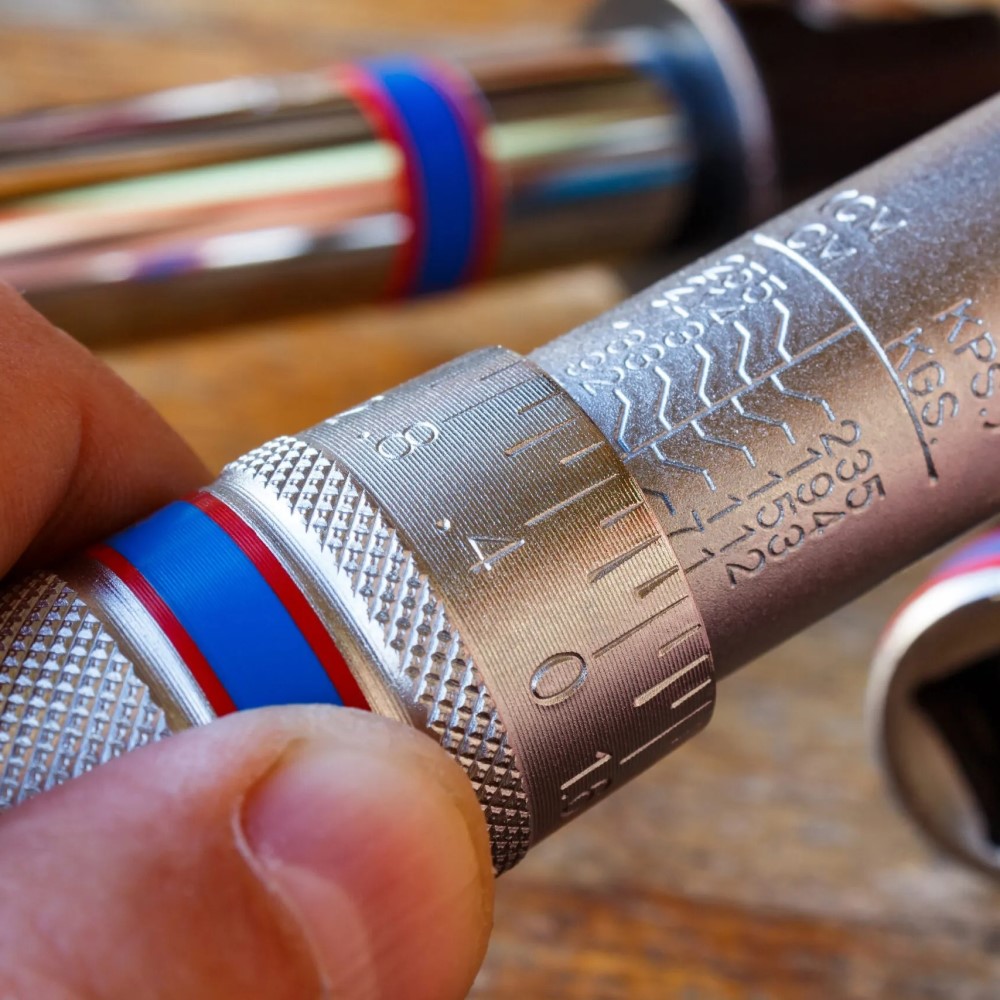
Beam-type wrenches use a flexible beam and scale for torque measurement. They don’t rely on mechanical clicks but provide visual torque feedback. These wrenches are simple and durable, ideal for basic applications.
Digital Torque Wrench
Digital torque wrenches feature electronic displays for easy readings. They offer high precision with adjustable settings. Some models include alerts like lights or beeps when target torque is reached.
Dial-Type Torque Wrench
Dial-type wrenches display torque values on a dial gauge. These are highly accurate and often used in professional industries. They are especially helpful in situations requiring strict torque control.
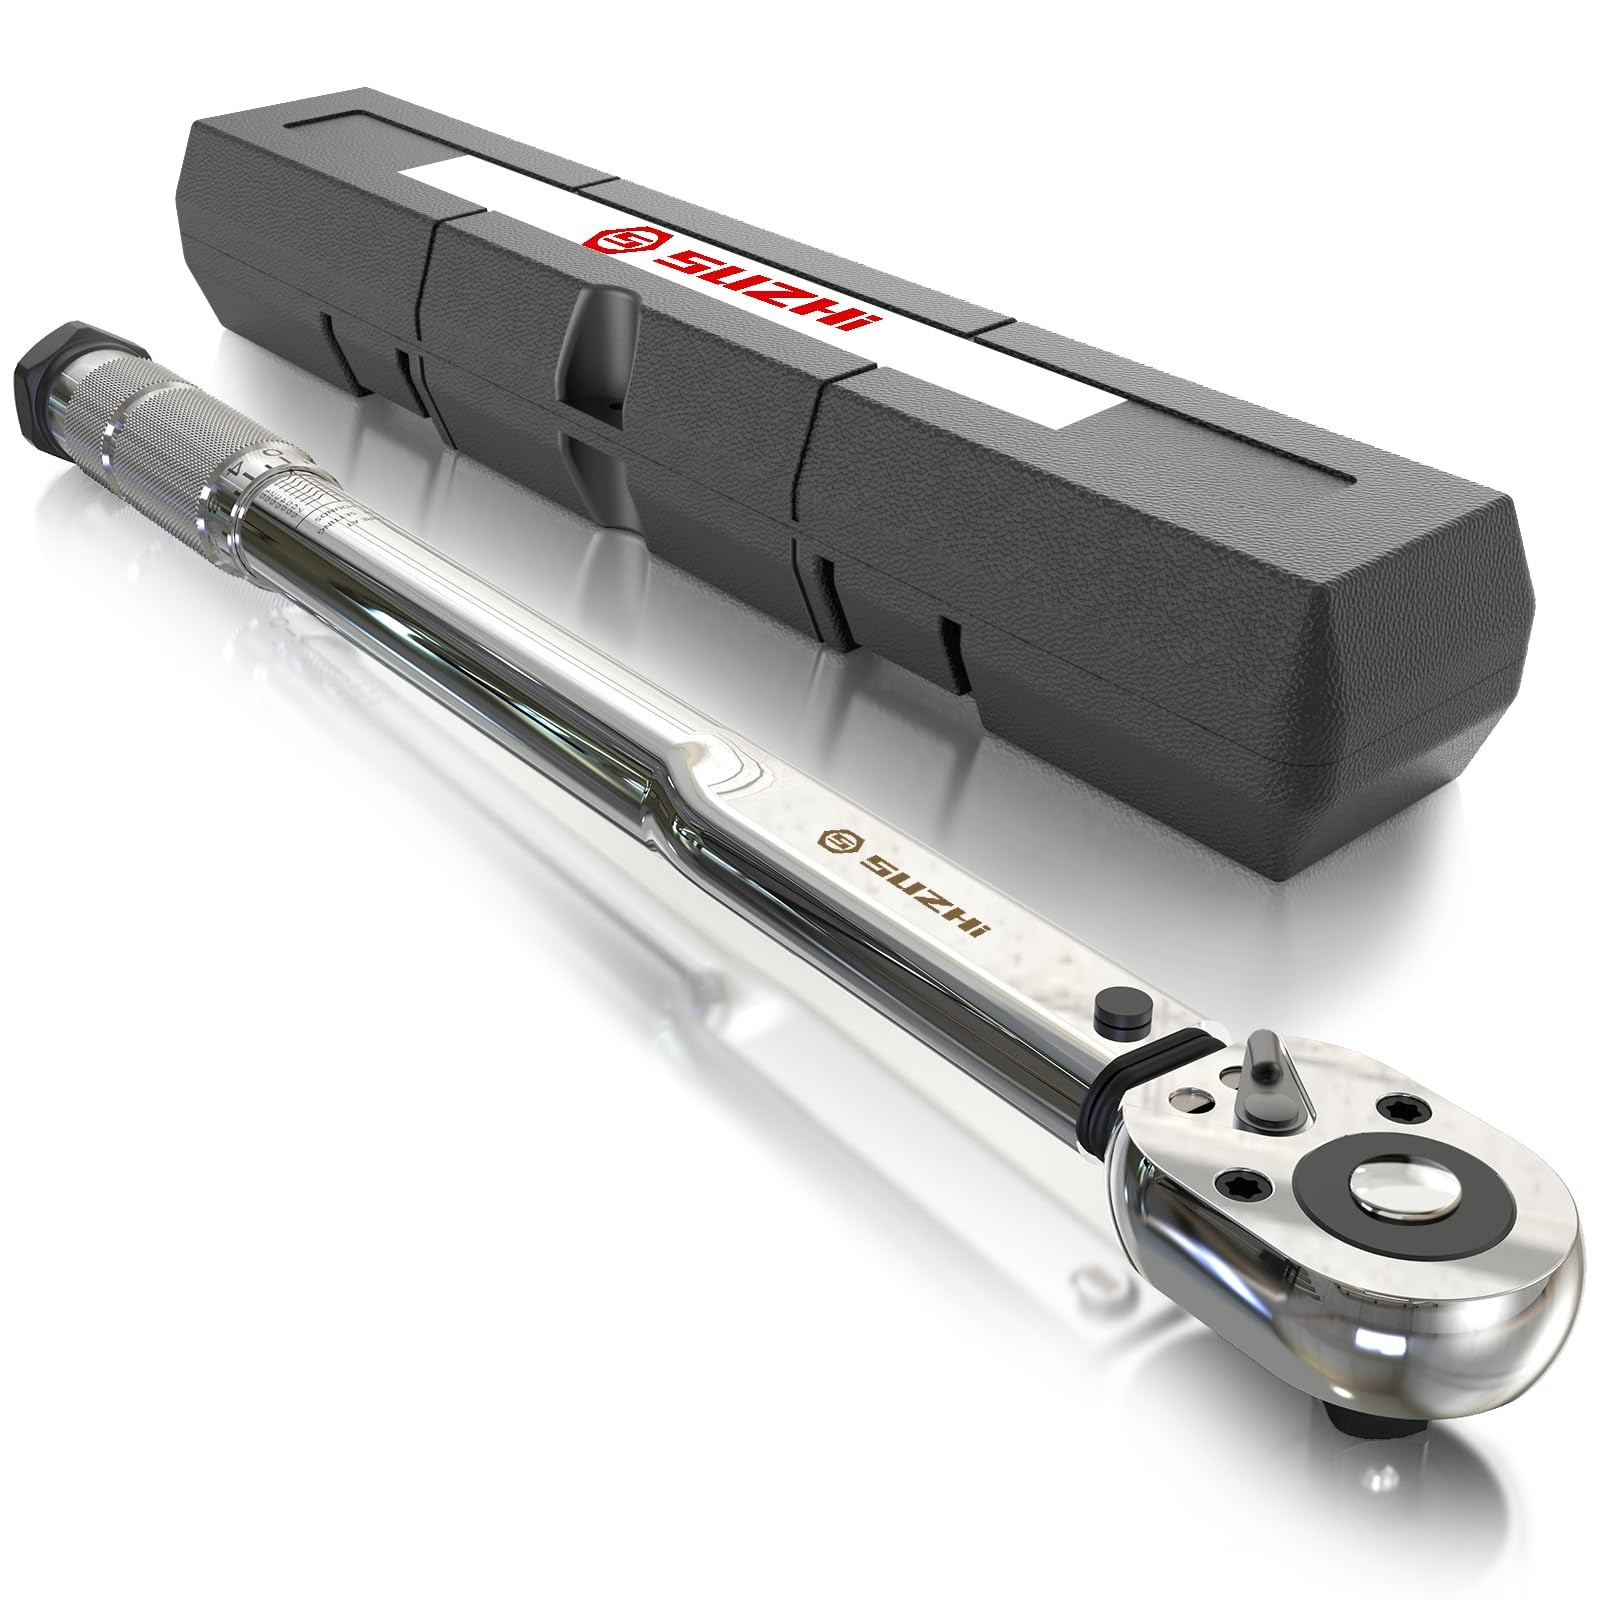
Split Beam and Micrometer Torque Wrenches
Split beam wrenches are lightweight and offer quick adjustments. Micrometer-style wrenches enable fine torque tuning with intricate control. Both are useful in automotive and mechanical environments.
Understanding the types of torque wrenches helps in selecting the right tool for the task. This ensures efficiency, safety, and durability for mechanical projects.
Steps to Set a Click-Type Torque Wrench
A click-type torque wrench is widely used for its precision and ease of use. Setting it correctly ensures that you achieve the desired torque without damaging components or compromising safety. Here’s how to set this type of wrench effectively:
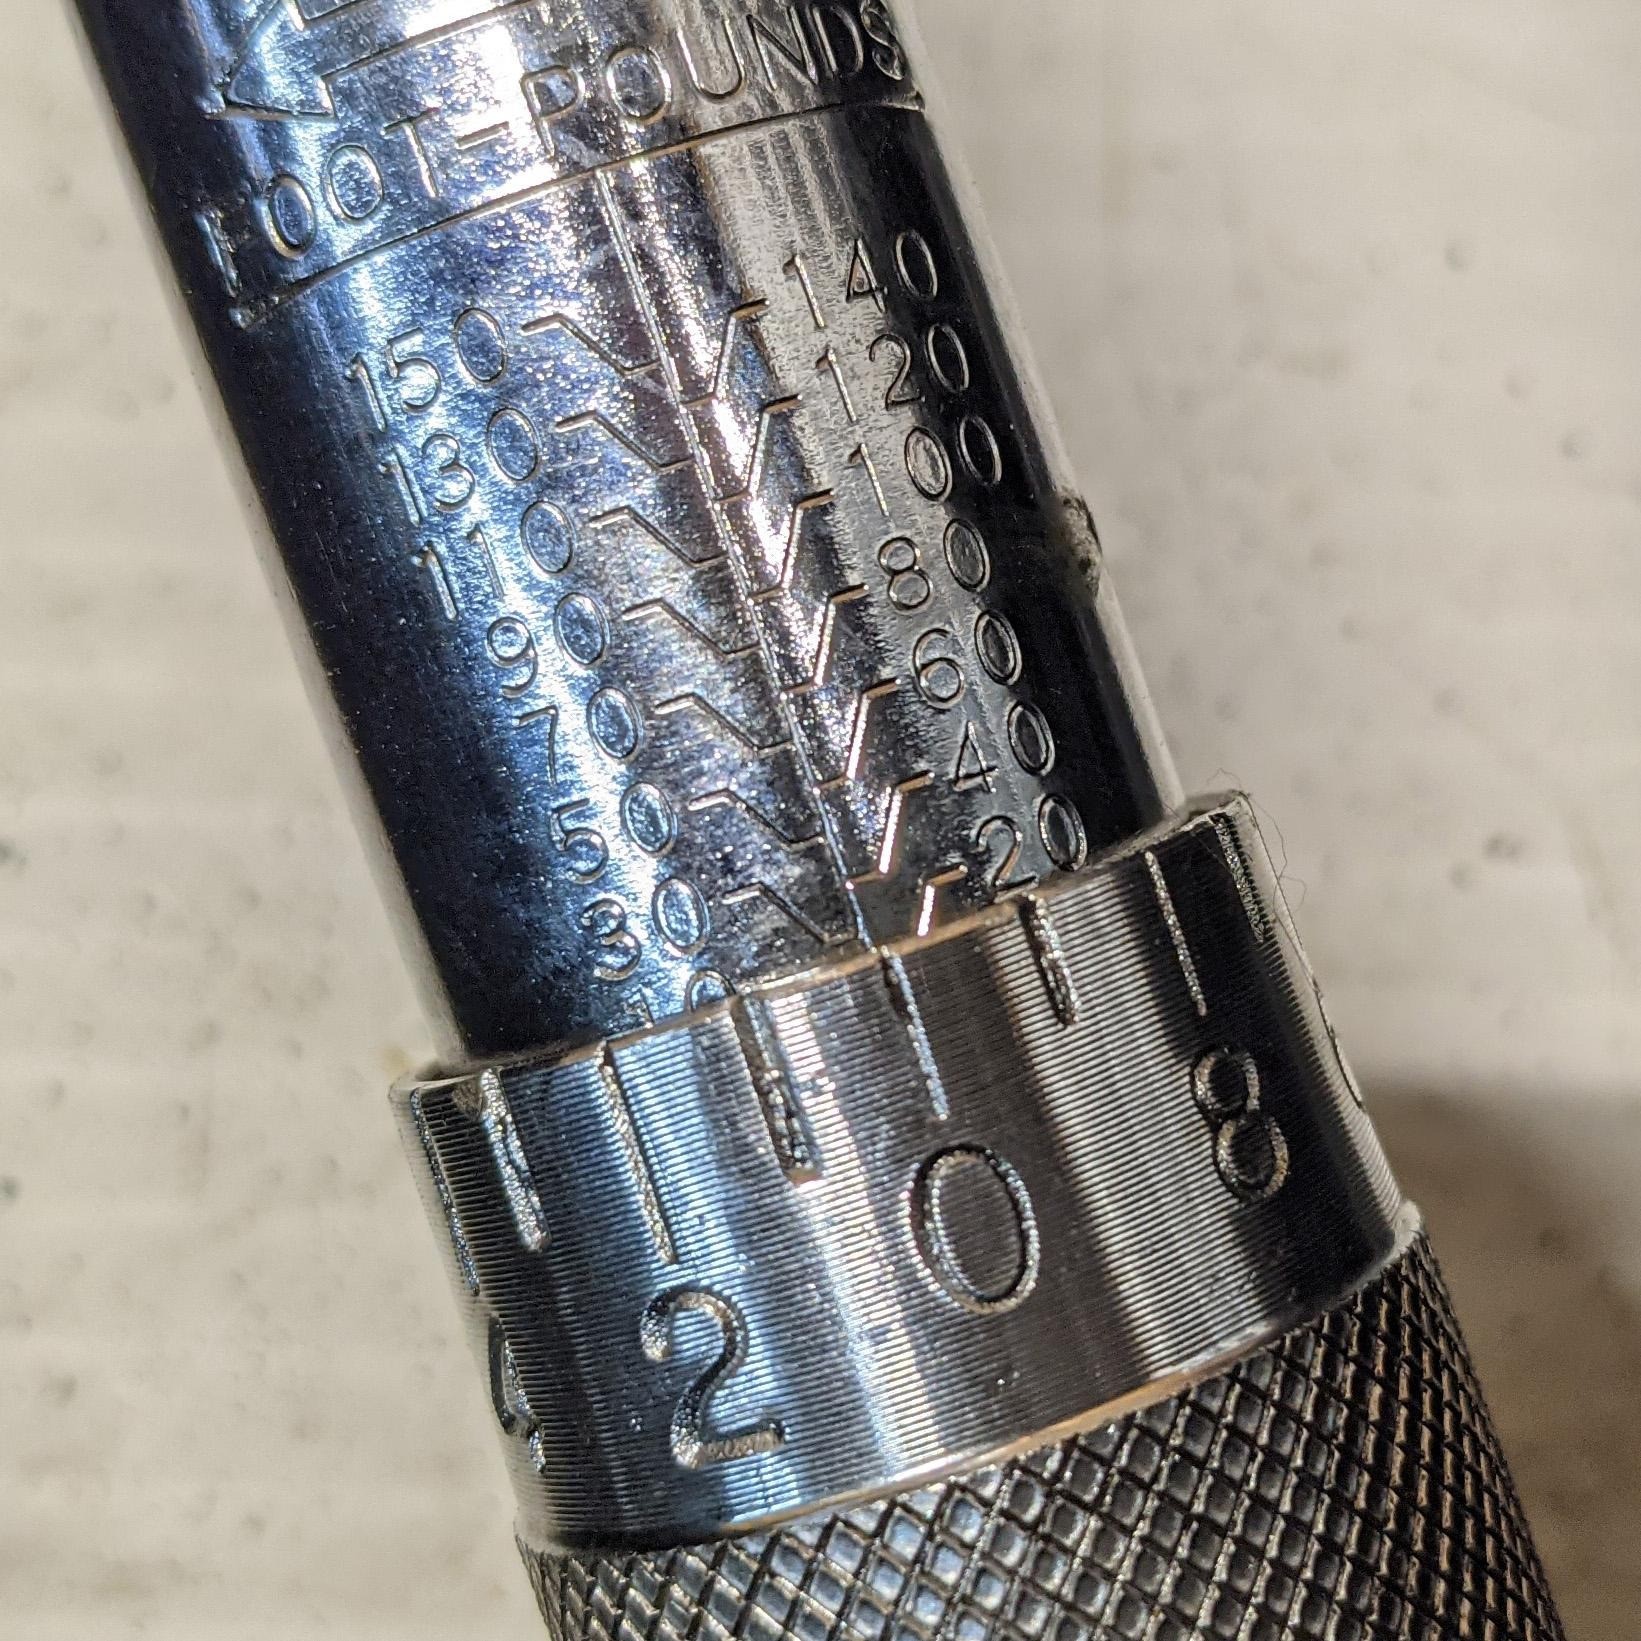
Locating and Adjusting the Torque Scale
- Find the handle and torque scale: Most click-type torque wrenches have a visible torque scale on the handle. Identify the unit of measurement (e.g., foot-pounds or Newton-meters).
- Determine the required torque: Refer to the manufacturer’s specifications for the correct torque. This is usually found in manuals or on the equipment.
- Unlock the adjustment mechanism: Some wrenches have a locking ring or knob to secure the settings. Unlock it before adjusting.
- Rotate the handle to set the torque: Turn the handle to increase or decrease the scale until your desired torque value aligns with the indicator.
- Double-check your setting: Ensure the indicator aligns perfectly with the required torque level before proceeding.
Locking the Wrench After Adjustment
- Secure the setting: Once the desired torque is set, tighten the locking mechanism. This prevents inadvertent changes while working.
- Test the adjustment: If possible, test the wrench on a sample bolt to verify the accuracy.
- Listen or feel for the click: When you use the wrench, it will produce a click sound or sensation when the set torque is reached. Stop tightening immediately upon hearing this sound.
Following these steps will ensure that your click-type torque wrench is properly set. This minimizes errors and ensures your work is safe and accurate. Regular practice and attention to detail will help you master how to set a torque wrench effectively.
 Setting a Digital Torque Wrench
Setting a digital torque wrench is a straightforward process. These tools provide high precision, making them ideal for various applications. Follow these steps to set up your digital torque wrench properly:
Steps to Set a Digital Torque Wrench
- Power on the wrench:
- Locate the power button and switch on the wrench.
- Ensure the screen is working and no error codes are displayed.
- Select the desired unit of measurement:
- Digital wrenches let you toggle between units like foot-pounds or Newton-meters.
- Use the settings button to choose the correct unit for your requirement.
- Determine the required torque value:
- Check the manufacturer’s specification for the specified torque requirement.
- Write it down if needed to ensure accuracy.
- Set the torque value:
- Use the adjustment buttons to increase or decrease the torque setting.
- Align the screen reading with the required value.
- Confirm the settings:
- Double-check the torque value on the display.
- Ensure the wrench is ready to use before proceeding.
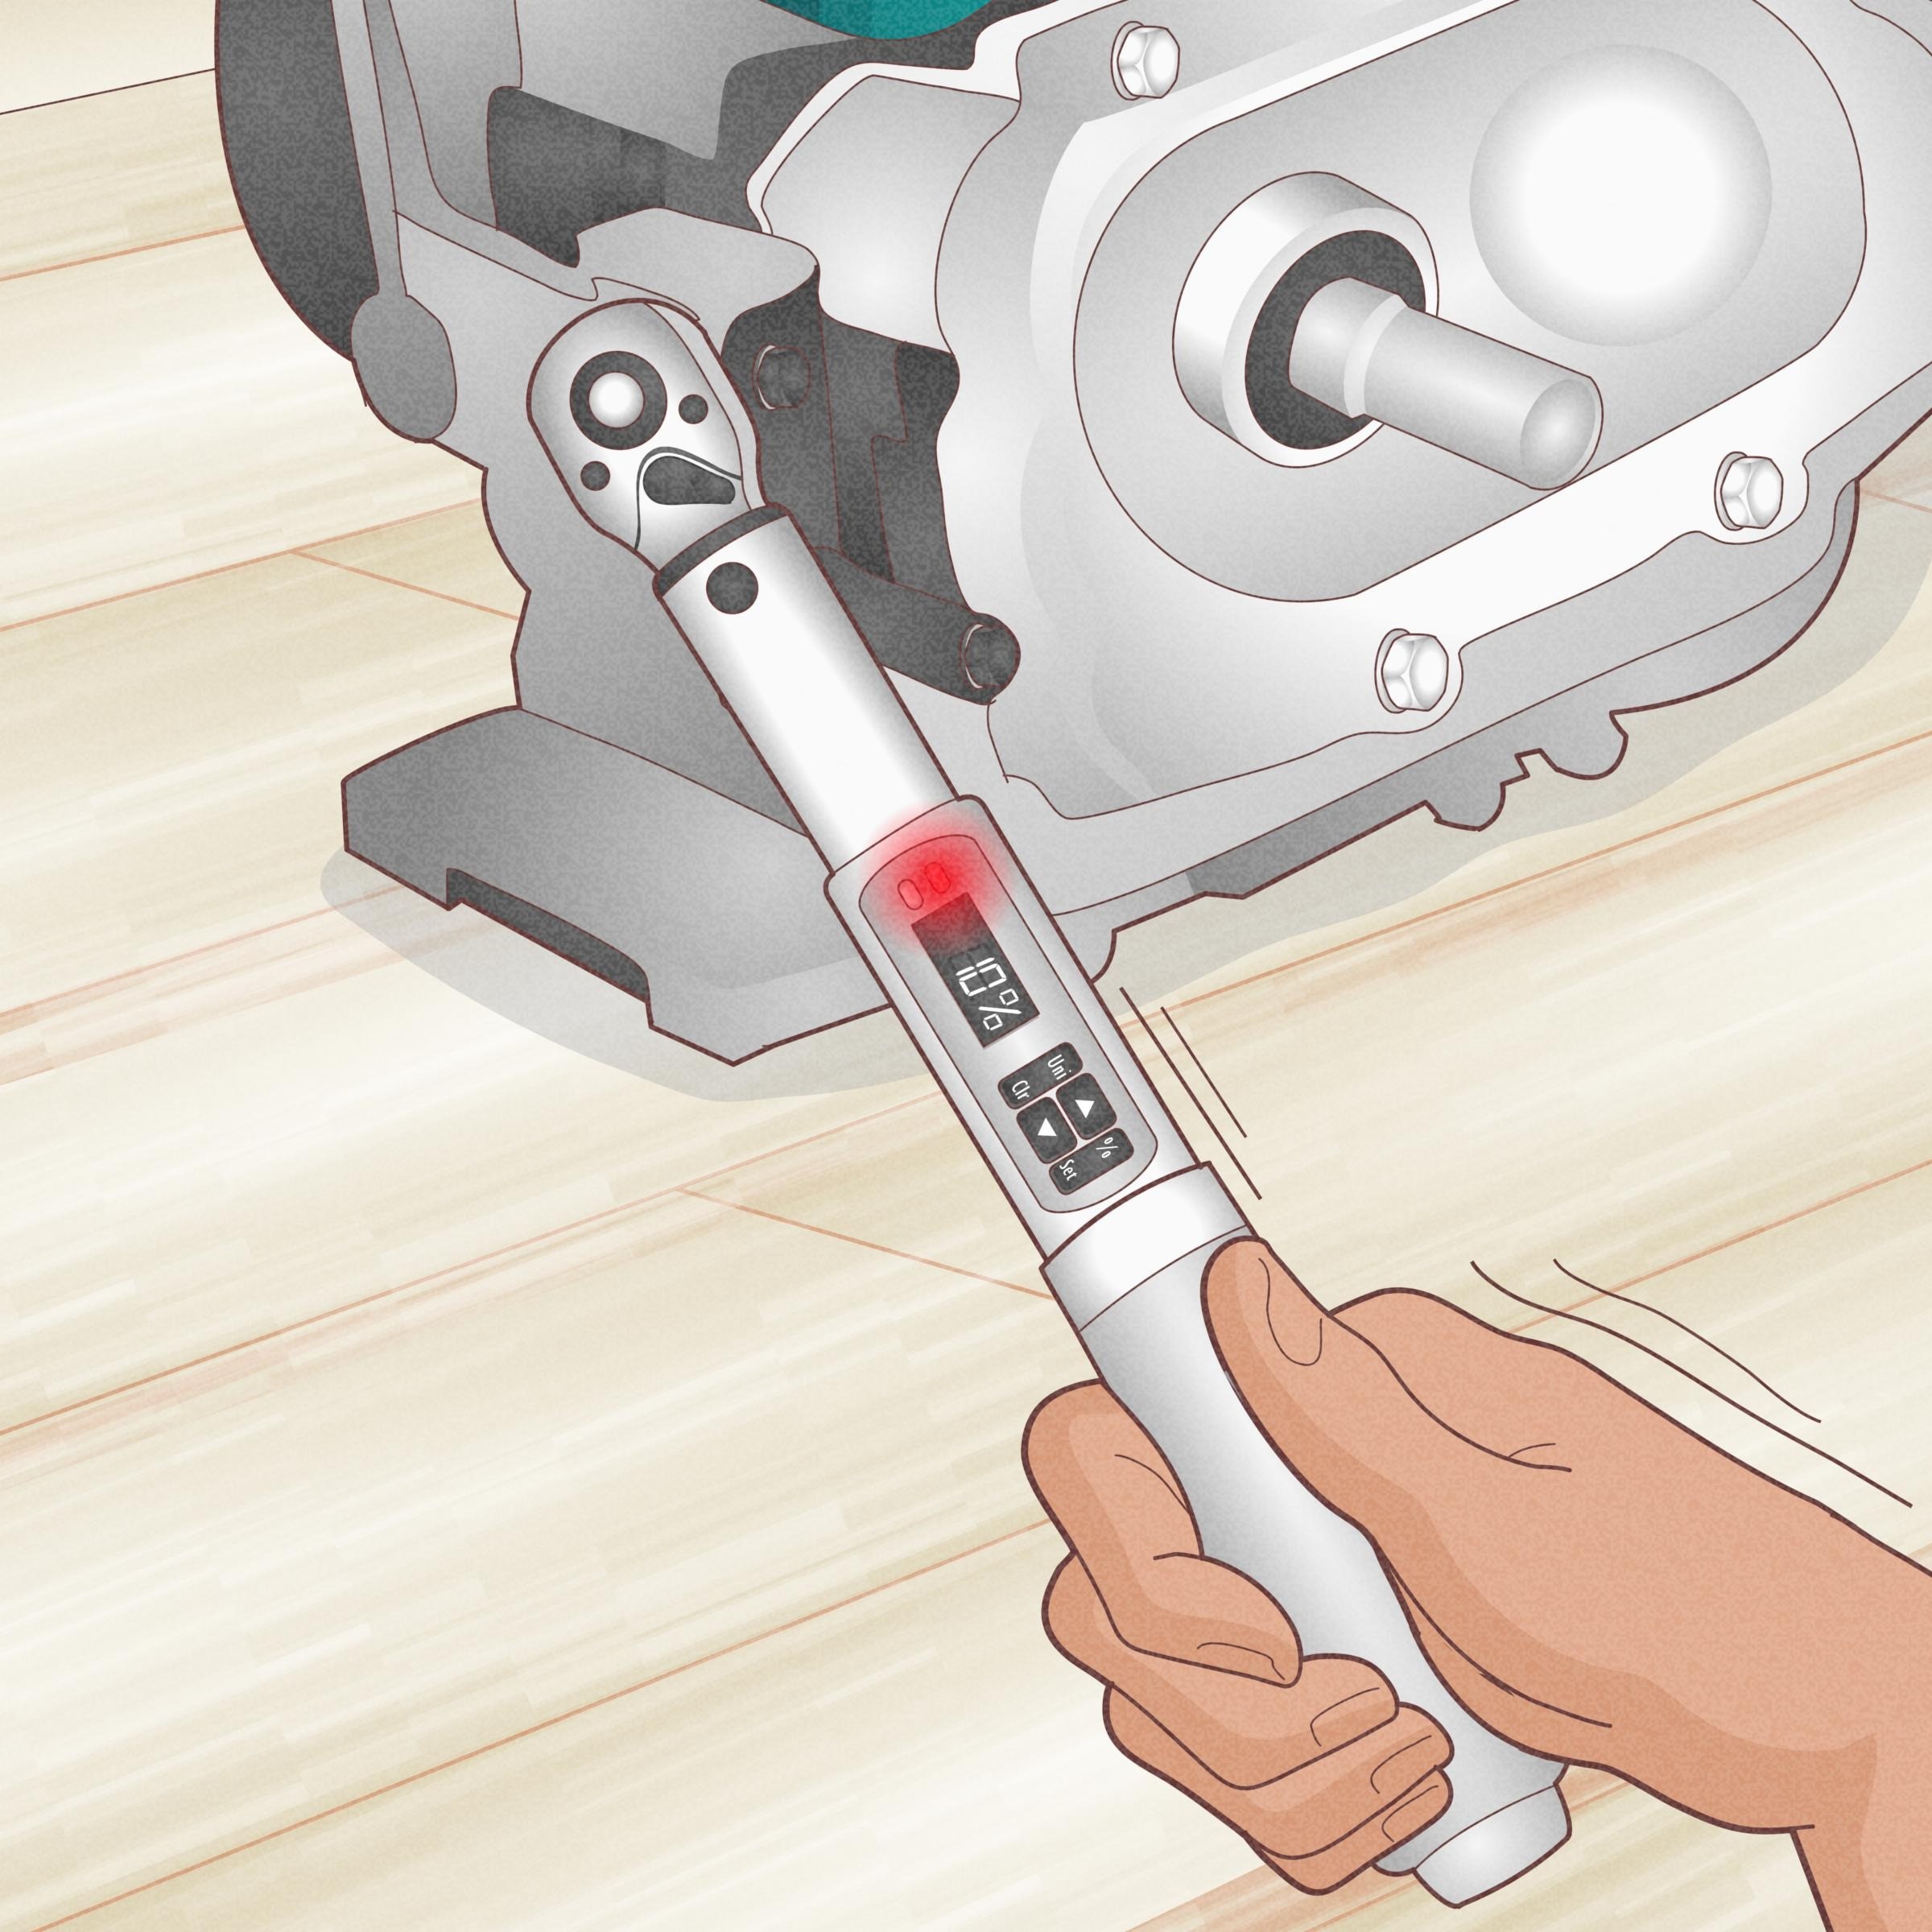
Using the Digital Torque Wrench
- Position the wrench:
- Place the socket onto the bolt or nut you need to tighten.
- Keep a firm grip on the handle.
- Apply force evenly:
- Begin tightening slowly.
- Do not rush to avoid inaccuracies or over-tightening.
- Watch for alerts:
- Many digital wrenches emit a beep or light up when the target torque is reached.
- Stop tightening as soon as you notice the alert.
- Verify the setting if needed:
- You may retest on a sample bolt to confirm accuracy.
Setting a digital torque wrench correctly ensures efficiency and accuracy. Regular calibration and proper use extend its life significantly. Always refer to the manufacturer’s guide for specific instructions related to your digital wrench model.
Common Mistakes to Avoid When Setting a Torque Wrench
To correctly set a torque wrench, you must avoid certain common mistakes. These errors can compromise safety, reduce accuracy, and damage components. Awareness of these mistakes ensures proper functionality and extends the life of your wrench.
Ignoring the Manufacturer’s Specifications
- Relying on guesswork: Always refer to the manufacturer’s torque recommendations. Using incorrect torque can harm equipment.
- Skipping the manual: Carefully read the manufacturer’s instructions. It provides precise guidelines for proper settings.
Not Calibrating the Wrench
- Ignoring regular calibration: A torque wrench must be calibrated periodically. Skipping this affects its accuracy.
- Using an expired calibration: Always check if the calibration date is valid before starting a task.
Using the Wrong Units
- Confusion between units: Always confirm the torque measurement units – foot-pounds or Newton-meters.
- Failing to switch units correctly: On digital wrenches, adjust to the required units before setting.
Incorrect Handling
- Over-tightening bolts: Stop as soon as you reach the desired torque. Over-tightening damages threads and components.
- Under-tightening bolts: Loosely tightened bolts can lead to structural issues or safety risks.
- Applying excessive force: Never force the wrench beyond its final click or indicator.
Improper Storage
- Storing while under tension: After use, always reset the wrench to the lowest torque setting.
- Exposing to extreme conditions: Avoid storing your wrench in humid or hot environments to prevent wear.
- Skipping regular maintenance: Clean your wrench and check for visible damage or wear regularly.
Failing to Verify the Setting
- Starting work without checking: Double-check the torque scale before beginning.
- Neglecting test adjustments: Use a sample bolt to test accuracy and ensure the wrench operates correctly.
Avoiding these common mistakes will enhance the reliability and safety of your work. Proper care and correct handling will keep your torque wrench accurate and efficient for years.
 Maintenance and Calibration of Torque Wrenches
Proper maintenance and calibration are crucial for the performance of a torque wrench. Regular care extends its life and keeps its accuracy reliable.
Regular Cleaning and Storage
- Clean after use: Wipe the wrench with a clean, dry cloth after each use.
- Avoid harsh chemicals: Do not use solvents as they can damage the finish and internal parts.
- Store in a dry place: Keeping it in a clean, moisture-free environment prevents rust and corrosion.
- Release tension: Always set the torque to the lowest setting before storing.
Periodic Calibration
- Schedule regular checks: Calibrate the wrench as recommended by the manufacturer, usually annually.
- Test before use: Check the calibration if the wrench was dropped or heavily used recently.
- Professional calibration tools: Use certified calibration services or equipment for best results.
- Record calibration dates: Keep a log of when the wrench was last calibrated for reference.
Avoid Overuse and Rough Handling
- Avoid over-torquing: Do not exceed the wrench’s maximum torque capacity.
- Handle with care: Do not drop the wrench to avoid disturbing its calibration.
- Use for intended purposes: Only use the wrench for its specified applications.
Inspect for Damage
- Check for wear and tear: Look for visible damage, cracks, or bending on the wrench.
- Verify functionality: Test the wrench periodically to ensure it works correctly.
- Replace worn components promptly: Do not use the wrench if parts appear damaged or compromised.
Replace When Necessary
- Watch for diminishing accuracy: Replace the wrench if it consistently fails calibration tests.
- Monitor its lifespan: Understand the manufacturer’s recommended lifespan for the wrench.
By following these maintenance and calibration guidelines, your torque wrench will remain accurate and durable over time. Caring for your tool ensures its efficiency and prevents costly repairs or replacements. Always adhere to the manufacturer’s guidelines for the best results.
Frequently Asked Questions About How to Set a Torque Wrench
Can I use a torque wrench to loosen bolts? No. Use a regular ratchet. Torque wrenches are only for tightening.
Should I oil my torque wrench? Not inside. External wiping is fine. Do not spray lubricant into the mechanism.
How do I convert ft-lbs to Nm? Multiply ft-lbs by 1.356. Or use a conversion chart.
Why does my wrench click repeatedly? You passed the set point. Stop once it clicks.
Can I use any socket with it? Yes, as long as it fits. Use chrome sockets for best results.
Is drop damage serious? Yes. Even small falls affect accuracy. Get it checked.
Do digital wrenches need charging? Yes. Charge before each major job.
Final Thoughts
Learning how to set a torque wrench correctly is a vital skill for any mechanic or DIY enthusiast. It ensures safety, extends part life, and improves performance. With so many types and uses, taking the time to understand the process pays off.
Additionally, regular maintenance and proper storage keep your tool accurate. Whether you drive, build, or repair, a well-set torque wrench supports every task. By following these steps, you gain confidence and precision in every project.
As tools evolve and vehicles become more complex, one thing remains clear: knowing how to set a torque wrench is not optional—it’s essential. So grab your wrench, consult the manual, and start building smarter, safer results today.