Understanding 9/16 on Tape Measure for Accurate DIY Projects
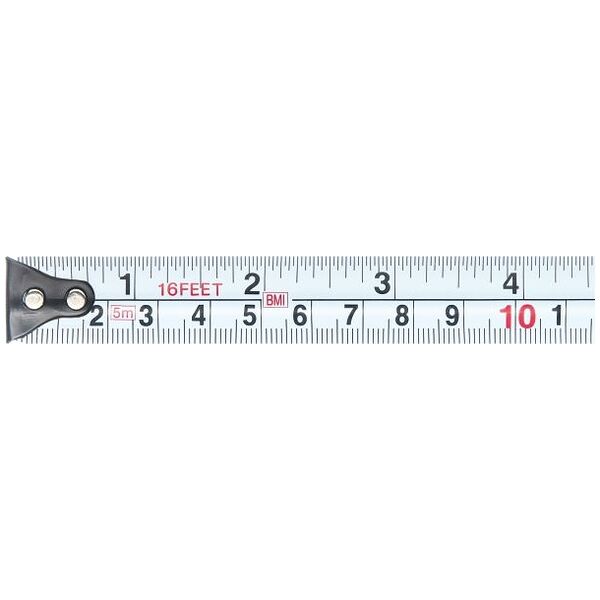
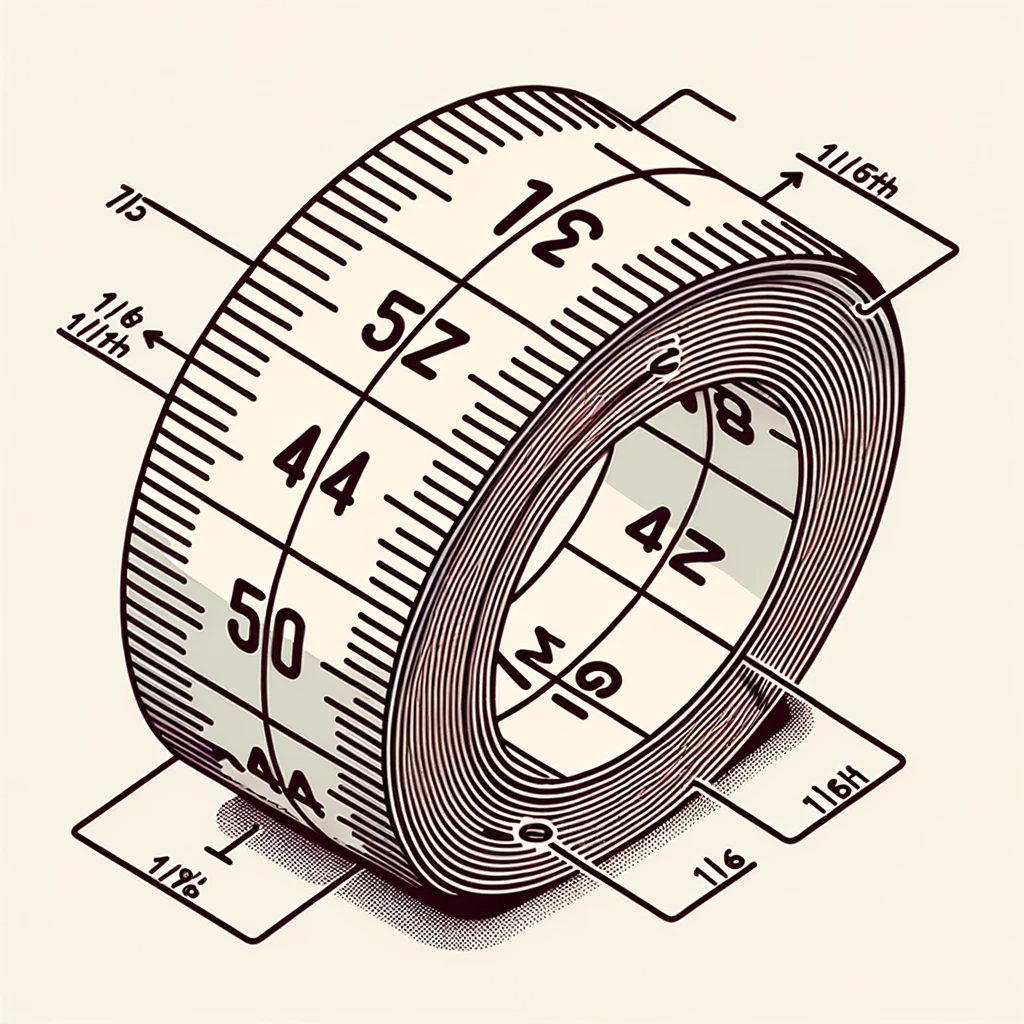
When working on any project that involves precise measurements, knowing how to read a tape measure is essential. One of the most commonly used fractions in construction, woodworking, and crafting is 9/16 on tape measure. This specific mark appears between the half-inch (8/16) and five-eighths (10/16) marks. It represents just over half an inch—specifically 0.5625 inches in decimal form.
Understanding 9/16 on tape measure helps ensure accuracy in cutting materials, aligning fixtures, or installing hardware. Whether you’re hanging shelves, framing a wall, or building furniture, missing this small but critical line can lead to misaligned joints or poorly fitting pieces. As a result, mastering fractional readings like 9/16″ improves both efficiency and quality.
Contents
hide
 Basics of Tape Measure Markings
Understanding the basics of tape measure markings is essential for accurate measurements. Tape measures often display measurements in both inches and fractions, catering to various projects. By learning how to interpret these markings, you can improve precision and avoid costly errors.
Common Fractions on a Tape Measure
Tape measures typically include fractions to represent sections of an inch. These fractions, like 1/2, 1/4, and 1/8, are easy to spot. Less common fractions, such as 9/16, are smaller divisions that require careful observation. Familiarity with common fractions helps you quickly identify measurements.
Understanding How Fractions are Displayed
Fractions on a tape measure divide each inch into smaller equal parts. These are typically marked with lines of varying lengths. Longer lines usually represent larger fractions like 1/2 and 1/4. Shorter lines, such as those for 1/16 or 9/16, provide finer measurements. Recognizing these patterns simplifies reading the tape measure.
What Does 9/16 Mean on a Tape Measure?
The fraction 9/16 on a tape measure represents a specific part of an inch. Fractions like this help measure precise sections of objects during projects. Understanding how to interpret 9/16 ensures accurate readings and better results.
Breaking Down the Fraction 9/16
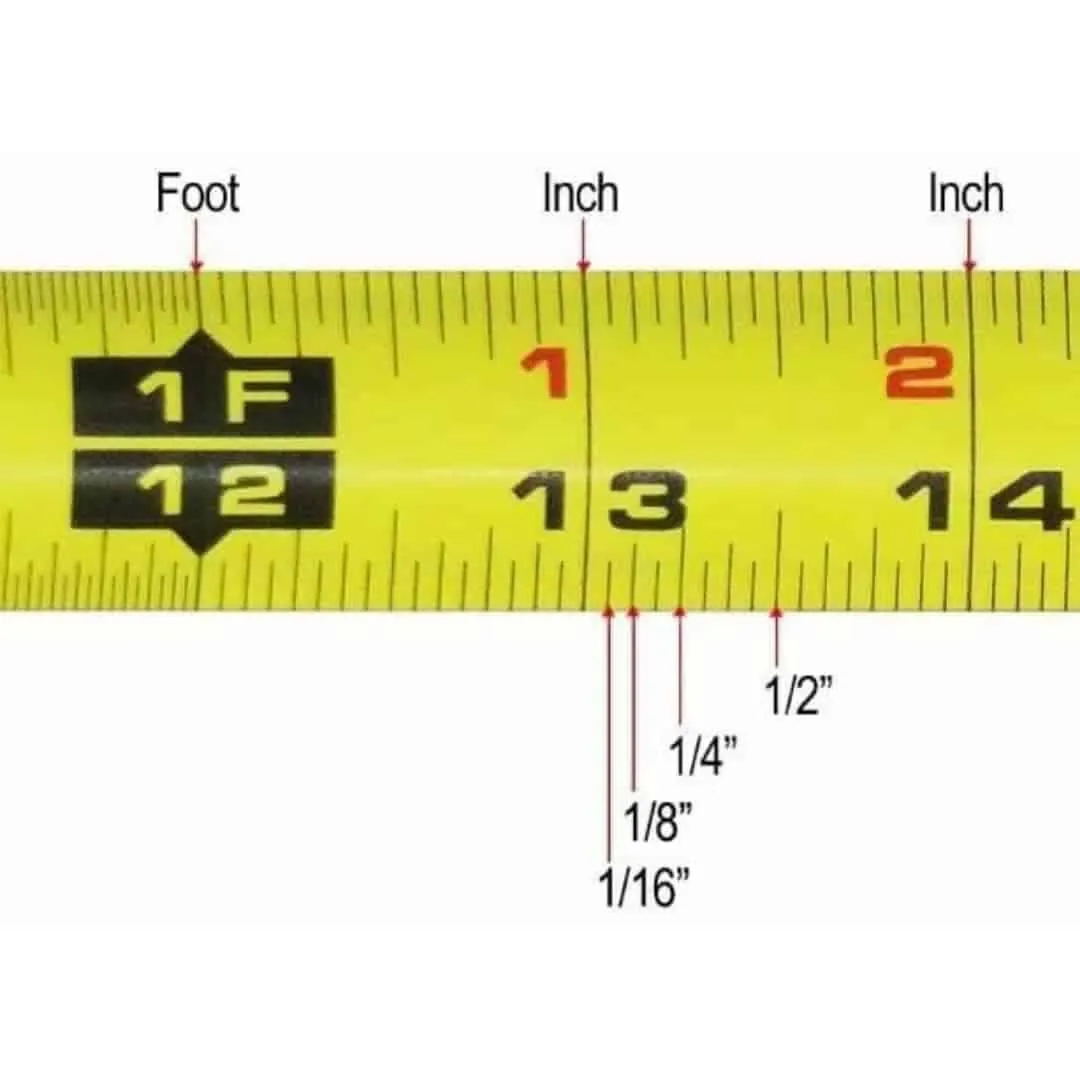
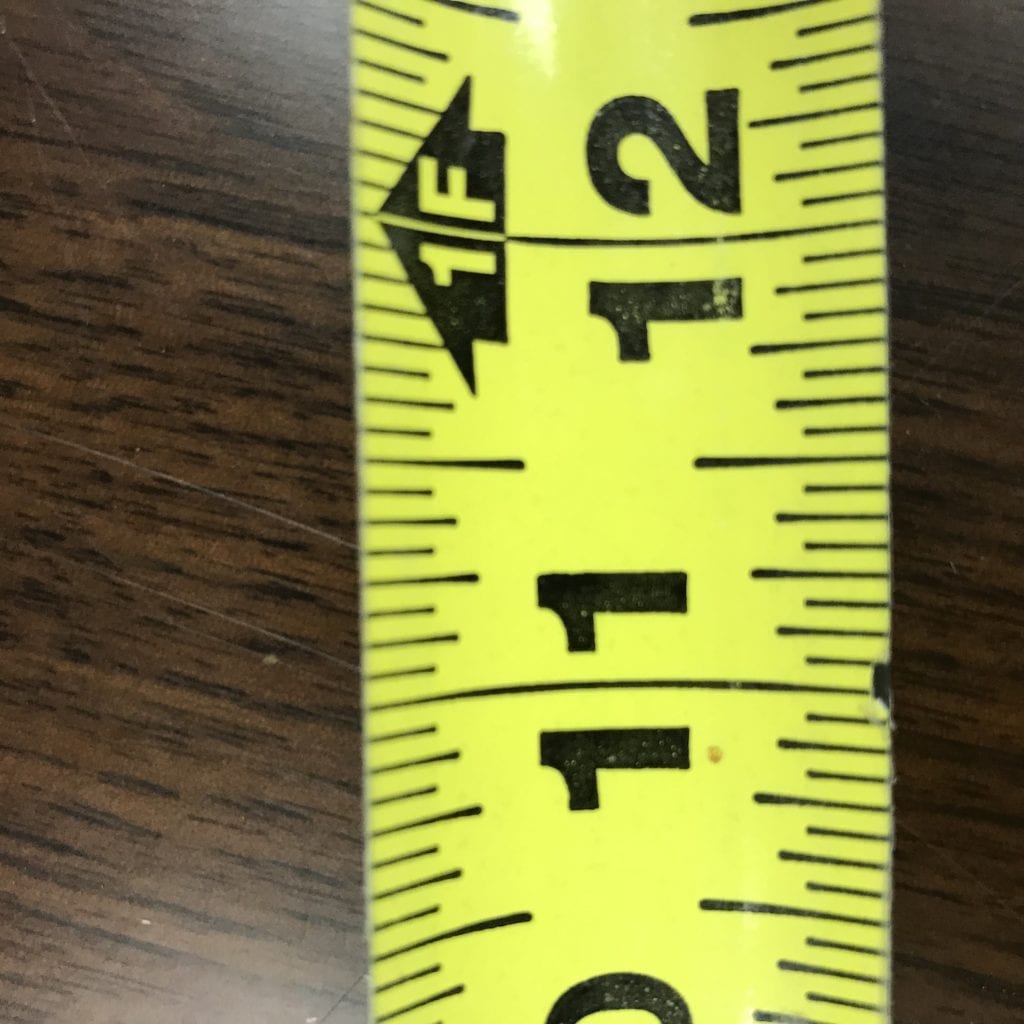
The fraction 9/16 divides an inch into 16 equal parts. Here, 9 refers to nine of those sections. This fraction sits between 8/16 (or 1/2 inch) and 10/16 on the tape. It is typically represented by a shorter line, making it finer than larger fractions like 1/2 or 1/4. Familiarizing yourself with fractional placement simplifies using the tape measure.
Converting 9/16 into Decimals and Inches
You can convert 9/16 into decimals for different applications. Dividing 9 by 16 yields 0.5625. In inches, this means slightly more than half an inch. Conversions are handy for calculations or understanding alternative measurement systems. Recognizing both fractional and decimal formats enhances versatility during projects.
 How to Locate 9/16 on a Tape Measure
Finding 9/16 on a tape measure can seem tricky but is manageable with practice. Knowing the fractional markings and their visual clues simplifies the process. This section will guide you step by step.
Visual Guide to Finding 9/16
- Identify the Inch Markings: Tape measures are divided into segments of inches. Locate the inch marks first.
- Break the Inch into 16 Parts: Each inch is split into 16 equal divisions marked with varying line lengths.
- Spot the 9/16 Line: Count nine markings past the inch line. The 9/16 mark lies between 8/16 and 10/16.
- Recognize the Line Size: 9/16 is a shorter line, smaller than 1/4 or 1/2 inch markings.
- Double-Check: Confirm your count to avoid errors. Ensure precision when locating the fraction.
Tips for Accuracy When Measuring Fractions
- Take Your Time: Avoid rushing to prevent mistakes when locating 9/16.
- Use Good Lighting: Proper lighting helps you see smaller fractional lines clearly.
- Hold the Tape Measure Steady: Movement can lead to misreading fractional markings.
- Practice Regularly: Familiarize yourself with tape measure patterns for quicker identification.
- Verify Measurements: Cross-check the fraction with another tool for additional accuracy.
Locating 9/16 on a tape measure is simple with these tips. Careful observation ensures precise results.
Practical Applications of the 9/16 Measurement
The 9/16 mark on a tape measure is versatile. It serves many purposes across various tasks. Its precise nature benefits projects requiring exactness, especially in detailed work.
Common Uses for 9/16 in Woodworking
- Cutting Materials to Specified Lengths: Woodworkers frequently measure to 9/16 for accurate cuts. This ensures pieces fit seamlessly.
- Precise Joinery: For tasks like creating dovetail joints, 9/16 ensures tight, proper fits. Details matter in fine woodworking.
- Furniture Assembly: Many furniture designs require 9/16 measurements. This marks edges or spaces when integrating components.
- Tool Adjustments: Some woodworking tools, like routers, use 9/16 marks to set blade or bit positions.
- Marking Depths: Drill depth gauges often rely on fractional markings like 9/16 for accurate holes.
For woodworking, even slight inaccuracies matter. Utilizing the 9/16 mark prevents misalignments and wasted materials.
Importance of Precision in 9/16 Measurements
Precision is critical, especially with 9/16, a smaller fraction. Errors multiply across larger projects. Accurate 9/16 measurements ensure parts align correctly and maintain structural integrity.
- Prevents Mistakes: Small errors in 9/16 can disrupt entire projects.
- Ensures Safety: Precisely cut pieces prevent loose, unsafe structures.
- Supports Smooth Assembly: Precision avoids gaps or overlaps during installation or build.
- Minimizes Waste: Correct measurements save materials and cost, reducing the margin for error.
Mastering 9/16 measurements benefits professionals and DIYers alike. Its precise nature demands careful attention and practice.
How Lighting and Angle Affect Reading 9/16 on Tape Measure
Poor lighting distorts perception. Shadows can hide small ticks. Glare from overhead lights makes steel blades hard to read. In dim areas, the difference between 8/16 and 9/16 blurs.
Angle matters too. Looking at the tape from above causes parallax error. The mark appears shifted due to perspective. To avoid this, keep your eye directly perpendicular to the blade.
Many professionals use magnetic tape holders. These clip onto metal studs or nails. They free up one hand and stabilize the end. This reduces sagging and bending.
Retractable tapes can curl or twist. Extend slowly to prevent kinks. Lock the blade in place before reading. Jerking motions stretch or deform the tape over time.
If working alone, use a clamp or nail to hold the end. Then walk to the far side and check alignment. This method improves consistency. Accurately locating 9/16 on tape measure depends on clear sightlines and steady tools.
Tools That Help Improve Measurement Accuracy
While the standard tape measure remains essential, other tools support accuracy. Combination squares transfer 9/16″ marks cleanly onto surfaces. Their rulers include fine engravings for exact alignment.
Digital calipers offer extreme precision. They measure internal, external, and depth dimensions. Some switch between fractions and decimals. Though not ideal for long spans, they verify small distances.
Laser distance measurers calculate room sizes instantly. They don’t replace tapes for close work. However, they help confirm overall dimensions before detailed marking.
Self-adhesive measuring tapes stick to saws or jigs. These pre-marked strips save time. Include 9/16″ indicators for repeated cuts.
Magnetic markers attach to steel tapes. They highlight key points like 9/16″. This speeds up identification during repetitive tasks.
Using multiple tools together reduces human error. Always cross-check important measurements. Trust, but verify.
Tools and Techniques to Measure 9/16 Accurately
Measuring 9/16 on a tape measure requires precision. Using the right tools and techniques makes this easier. This section explains how to use a tape measure effectively and explores alternative tools for confirming fractional measurements.
Using a Tape Measure Effectively
- Read the Markings Clearly: Locate the 9/16 line by breaking the inch into 16 equal parts.
- Stabilize the Tape: Hold the tape measure steady to ensure accuracy.
- Use Fingertip Guides: Place your fingertip on the 9/16 mark for easy reference.
- Measure from a Fixed Point: Anchor the tape at one end to avoid shifting.
- Recheck Your Measurement: Double-check by recounting the fractions to confirm it’s 9/16.
Other Measurement Tools for Checking Fractions
- Ruler with Fractional Markings: Some rulers also have detailed fractional divisions.
- Digital Calipers: These provide precise decimal readings that can include 9/16 measurements.
- Combination Squares: Use this tool for checking 9/16 in woodworking or metalwork.
- Laser Distance Measurer: Advanced tools can provide accurate fractions if pre-set for the job.
- Marking Gauges: These are useful for transferring fractional measurements like 9/16 onto materials.
Using these tools alongside the tape measure ensures accuracy and reduces the chance of error.
 Troubleshooting Measurement Errors
Measurement errors are common when using a tape measure, especially with fractions like 9/16. Spotting and fixing these errors is crucial for accuracy.
Common Mistakes When Reading Tape Measures
- Incorrect Line Identification: Confusing lines on the tape can lead to wrong measurements. For example, mistaking the 9/16 line for a neighboring fraction like 8/16 or 10/16 often occurs.
- Miscounting Fractions: Errors happen when users count incorrect divisions within an inch. Miscounts occur if you’re not focused.
- Starting From the Wrong Point: Forgetting to measure from the tape measure’s correct starting point results in flawed readings.
- Unstable Hold: A shaky or angled tape measure may show incorrect marking placement. This can lead to imprecise readings.
- Poor Lighting: Working under low light makes it hard to see smaller fractional lines like 9/16.
- Misaligned Tape: If the tape isn’t parallel to the object, measurements won’t be accurate.
How to Avoid Errors with Fractions Like 9/16
- Double-Check the Marking: Always ensure the marking matches the exact fraction, such as 9/16.
- Slow Down the Process: Rushing leads to errors. Measure carefully, especially with smaller fractions.
- Use Clear Lighting: Work in environments with bright light for visibility of fractional markings.
- Practice Reading Fractions: Familiarize yourself with tape measure patterns to easily recognize fractions like 9/16.
- Stabilize Your Tape Measure: Ensure the tape measure is firmly held with minimal movement during the process.
- Recheck with Alternative Tools: Confirm 9/16 measurements using rulers, digital calipers, or marking gauges if possible.
- Start From the Zero Point: Always align the object with the tape start (often marked as zero).
By avoiding common mistakes and following these tips, you can ensure accurate 9/16 measurements every time..
Teaching Kids and Beginners to Read 9/16 on Tape Measure
Introducing young learners to 9/16 on tape measure builds foundational skills. Start with simplified visuals. Draw inch blocks divided into 16 parts. Shade the first nine to illustrate 9/16.
Use colored pencils or stickers to mark actual tapes. Label 1/2 (8/16), then add “+1” to reach 9/16. Hands-on practice reinforces learning. Have them measure books, boards, or toys.
Games help retention. Create a scavenger hunt. Ask participants to find objects exactly 9/16″ thick. Or challenge them to draw a line at 9/16″ without looking.
Beginners often confuse 9/16 with 3/4 (12/16). Emphasize the length hierarchy. Show that 3/4 is much farther along the inch. Practice counting aloud: “8…9…10…”
Encourage repetition. Mastery comes through consistent exposure. Soon, spotting 9/16 on tape measure becomes intuitive.
Building Confidence Through Repetition and Practice
Confidence grows with experience. New builders fear making irreversible mistakes. They double-check every mark. Over time, familiarity reduces hesitation.
Set up scrap wood drills. Cut pieces at various 1/16″ intervals. Include 9/16″ challenges. Compare results to target lines. Discuss what went right or wrong.
Use real projects whenever possible. Even simple birdhouses or plant stands involve accurate measuring. Celebrate successes to motivate continued effort.
Keep a reference chart nearby. List common fractions and their decimal equivalents. Post it in the workshop. Visual aids reduce mental math strain.
Eventually, users recognize 9/16″ without counting. Muscle memory takes over. This fluency defines skilled craftsmanship.
 FAQ About 9/16 on a Tape Measure
Why is 9/16 Important in Everyday Measurements?
The 9/16 measurement plays an essential role in tasks requiring precision. It frequently appears in activities like woodworking, construction, and home improvement. Its importance arises from its intermediate size. It helps measure objects more precisely than common fractions like 1/4 or 1/2. For example, adjusting specific tool settings often relies on 9/16 markings. Additionally, furniture assembly and detailed crafts require this fraction for tight fittings and proper alignment. Mastering 9/16 ensures accurate results in a wide range of applications.
How Does 9/16 Compare to Other Fractions?
9/16 is finer than larger fractions like 1/4 or 1/2. It provides more accuracy in smaller measurements. Compared to 1/16 or 3/16, it is larger and easier to locate on a tape. Its position directly between 1/2 inch (8/16) and 5/8 inch (10/16) makes it a mid-point for numerous tasks. Its versatility supports both detailed and intermediate projects effectively. Understanding how 9/16 fits among other fractions simplifies choosing the right measurement for your needs.
Final Thoughts
Understanding 9/16 on tape measure is more than just reading a number—it’s about precision, confidence, and professionalism. From seasoned contractors to weekend DIYers, everyone benefits from knowing this crucial fraction. It bridges the gap between rough estimates and exact craftsmanship.
Whether you’re framing a house or hanging a shelf, accuracy starts with the tape. Take time to study its markings. Practice identifying 9/16″ until it feels natural. Combine good tools with smart habits. In the end, success lies in the details. So next time you reach for your tape, remember the power of 9/16 on tape measure.