From DIY to Pro Jobs: Tape Measure Tricks for Any Project
Mastering the art of measurement can significantly enhance your DIY projects, home improvements, and everyday tasks. Understanding tape measure tricks not only saves time but also ensures precision and professionalism in your work. Whether you’re a seasoned builder or a weekend hobbyist, incorporating these tape measure tricks into your routine can elevate your craftsmanship and efficiency. In this article, we delve into a variety of innovative and practical tape measure tricks that will revolutionize the way you measure and mark.
Contents
hide
 Essential Features of a Tape Measure
A tape measure is a vital tool for DIY projects. Understanding its essential features ensures accurate and reliable use.
Key Components to Know
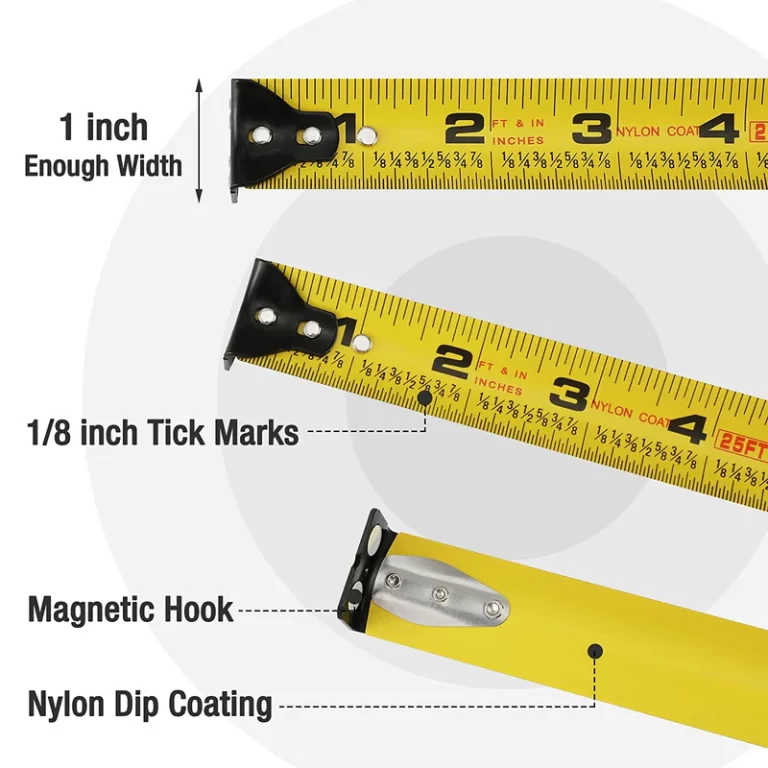
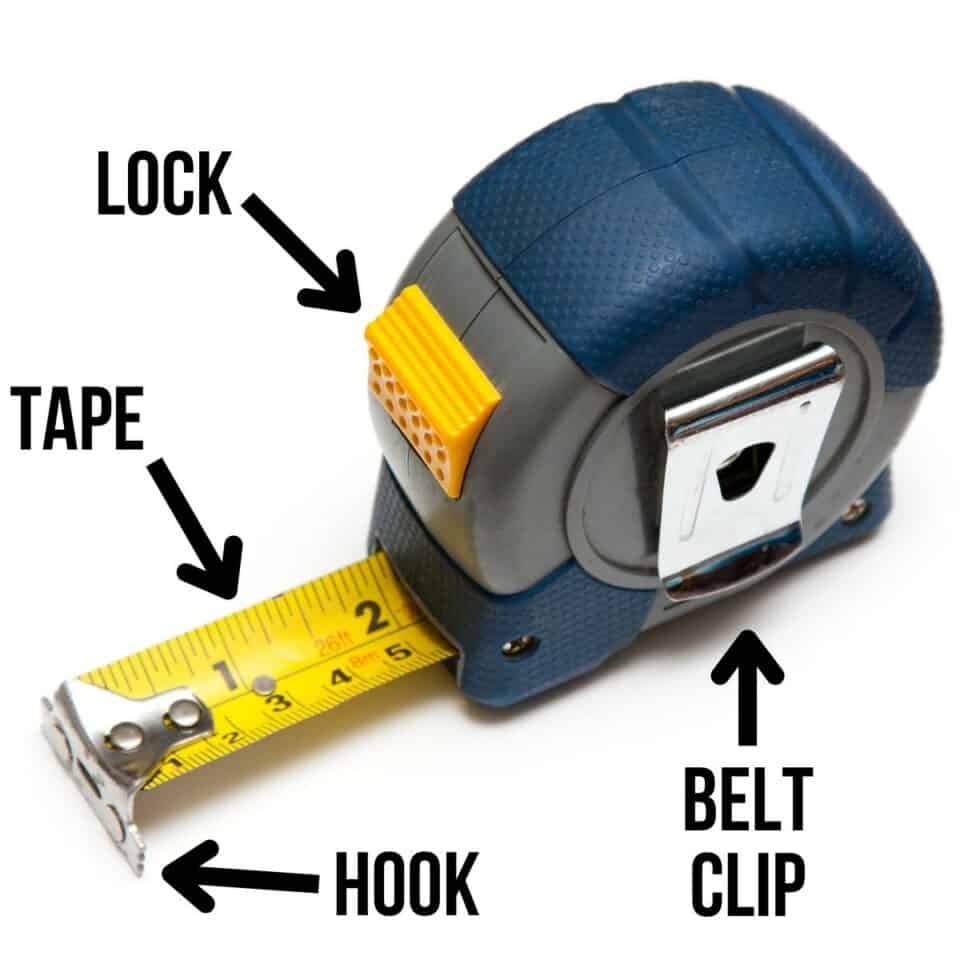
- Blade: The blade is the flexible steel or fiberglass strip that extends for measurement. It usually features markings in imperial, metric, or both units.
- Hook: The hook at the end of the blade allows for secure positioning while measuring. Some models have a sliding hook for increased accuracy.
- Spring Mechanism: This internal mechanism retracts the blade after use. It ensures smooth operation and better storage.
- Housing: The case or housing protects the blade and mechanism from damage. It’s often made of impact-resistant materials.
- Locking Mechanism: The lock stops the blade from retracting, helping you take stable measurements easily.
Types of Tape Measures and Their Uses
- Pocket Tape Measure: Compact and portable, ideal for small tasks like measuring furniture or craft spaces.
- Surveyor’s Tape Measure: Designed for outdoor use, this tape is longer and often encased in heavy-duty housing.
- Steel Tape Measure: Durable and preferred for heavy-duty or industrial tasks due to its rigid blade.
- Fiberglass Tape Measure: Lightweight and corrosion-resistant, best suited for construction or landscaping projects.
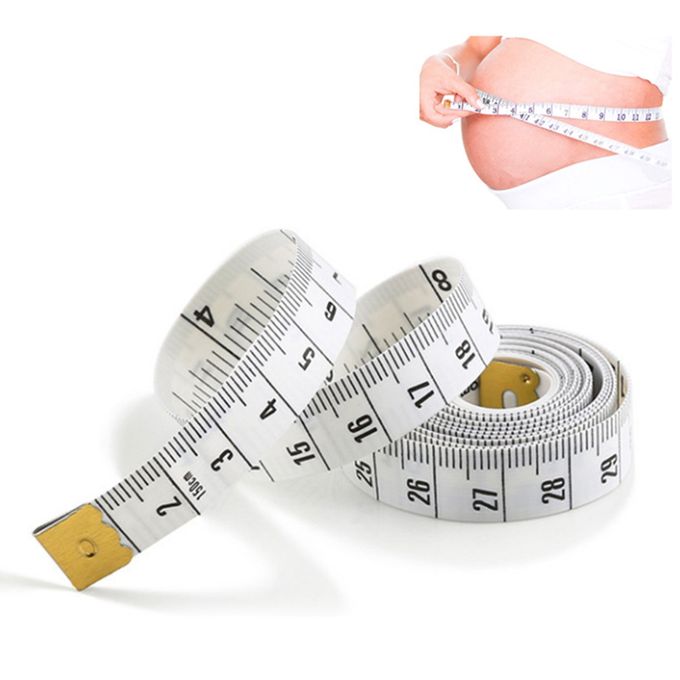
- Precision Tape Measure: Comes with finer markings, great for crafts, sewing, or any task needing absolute accuracy.
Choosing the right type ensures optimized results for different projects, promoting efficient and precise measuring work.
Accurate Measuring Techniques
Accurate measuring is essential for every DIY project. Precise measurements save time and improve results.
Tips for Achieving Perfect Measurements
- Start with a Clean Tape: Ensure your tape measure is free from dirt or debris.
- Check the Hook: Confirm that the hook is aligned and not bent for precision.
- Measure Twice: Always measure twice to verify accuracy before cutting or working.
- Place Firmly: Hold the tape measure firmly against the surface or object you’re measuring.
- Use the Right Tape: Choose an appropriate tape measure type for your project needs.
- Avoid Sagging: Keep the tape straight and taut to prevent inaccurate readings.
- Look at Eye Level: Read the measurement at eye level to avoid parallax errors.
Common Mistakes to Avoid When Using a Tape Measure
- Relying on a Damaged Tape: Cracked or bent blades cause inaccurate readings.
- Ignoring the Hook Play: Sliding hooks allow for inside and outside measurements. Misusing this leads to errors.
- Measuring Rounded Edges Poorly: Use the tape body for corner and curved measurements.
- Skipping the Lock Button: Always lock the tape to keep the measurement stable.
- Misreading the Markings: Understand the blade’s markings to avoid reading mistakes.
By following these tips and avoiding mistakes, you’ll achieve more precise measurements.
Innovative Uses of a Tape Measure in DIY Projects
A tape measure is more than just a tool for basic measurements. It can serve various creative purposes to enhance your DIY projects, making it an indispensable device in your toolkit.
Craft and Sewing Applications
Tape measures are vital in crafting and sewing projects. Here are some innovative uses:
- Perfect Pattern Measurements: Use the tape measure to ensure accurate dimensions for sewing patterns and fabric.
- Marking Straight Lines: Lay the tape measure flat on the fabric to draw straight and even lines.
- Creating Circular Shapes: Wrap the tape measure loosely to calculate circumference or measure for circular designs.
- Positioning Embellishments: Precisely measure where buttons, sequins, or embroidery should be placed for balanced designs.
- Stretchable Adhesive Measurement: Sticky models of tape measures can act as temporary markers on delicate fabrics while ensuring precision.
In crafts and sewing, the tape measure ensures consistency, accuracy, and professional-looking results.
Measuring Furniture Dimensions and Spaces
In home improvement or decoration tasks, tape measures simplify measurements for furniture and space planning:
- Fitting Furniture: Measure furniture to ensure it fits within the designated space without overcrowding the area.
- Design Layouts: Plan room designs by measuring the area for wall decor, rugs, or shelving units.
- Depth for Storage Units: Measure interior spaces, such as closets or cabinets, to match shelving and organizers perfectly.
- Align Placement: Use the tape measure as a guide for hanging items like mirrors or artwork symmetrically.
- Custom Build Adjustments: Ensure precise dimensions for building custom furniture that fits your specific needs.
With the versatility of tape measures, you can execute furniture and spatial projects with professional accuracy. This tool ensures that every detail is measured for success.
Hidden Features of a Tape Measure
Tape measures do more than just basic measuring. They have hidden features that can simplify tasks and improve accuracy.
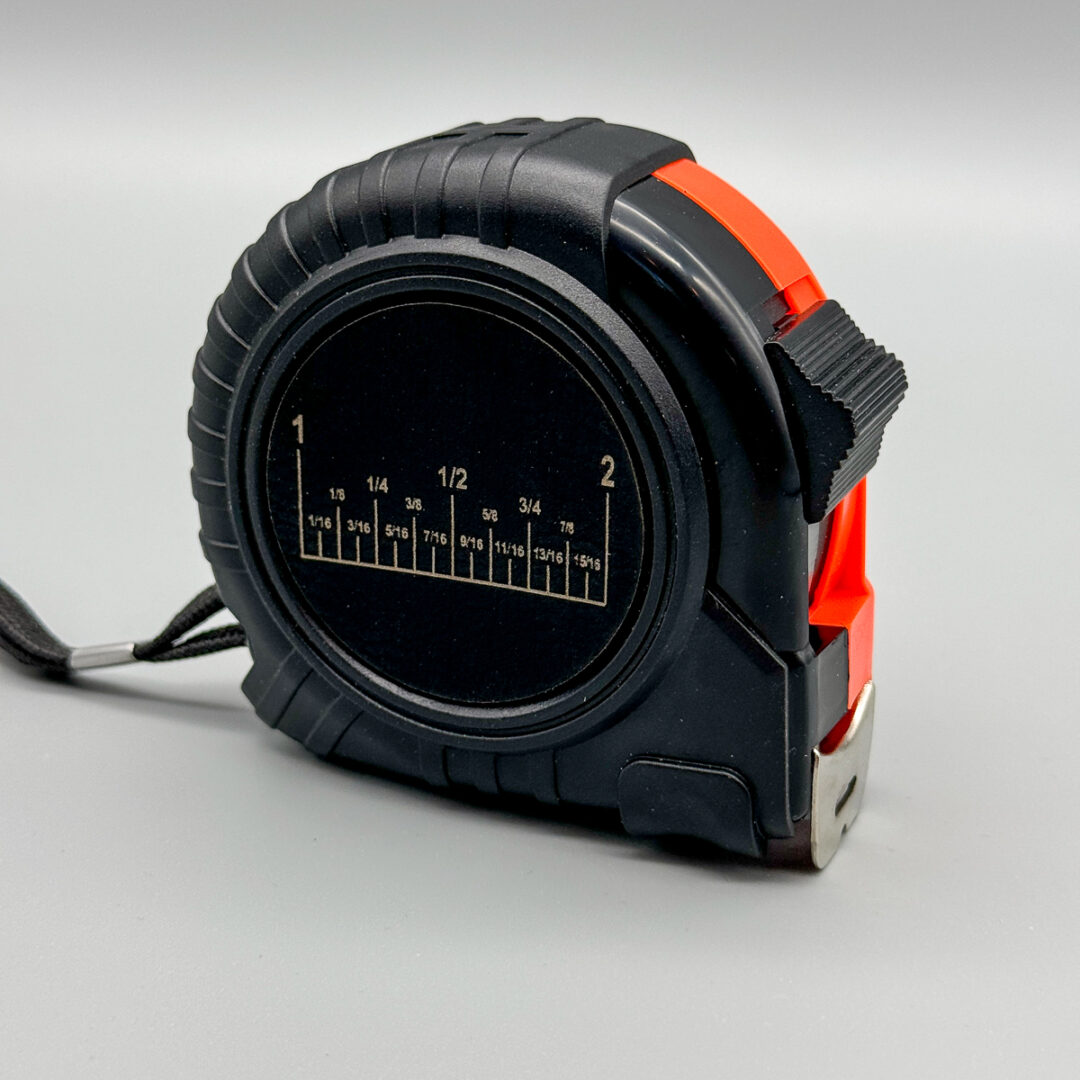
Decoding the Markings on the Blade
- Red Numbers for Studs: Many tape measures mark every 16 inches in red, a common stud spacing in construction.
- Black Diamonds for Trusses: Black diamonds, spaced at 19.2 inches, help locate trusses or joists in building structures.
- Fractional Intervals: Tape blades often feature fractional units, making complex measurements quicker and clearer.
- Metric and Imperial Units: Some tapes have dual markings, offering flexibility for international measurement needs.
- Center Points Indicated: Certain tape measures include center marks, assisting in balanced spacing and symmetrical layouts.
Understanding these markings allows quick reference and prevents time-consuming miscalculations during projects.
Using the Sliding Hook Effectively
- Inside and Outside Measurements: The sliding hook compensates for its thickness, ensuring accurate readings for both types of measures.
- Hook as a Marker: Use the hook to scratch or mark surfaces for precision without extra tools.
- Grip Security: The hook grabs onto edges or corners, keeping the tape stable while measuring.
- Double-Sided Hook: Some models have a hook with measuring edges on both sides for additional flexibility.
- Maintaining Hook Movement: Always ensure the sliding hook moves freely for reliable accuracy.
Mastering the sliding hook enhances measuring efficiency and precision for your DIY needs.
 Quick Repair and Adjustment Tips for Your Tape Measure
Tape measures can wear out or malfunction after extensive use. Regular repairs and maintenance ensure optimal performance.
Fixing a Loose or Broken Tape
- Rewind Stuck Tape: Open the housing carefully and untangle the blade inside.
- Replace a Broken Blade: Remove the damaged blade and install a compatible replacement securely.
- Realign a Bent Hook: Use pliers to bend the hook back to its original position.
- Repair a Broken Spring Mechanism: Replace the faulty spring with a new one to restore blade retraction.
- Tighten Loose Screws: Check screws near the hook and housing. Tighten them to secure the tape.
Fixing these common issues extends the tape measure’s usability and ensures accurate readings.
Maintaining the Tape for Longer Lifespan
- Keep It Dry: Prevent rust by storing your tape measure in a dry environment.
- Clean the Blade: Wipe off dirt and debris regularly with a soft cloth.
- Lubricate the Mechanisms: Use silicone lubricant to keep the spring and hook moving smoothly.
- Avoid Dropping: Handle your tape measure carefully to prevent damage to the housing or blade.
- Store Safely: Store in a protective case to avoid accidental damage when not in use.
Proper maintenance saves costs and keeps your tape measure reliable for all your projects.
Fun and Practical Tape Measure Hacks
Tape measures are versatile tools that go beyond basic measuring tasks. With a little creativity, they can simplify various challenges and add efficiency to DIY projects. Here are some fun and practical hacks to try.
Creative Ways to Use a Tape Measure Beyond Measuring
- Use as a Compass Alternative: Hold one end on a fixed point and pivot the blade to draw perfect circles.
- Create Temporary Straight Edges: Extend the blade and use it to draw straight lines on large surfaces.
- Portable Level Tool: Use the housing or blade edge to check if surfaces are level.
- Spacing Tool for Art: Measure equal spaces between picture frames or wall decor.
- Quick Ruler Replacement: Use the markings to replace a ruler in a pinch for crafts or notes.
- Clamp Substitute: Secure items temporarily by wrapping them with the stiff blade.
- Hook Object Pickup: Use the tape’s metal hook to grab objects from hard-to-reach places.
These hacks show the tape measure’s adaptability, saving time and adding convenience to your projects.
How to Create a Straight Line Without a Ruler
- Anchor the Hook Firmly: Attach the hook to the starting point on your surface.
- Extend and Align: Pull the tape blade taut to the desired endpoint.
- Mark Points Along the Blade: Place small pencil or chalk marks at multiple intervals for increased precision.
- Connect the Dots: Use a pencil or chalk to connect your marks into a straight line.
- Check the Line: Re-measure to confirm its accuracy and adjust if necessary.
This method is excellent for large projects like wall painting or woodworking. Using the tape measure ensures straight and even lines every time. By exploring these hacks, you’ll uncover the full potential of this essential tool.
 Choosing the Right Tape Measure for Your Projects
Selecting the perfect tape measure can enhance your DIY experience. A well-suited tape measure ensures accuracy, ease, and efficiency.
Factors to Consider When Buying a Tape Measure
- Length: Choose a tape measure with a length suitable for your projects. Standard options range from 12 to 50 feet.
- Material: Opt for steel blades for durability or fiberglass for flexibility and outdoor use.
- Markings: Look for clear, easy-to-read measurements. Dual units (imperial and metric) offer additional versatility.
- Locking Mechanism: A reliable locking button ensures stable measurements without slipping.
- Width: Wider blades provide better stability and visibility over longer distances.
- Hook Design: A sturdy hook, preferably with a sliding function, improves accuracy for inside and outside measurements.
- Durability: Heavy-duty housing made of impact-resistant materials protects the tape in tough environments.
- Ergonomic Design: A comfortable grip minimizes strain during extended use.
Considering these factors helps you choose a tape measure tailored to your specific needs.
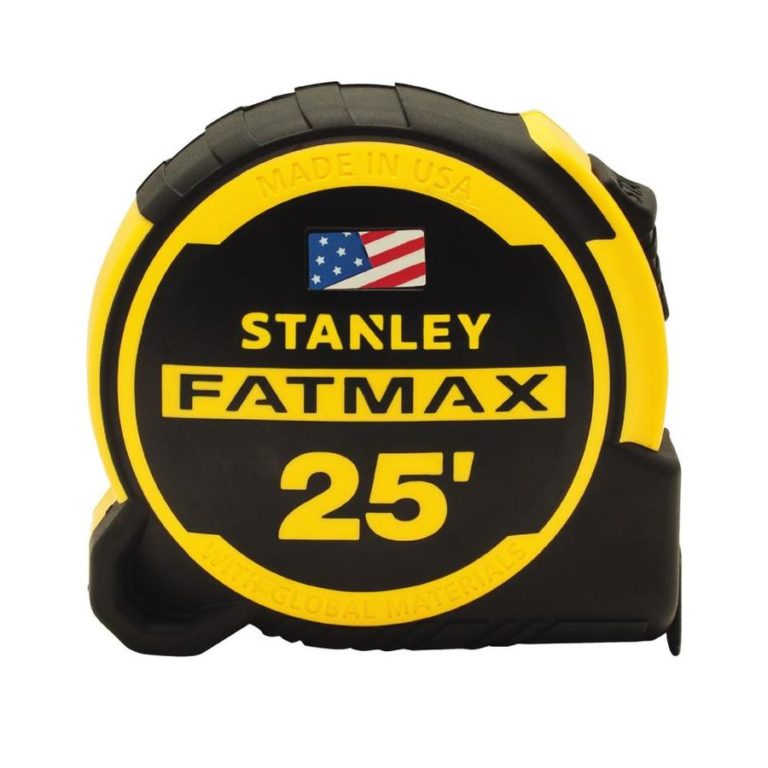
Top Recommendations for DIY Enthusiasts
- Stanley PowerLock Tape Measure: Known for its durability and classic design, it’s great for everyday projects.
- Komelon Self-Lock Tape Measure: Features a self-locking blade for added convenience and safety.
- Milwaukee Compact Wide Blade Tape: Wider blade design ensures better readability and stability for larger tasks.
- DeWalt ToughSeries Tape Measure: Built rugged for demanding jobs, with extra-long standout and reinforced housing.
- FastCap PSSR16 Tape Measure: Includes a built-in pencil sharpener and an erasable notepad, ideal for cutting and marking tasks.
- Craftsman ProReach Tape Measure: Great value for beginners and features robust construction for home projects.
Investing in the right tape measure can significantly improve the accuracy and efficiency of your DIY projects.
Tape Measure Safety Tips
Safety is crucial when using a tape measure. Following simple precautions can prevent injuries and damage.
Precautions to Protect Yourself and Your Tools
- Handle Blade Retracting Carefully: Control the blade as it retracts to prevent injuries or snapped mechanisms.
- Keep Hands Away from Edges: Avoid sharp edges of the blade, which can cause cuts.
- Inspect Before Use: Check for cracks, rust, or bending on the blade or hook.
- Wear Gloves if Necessary: Use gloves when working on heavy projects to enhance grip and protect your hands.
- Avoid Overextending: Do not extend the blade beyond its specified limit to prevent snapping.
- Use Locks Properly: Engage the locking mechanism to avoid sudden blade retraction during measuring.
- Store Securely: Store your tape measure in a toolbox or hang it safely when not in use.
Avoiding Damage to Surfaces When Measuring
- Use a Cushion: Place a soft pad under the housing if measuring delicate surfaces.
- Avoid Dragging the Blade: Lift and place the blade to prevent scratches on wood or painted surfaces.
- Use Chalk for Marking: Avoid using the metal hook to mark points on fragile or finished surfaces.
- Hook Gently: Attach the hook lightly to prevent damage to edges or corners.
- Be Mindful of Tension: Do not pull the tape too tightly to avoid damaging surfaces.
- Test on Scrap Material: Before measuring a sensitive surface, test your tape measure on a spare piece.
By following these tips, you’ll protect yourself, your tools, and the surfaces you work on while achieving accurate and safe measurements.
 Frequently Asked Questions About Tape Measure Tricks
What Are the Most Useful Tape Measure Tricks for Beginners?
For beginners, focus on mastering basic techniques such as holding the tape measure correctly, using the hook method, and practicing one-handed measurements. These foundational skills are essential for accurate and efficient measuring in any project.
How Can I Prevent the Tape Measure from Bending or Kinking?
To prevent bending or kinking, use a stiff, high-quality tape measure and ensure it is fully extended before taking a measurement. Avoid applying excessive force, and store the tape measure properly after use by retracting it slowly.
What Are Some Common Mistakes to Avoid When Using a Tape Measure?
Common mistakes include not anchoring the tape measure properly, allowing the tape to sag or bend, not accounting for the thickness of the hook, and failing to double-check measurements. Avoiding these errors ensures accurate and reliable measurements.
How Do I Measure Curved or Irregular Objects with a Tape Measure?
When measuring curved or irregular objects, use a flexible tape measure and carefully follow the object’s contour. For complex curves, take multiple measurements at different points and calculate the average if necessary.
Can I Use a Tape Measure for Both Interior and Exterior Measurements?
Yes, a tape measure is versatile enough to handle both interior and exterior measurements. However, ensure you use appropriate techniques and secure the tape securely to capture accurate measurements in various settings.
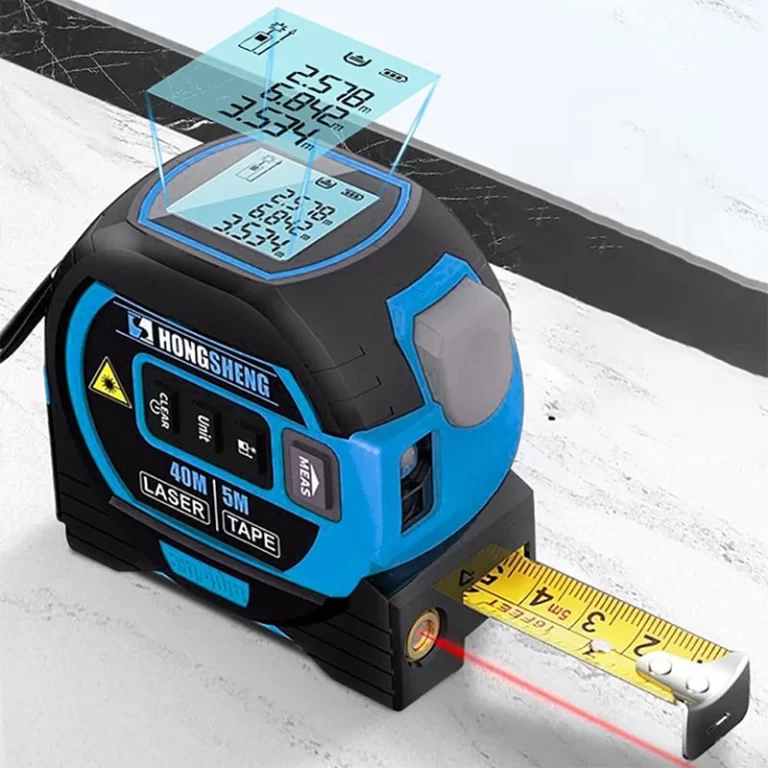
What Are Some Innovative Tape Measure Tricks for Complex Projects?
For complex projects, consider using modular rod cases, GPS-enabled tracking, or digital tape measures with advanced features. These innovations provide enhanced precision and functionality, making complex measurements easier and more accurate.
How Do I Maintain and Care for My Tape Measure?
Maintain your tape measure by keeping it clean and dry, avoiding excessive force that can damage the tape or case, and storing it in a safe place when not in use. Regularly inspect the tape for wear and tear, and replace it if necessary to ensure continued accuracy.
Conclusion
Mastering tape measure tricks transforms a simple tool into a powerful asset for any DIY enthusiast, craftsman, or homeowner. By incorporating these techniques into your measuring routine, you enhance precision, efficiency, and overall project quality. From the fundamentals of handling and selecting the right tape measure to advanced methods tailored for specific projects, these tricks empower you to measure with confidence and accuracy. Additionally, leveraging the latest tools and practicing regularly will further refine your skills, making you adept at tackling a wide range of tasks with ease.
Embrace these tape measure tricks and experience the difference they make in your projects and daily tasks. Whether you’re embarking on a home renovation, crafting a custom piece, or simply organizing your space, these strategies ensure that your measurements are spot-on every time. Elevate your measuring game, achieve professional results, and enjoy the satisfaction of precise and efficient workmanship with these essential tape measure tricks.