Understanding Lines on Tape Measure for Precise Measurements
When it comes to accurate measurements, the lines on a tape measure are indispensable. These markings are more than just lines; they are essential tools that ensure precision in every project. Understanding the lines on tape measure can significantly enhance your measuring skills. Whether you’re a DIY enthusiast or a professional contractor, this guide will help you master the lines on tape measure, reduce errors, and improve your overall work quality.
 The Ultimate Marking Guide
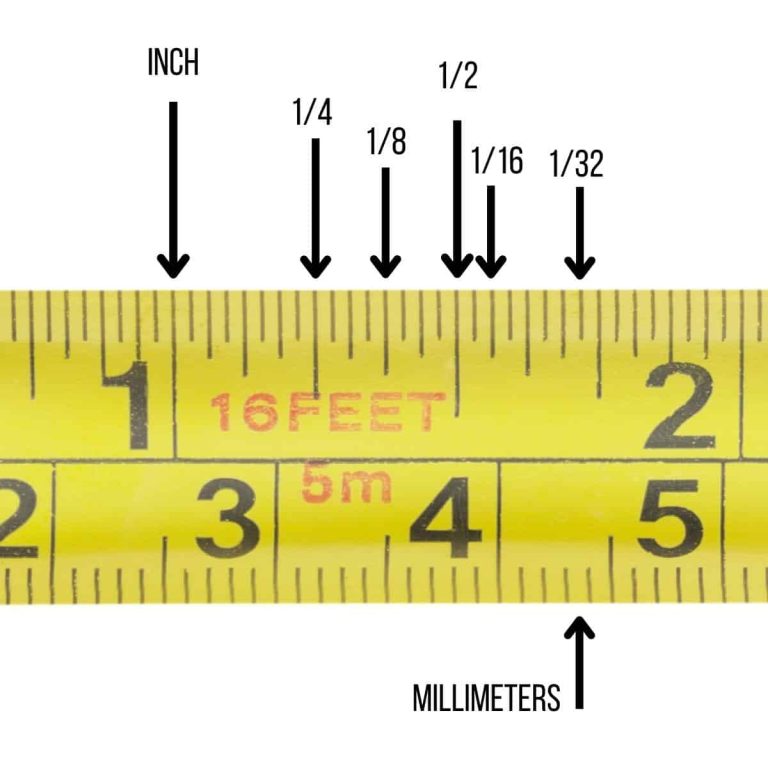
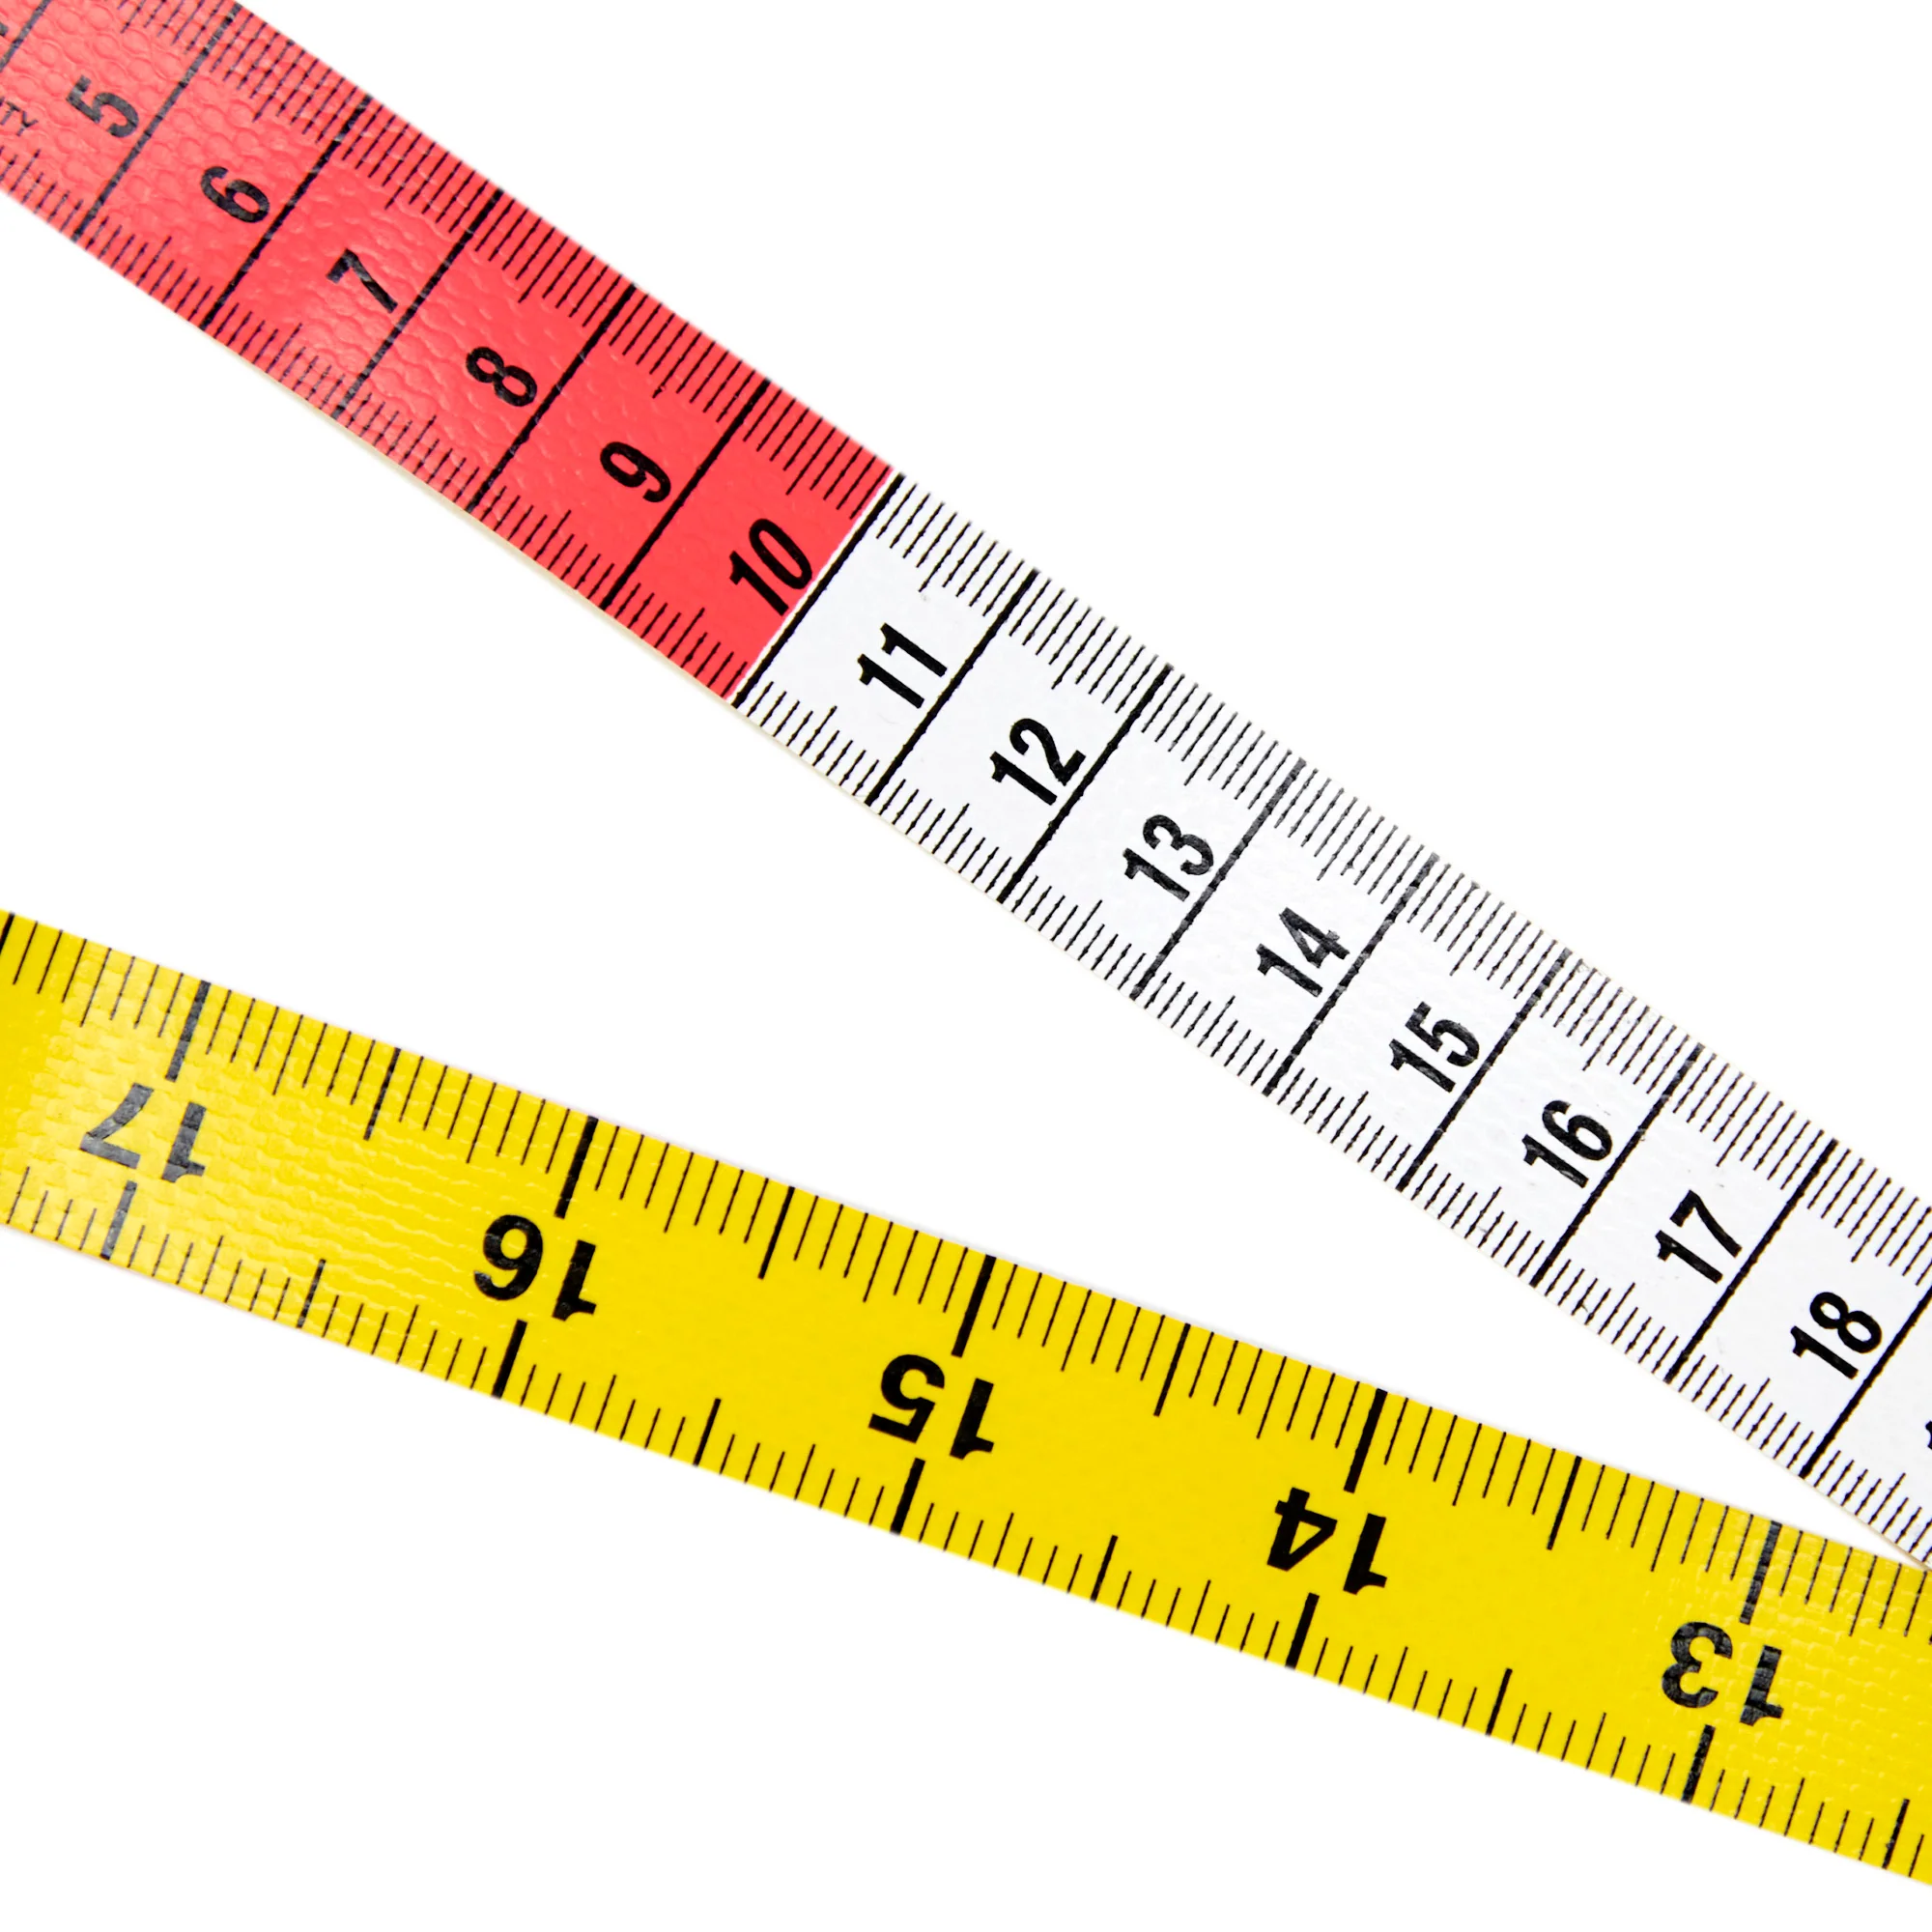
Decoding the lines on a tape measure is crucial for precise measurements. Each line serves a specific purpose, helping you achieve the exact measurement needed for your project. Let’s delve into the details of these markings to eliminate any confusion.
Demystifying Sub-1/16 Inch Markings
The lines below the 1/16-inch mark are often the most confusing. These tiny markings, such as red boxes and triangle symbols, represent fractions smaller than 1/16 inch. Understanding these symbols is vital for projects that require high precision.
Red boxes typically indicate specific fractional measurements. For example, a red box might mark the 3/32-inch increment. Triangles or other symbols can denote crosscuts or guide points for complex measurements. By recognizing these symbols, you can ensure accuracy in your cuts and fits, avoiding common DIY mistakes.
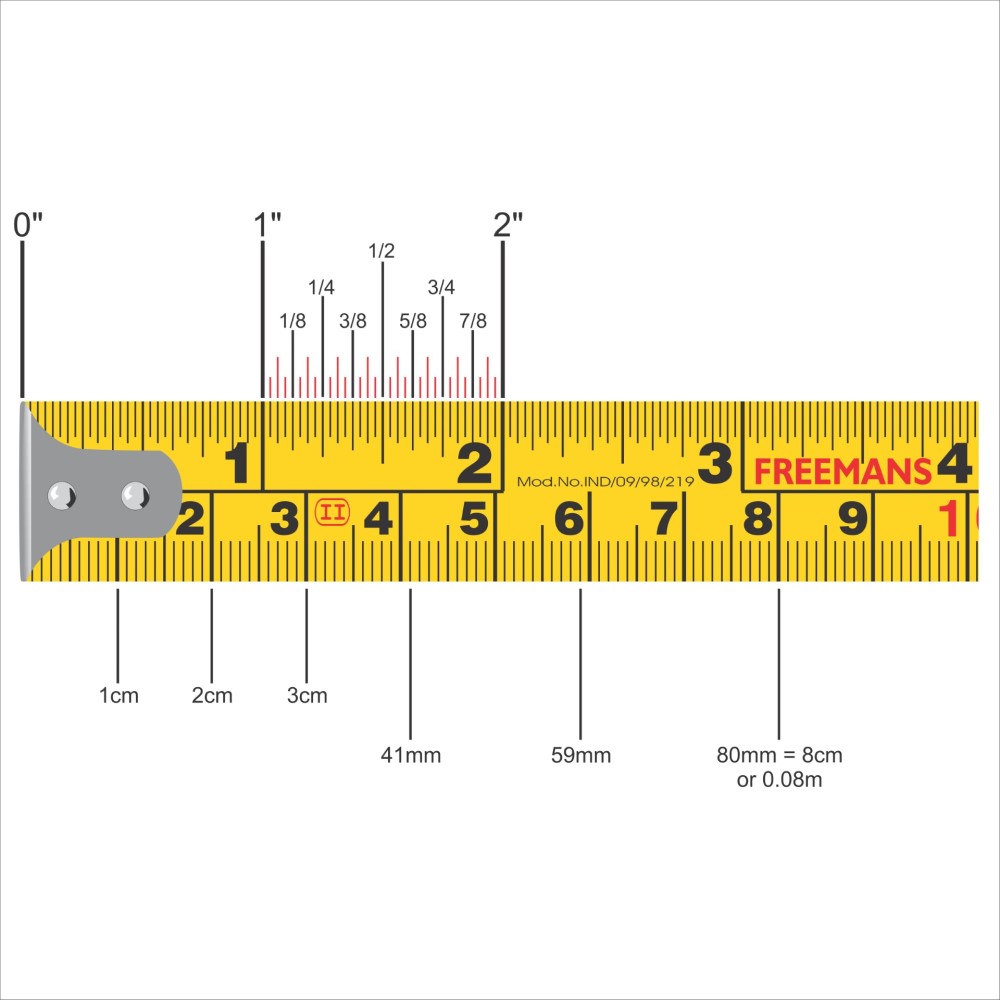
Enhanced Visualization with Enlarged Diagrams
Visual aids play a significant role in understanding the lines on tape measure. Enlarged diagrams provide a clearer view of each marking, making it easier to differentiate between similar symbols. These diagrams help you see the exact position and purpose of each line.
Incorporating enlarged diagrams into your measuring routine can drastically reduce errors. When you visualize each marking clearly, you can interpret measurements more accurately. This practice is especially beneficial when dealing with intricate projects that demand precise measurements.
Practical Applications for DIY Enthusiasts
For DIY enthusiasts, mastering the lines on tape measure translates directly into better project outcomes. Whether you’re building furniture, installing trim, or crafting detailed models, precise measurements are essential. Understanding each marking ensures that every component fits perfectly.
Accurate measurements not only improve the aesthetic quality of your work but also enhance its structural integrity. Avoiding measurement errors saves time and resources, allowing you to complete projects more efficiently. By familiarizing yourself with the lines on tape measure, you can tackle a wide range of DIY projects with confidence and precision.
 Lines Secrets Contractors Never Share
Contractors often develop their own set of techniques to speed up their workflow without sacrificing accuracy. These insider secrets involve specialized uses of the lines on tape measures that are rarely shared outside the professional community. Learning these secrets can elevate your measuring skills to a professional level.
The Quick Read Method with Serrated Marks
One of the most effective techniques contractors use involves the serrated marks on a tape measure. These serrated edges allow for a quick and secure grip, enabling swift measurements without needing precise alignment. By holding the tape measure firmly, contractors can read measurements rapidly, even in challenging conditions.
This method is particularly useful in dynamic work environments where time is of the essence. It ensures that measurements remain accurate without slowing down the workflow. Adopting the quick read method can significantly enhance your efficiency and accuracy in various projects.
The Arch Compensation Principle
When a tape measure is stretched or relaxed, it naturally forms an arch. This arch can distort measurements, leading to inaccuracies. Contractors use the arch compensation principle to adjust their readings accordingly. By understanding how the tape’s tension affects its shape, they can make precise adjustments to maintain accuracy.
This technique is especially crucial in large-scale projects where even minor inaccuracies can lead to significant discrepancies. By applying the arch compensation principle, contractors ensure that their measurements remain true to the intended value, regardless of the tape’s tension.
Decoding Roman Numerals for Enhanced Accuracy
Some tape measures include Roman numerals as additional markers. These numerals correspond to specific distance intervals, providing another layer of measurement reference. Contractors use these numerals to verify measurements, ensuring pinpoint precision in their work.
Incorporating Roman numerals into your measuring routine can enhance the reliability of your measurements. They serve as quick reference points that can be particularly useful in tasks requiring high levels of accuracy, such as roofing or framing. Understanding these numerals allows for more precise and dependable measurements.
Practical Demonstrations and Real-World Examples
Seeing these contractor secrets in action can solidify your understanding. Practical demonstrations, such as videos showing roof construction, can illustrate how these techniques are applied in real-world scenarios. These examples bridge the gap between theory and practice, providing invaluable insights into effective tape measure usage.
By observing real-world applications, you can better grasp how to implement these secrets in your own projects. This hands-on learning approach ensures that you can replicate the techniques accurately, enhancing your overall measurement skills.
Here’s How to Read Them Blindfolded!
Imagine being able to measure accurately without relying on your sight. It may sound impossible, but developing tactile skills allows you to read the lines on tape measure by touch alone. This ability is incredibly useful in situations where visual access is limited or when working in low-light conditions.
Designing Non-Slip Features for Enhanced Grip
A secure and steady grip is essential for accurate tactile measurements. Tape measures equipped with non-slip designs prevent the tool from slipping out of your hand during use. Features such as textured surfaces or rubberized grips enhance your hold, making it easier to feel the markings with your fingers.
This stability allows you to focus solely on the tactile feedback from the tape measure, enabling precise readings without relying on visual cues. Investing in a tape measure with non-slip features can significantly improve your ability to measure accurately by touch.
Five-Level Difficulty Challenge for Tactile Recognition
Training yourself to read tape measures blindfolded involves a structured approach. Start with a five-level difficulty challenge designed to enhance your tactile recognition skills. Begin with basic scale markings, such as whole inches and half-inches, and progress to more complex symbols like diamond-shaped markers and specialized symbols.
Each level introduces new challenges that build upon the previous one, gradually enhancing your tactile memory and recognition capabilities. By systematically increasing the difficulty, you can train your sense of touch to accurately identify various markings, ultimately enabling you to read measurements accurately without relying on sight.
Unlocking Touch Memory Mnemonics
Creating mnemonics based on the tactile feel of each mark can significantly enhance your ability to read measurements blindfolded. For example, associating specific textures or shapes with their corresponding values allows for rapid and accurate recall. You might assign a particular pattern or pressure to different fractional marks, creating a mental map that you can follow by touch.
These touch memory mnemonics streamline the measurement process, making it possible to measure with confidence even in the absence of visual information. Developing these mnemonics can lead to quicker and more reliable tactile measurements, enhancing your overall precision.
Practical Applications and Benefits
Being able to read a tape measure blindfolded offers several practical advantages. It enhances your versatility as a craftsman, allowing you to work efficiently in various conditions. For instance, in low-light environments or cramped spaces, relying on touch can be more practical than trying to see the markings.
Additionally, developing tactile measurement skills can improve your overall dexterity and attention to detail. This ability ensures that you can maintain precision even when visual access is limited, contributing to higher-quality workmanship. Whether you’re working on intricate woodwork, precise metal fabrication, or detailed installations, the ability to read measurements by touch enhances your reliability and accuracy.
 Beyond Inches: What Those Lines Really Mean
The lines on tape measure go beyond simple inch measurements. They embody a rich history and intricate engineering principles that enhance their practical applications. Understanding these deeper meanings can provide valuable insights into their use and improve your measurement accuracy.
Tracing Back to 19th Century British Thread Gauge Standards
The origins of modern tape measure markings trace back to 19th-century British thread gauge standards. These standards were established to ensure uniformity and precision in measurements across various industries, including construction, manufacturing, and engineering.
The introduction of standardized markings allowed for consistent communication and reduced errors in measurements. This uniformity fostered greater efficiency and reliability in professional practices. By appreciating this historical context, users can better understand the rationale behind current tape measure designs and the enduring importance of accurate measurement systems.
The Correlation Between Colored Marks and Material Strength
Colored lines on tape measures often signify different material strengths or load-bearing capacities. For example, black lines may indicate steel’s bearing strength, providing a quick reference for selecting the appropriate tape measure for specific tasks. Similarly, other colors like blue or green could denote alternative materials, such as aluminum or fiberglass, each offering unique advantages in terms of durability and flexibility.
This color-coding system helps users identify the best tool for each project, ensuring that measurements align with the material requirements. It enhances safety and efficiency in construction and DIY endeavors by allowing quick identification of tape measures suitable for specific tasks.
Advanced Measurement Systems and Engineering Language
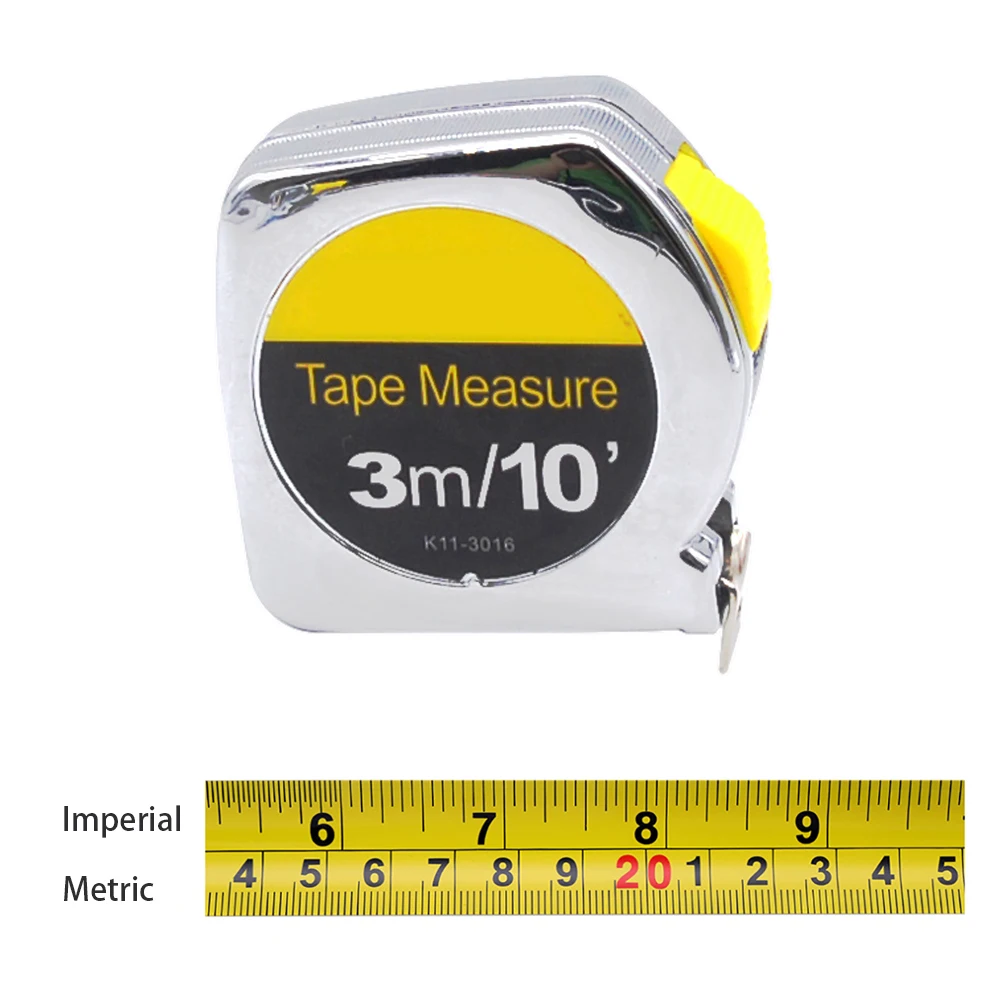
Modern tape measures incorporate various measurement systems and engineering languages to cater to a wide range of project requirements. These systems include both metric and imperial scales, allowing for versatile use in international and diverse projects.
Specialized markings may indicate angles, slopes, or specific construction tolerances, providing comprehensive information essential for complex tasks. Understanding these advanced markings enables users to navigate sophisticated measurement tasks with greater ease and accuracy, expanding their capabilities beyond simple inch measurements.
Integrating Historical Standards with Modern Technology
Today’s tape measures integrate historical standards with cutting-edge technology, enhancing their functionality and user experience. Digital tape measures, for instance, combine traditional markings with electronic displays, offering precise digital readings alongside tactile measurements.
Laser-guided tape measures utilize advanced optics to provide accurate distance measurements without the need for physical contact. This technology streamlines the measurement process in large-scale projects, saving time and improving accuracy. By understanding how historical standards inform modern designs, users can maximize the benefits of contemporary measurement tools while maintaining the reliability and precision of time-tested systems.
 5 Calibration Tricks Pros Use
Even the most reliable tools can experience inaccuracies over time. Tape measures are no exception, as factors like temperature fluctuations and physical wear can affect their precision. Professionals employ specific calibration tricks to maintain their tape measures’ accuracy and dependability. Here are five essential calibration techniques used by the pros to ensure measurement integrity.
Addressing Thermal Expansion and Contraction
Temperature changes can cause the materials in a tape measure to expand or contract, leading to measurement discrepancies. For instance, a tape measure may become longer in hot conditions and shorter in cold environments. Professionals conduct experiments to understand how these temperature variations affect their tools.
By documenting how measurements shift between -10°F and 100°F, they develop correction factors to compensate for thermal expansion and contraction. This knowledge allows users to adjust their measurements based on current temperatures, ensuring consistent accuracy across different environments.
Quick Calibration Checks with Coins and Credit Cards
A simple yet effective method for quickly calibrating a tape measure involves using everyday items like coins or credit cards. By comparing the measured lengths against the known dimensions of these objects, users can identify and correct any discrepancies.
For example, placing a standard-sized credit card against the tape measure at specific points allows for a quick visual or tactile comparison. If the measurements do not align with the known dimensions, it indicates that the tape measure needs adjustment. This hands-on approach enables users to perform routine calibration checks without specialized tools, maintaining the tape measure’s accuracy through regular verification.
Regular Maintenance and Inspection
Keeping your tape measure in good condition is essential for maintaining its accuracy. Regular maintenance involves cleaning the tape to remove dirt and debris that can obscure markings. Additionally, inspecting the casing for damage is crucial, as dents or deformities can affect the tape’s functionality.
Ensuring that the markings remain clear and visible is a key aspect of maintenance. Faded or worn markings can lead to measurement errors, undermining the tape measure’s reliability. By routinely maintaining and inspecting your tape measure, you prolong its lifespan and safeguard its precision.
Re-calibrating for Specific Projects
Different projects may demand varying levels of measurement precision. Professionals often recalibrate their tape measures to suit the specific requirements of each task. This ensures that measurements align perfectly with project specifications, minimizing the risk of costly mistakes.
For instance, a detailed woodworking project may require higher accuracy than general construction work. In such cases, performing more thorough calibration checks ensures that the measurements are precise enough for the task at hand. Tailoring calibration practices to the demands of each project enhances accuracy and reliability.
Utilizing Digital Tape Measures for Enhanced Accuracy
While traditional tape measures are widely used, digital variants offer additional features that enhance measurement accuracy. Digital tape measures provide precise electronic readings alongside traditional tactile measurements. Some models also offer temperature compensation, automatically adjusting measurements based on ambient conditions to maintain accuracy.
Incorporating digital tape measures into your toolkit can simplify the calibration process. These devices often include built-in calibration features and memory functions that store accurate measurement data for future reference. By leveraging the advanced capabilities of digital tape measures, users can achieve higher levels of precision with minimal effort.
Conclusion
Mastering the lines on tape measure is more than just a fundamental skill; it’s a pathway to achieving unparalleled precision in your projects. By decoding the intricate markings, uncovering contractor secrets, developing tactile reading abilities, understanding the historical and engineering significance, and implementing effective calibration techniques, you equip yourself with the knowledge and tools necessary for accurate measurements.
Whether you’re a seasoned professional or a passionate DIY enthusiast, embracing the comprehensive understanding of the lines on tape measure will transform your work quality and efficiency. Accurate measurements lead to better project outcomes, saving time and resources while enhancing the structural integrity and aesthetic appeal of your work. Invest the time to learn and apply these insights, and watch as your projects reach new heights of excellence and reliability. Embrace the lines on tape measure, and let them guide you to precision and success in every endeavor.