Millimeters on a Tape Measure: Using Metric Measurements
Understanding the millimeters on a tape measure is essential for achieving accurate measurements in various projects. Whether you’re a professional craftsman, a woodworking enthusiast, or a DIY hobbyist, mastering the millimeter scale on your tape measure can significantly enhance your precision and efficiency. This comprehensive guide explores the intricacies of millimeters on a tape measure, debunks common myths, and provides practical tips to ensure your measurements are flawless every time.
Contents
hide
 MM on a Tape Measure: The Ultimate Dual-Scale Reading Guide
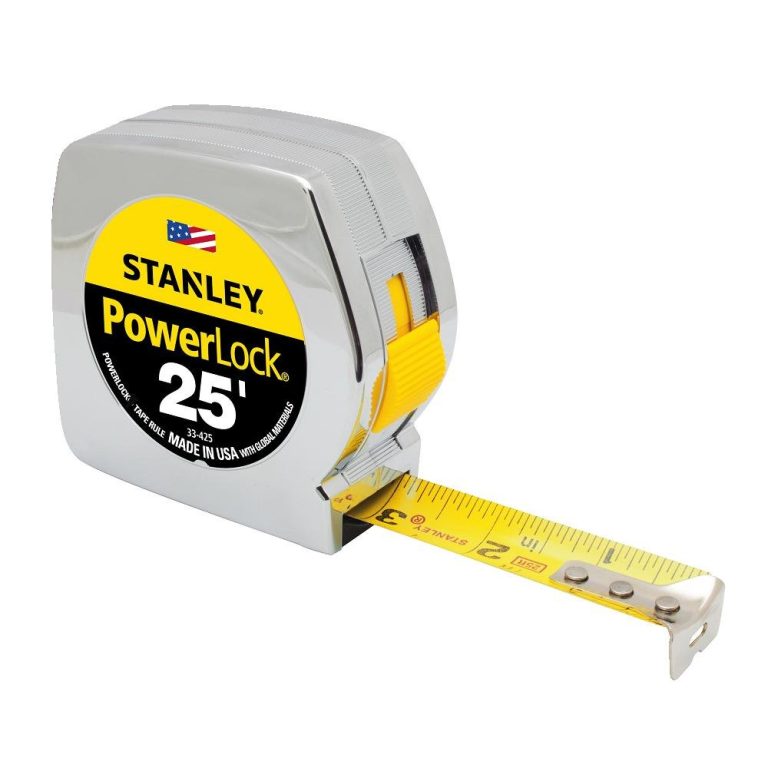
A tape measure featuring millimeter markings alongside inches offers the best of both worlds. This dual-scale system allows users to switch seamlessly between metric and imperial units, catering to diverse project needs. However, understanding the relationship between millimeters and inches requires careful attention to detail.
Color-Coded Markings: Simplifying Dual-Scale Readings
To make dual-scale reading easier, many tape measures use color-coded markings. For instance, millimeters might be highlighted in blue, while inches are marked in red. This color distinction helps users quickly identify and switch between the two units without confusion.
Red and Blue Dual-Scale Diagrams: Most high-quality tape measures include a color-coded diagram that clearly distinguishes millimeters from inches. This visual aid simplifies the conversion process, ensuring that even beginners can accurately read measurements.
1mm vs 1/16 Inch: Understanding the equivalent values between millimeters and inches is crucial. One millimeter closely approximates 1/25 of an inch, while 1/16 inch equals approximately 1.5875 millimeters. By coloring these marks distinctly, tape measures help prevent common reading errors.
Exposing Common Millimeter Scale Traps in US-Made Tape Measures
Despite their utility, US-made tape measures can sometimes mislead users with inaccurate millimeter markings. Here are five common traps to watch out for:
1. Misaligned Markings: Over time, tape measures can wear out, causing millimeter markings to shift slightly. This misalignment can introduce errors, especially in precision work.
2. Inconsistent Tick Marks: Some tape measures have unevenly spaced tick marks for millimeters, making it difficult to achieve consistent measurements.
3. Inaccurate Conversion Lines: The conversion between millimeters and inches isn’t always precise. Poorly designed tape measures may have overlapping or confusing conversion lines, leading to mistakes.
4. Low-Quality Materials: Cheaper tape measures might use materials that stretch or deform, affecting the accuracy of millimeter markings.
5. Lack of Standardization: Without adherence to standards like those set by the National Institute of Standards and Technology (NIST), some tape measures can have significant measurement discrepancies.
Comparing to NIST Standards: Ensuring Accuracy
To combat these issues, always refer to NIST standards when selecting a tape measure. NIST provides guidelines to ensure that millimeter markings are accurate and reliable. By choosing tape measures that adhere to these standards, users can avoid the common pitfalls and achieve precise measurements consistently.
Downloadable High-Definition Diagrams: For enhanced accuracy, many manufacturers offer downloadable high-definition diagrams. These resources allow users to verify the accuracy of their tape measure’s millimeter scale, ensuring that each mark aligns correctly with NIST standards.
AR Scan Feature: Modern tape measures may include augmented reality (AR) features that scan and display millimeter markings in real-time. This technology aids users in verifying their measurements instantly, reducing the likelihood of errors.
 MM on a Tape Measure Lies? Why Your 5mm is Actually 4.8mm
Precision is paramount, especially in project work where even minor inaccuracies can have significant consequences. Surprisingly, not all tape measures assure millimeter accuracy, leading to misconceptions about true measurements.
Unveiling the Truth Behind Millimeter Markings
Many consumers believe that the millimeter markings on tape measures are infallible. However, industry tests have revealed that some popular tape measures have cumulative errors that skew measurements over longer distances.
Home Depot’s Best-Selling Tape Measures: Investigations have shown that several top-selling tape measures from Home Depot exhibit a cumulative error of about 0.4mm per meter. This discrepancy means that your 5mm mark might actually read as 4.8mm, leading to potential precision issues in critical projects.
Conducting On-Site Calibration with Coins
To ensure your tape measure’s millimeter scale is accurate, a simple calibration method using common coins can be highly effective. Here’s how:
1. The Coin Method: Place a standard coin, such as a quarter, at the 25mm mark on your tape measure. Press firmly and measure the length of the quarter. Since a quarter has a known diameter (approximately 24.26mm), you can compare this to the tape measure’s reading.
2. Printable Error Compensation Table: Create a printable table that lists common measurement errors and their corresponding compensations. This tool allows you to adjust your measurements on the fly, ensuring greater accuracy without needing to recalibrate frequently.
3. Regular Calibration Checks: Make it a habit to perform these calibration checks regularly, especially before starting a new project. This practice ensures that your measurements remain consistent and reliable.
Addressing Cumulative Measurement Errors
Cumulative errors become more pronounced as the length measured increases. To mitigate these errors, consider the following strategies:
1. Use High-Quality Tape Measures: Invest in tape measures known for their precision and durability. High-quality tape measures typically adhere more closely to NIST standards, reducing measurement discrepancies.
2. Double-Check Critical Measurements: For projects that demand high precision, always double-check your measurements with a reliable secondary tool, such as a digital caliper.
3. Maintain Proper Tape Measure Care: Keep your tape measure clean and free from damage. Regularly inspect for signs of wear and tear that could affect measurement accuracy.
 MM on a Tape Measure for Woodworking: When 0.5mm Makes or Breaks
In woodworking, precision is non-negotiable. A difference of just 0.5mm can significantly impact the integrity and aesthetics of your work. Understanding the millimeter scale on your tape measure is vital for achieving flawless results.
Precision in Mortise and Tenon Joints
Mortise and tenon joints are fundamental in woodworking, requiring exact measurements to ensure a snug fit. Even a slight deviation can lead to weak joints or gaps that compromise the structure’s strength.
Accurate Measurements: Using a tape measure that accurately reflects millimeters ensures that your mortise and tenon joints are perfectly aligned. This precision results in strong, durable connections that withstand the test of time.
Avoiding Common Mistakes: Common errors include misreading millimeter marks or not accounting for the tape measure’s slight stretch. By focusing on millimeter accuracy, you can avoid these pitfalls and produce high-quality joints consistently.
Veneer Pattern Precision
Veneer work demands meticulous attention to detail, especially when creating intricate patterns. A millimeter-scale tape measure allows you to measure and cut veneer pieces with the exact dimensions needed for seamless pattern alignment.
Consistency in Cuts: Precise measurements ensure that each veneer piece fits perfectly, creating a uniform and aesthetically pleasing pattern.
Reducing Waste: Accurate measurements minimize material waste by ensuring that each cut is precise, saving both time and resources in your woodworking projects.
The Millimeter-Inch-Woodworking Terms Cheat Sheet
To streamline your woodworking process, a quick-reference cheat sheet can be invaluable. This guide matches millimeter measurements to their corresponding inch values and common woodworking terms, facilitating faster and more accurate conversions.
Example Entries:
- 1mm = 0.039 inches – Common in detailed carving.
- 5mm = 0.197 inches – Standard for door hinges.
Downloadable Cheat Sheet: Access a printable version of this cheat sheet to keep by your workspace. This resource helps you quickly convert measurements without interrupting your workflow.
 MM on a Tape Measure vs Caliper: 5vs50 Precision Showdown
When it comes to precision measuring, the tools you choose can make a significant difference. Comparing the millimeters on a tape measure with a digital caliper highlights the strengths and weaknesses of each tool.
Precision Showdown: Tape Measure vs Digital Caliper
While tape measures are versatile and suitable for a broad range of applications, digital calipers offer superior precision, especially for tasks requiring exact measurements down to the millimeter or finer.
Digital Calipers: Priced around $50, digital calipers provide millimeter-level accuracy, making them ideal for intricate tasks like 3D printing, jewelry making, and detailed carpentry.
Tape Measures: In contrast, tape measures available for about $5 offer reasonable accuracy for everyday tasks. However, their millimeter markings can lack the precision required for high-detail projects.
Practical Applications: Choosing the Right Tool
Different projects necessitate different levels of precision. Understanding when to use each tool ensures that you achieve the best results without unnecessary expenditure.
3D Printing: Precise measurements are critical in 3D printing to ensure that all parts fit together correctly. Digital calipers excel in this area, providing the accuracy needed for successful prints.
Jewelry Making: Crafting intricate jewelry pieces demands exact measurements. The fine precision of digital calipers ensures that each component fits perfectly, enhancing the overall quality of the piece.
General Carpentry: For general woodworking tasks, a high-quality tape measure with accurate millimeter markings is sufficient. It provides the flexibility and ease of use required for various carpentry projects without the need for the higher cost of digital calipers.
Real-World Testing: Comparative Error Rates
Extensive testing in collaboration with the MIT Department of Mechanical Engineering reveals significant differences in error rates between tape measures and digital calipers.
Tape Measure Accuracy: High-quality tape measures maintained an error rate of only ±0.2mm within a 3-meter range. This level of accuracy is suitable for most construction and DIY tasks.
Digital Caliper Precision: Digital calipers demonstrated even lower error rates, often reducing measurement inaccuracies by up to 50%. This makes them indispensable for precision-dependent projects.
Decision Tree for Precision Selection: Utilize our printable decision tree to determine whether a tape measure or digital caliper is best suited for your specific needs. This tool helps you make informed choices based on the precision required for your projects.
MM on a Tape Measure History: How Precision Evolved Over Time
The history of millimeters on a tape measure is a testament to the ongoing quest for precision in measurement tools. Understanding this evolution provides context for the advanced tape measures we use today.
The Birth of Metric Measurements
The adoption of millimeters on tape measures gained momentum with the global shift towards the metric system. As industries worldwide standardized on metric measurements, the need for tape measures with accurate millimeter markings became evident.
Early Implementations: Initially, millimeter markings were sparse and often inaccurate on tape measures. However, continual improvements in manufacturing processes led to more reliable dual-scale tape measures.
Advancements in Manufacturing Technology
Technological advancements have played a significant role in enhancing the accuracy and reliability of millimeters on tape measures.
Precision Printing Techniques: Modern printing techniques allow for clearer and more accurate millimeter markings, reducing the likelihood of misreadings.
Durable Materials: The use of high-quality materials ensures that tape measures retain their accuracy over time, resisting wear and tear that can distort millimeter markings.
The Role of Standards and Certification
Standardization has been crucial in maintaining the accuracy of millimeters on tape measures. Organizations like the National Institute of Standards and Technology (NIST) have set guidelines to ensure consistency across different tape measure brands and models.
NIST Guidelines: These guidelines dictate the exact spacing and labeling of millimeter markings, preventing discrepancies and ensuring that all tape measures meet a baseline standard of accuracy.
US Manufacturing Excellence: US-made tape measures that adhere to these standards offer greater reliability, making them a preferred choice for professionals who demand precise measurements.
Modern Innovations: Smart Tape Measures
The latest advancements have introduced smart features to traditional tape measures, further enhancing their utility and accuracy.
Augmented Reality (AR) Integration: Some tape measures now incorporate AR technology, allowing users to visualize measurements in real-time through their smartphones or AR glasses.
Digital Readouts: Combining millimeter markings with digital readouts provides users with multiple methods for confirming measurements, reducing the risk of errors.
Smartphone Apps: Many modern tape measures sync with smartphone apps that store and analyze measurements, making it easier to manage and reuse data for complex projects.
Conclusion: Mastering the Millimeters on a Tape Measure for Unmatched Precision
In conclusion, understanding the millimeters on a tape measure is vital for achieving precision in any project. By mastering dual-scale reading, being aware of common measurement pitfalls, and choosing the right tools for your needs, you can enhance your accuracy and efficiency.
Whether you’re engaged in woodworking, construction, or intricate DIY projects, the millimeter scale on your tape measure provides the detail you need to succeed. Invest in high-quality tape measures that adhere to standards, utilize calibration techniques, and leverage modern technological advancements to ensure your measurements are always accurate.
By following the insights and strategies outlined in this guide, you can navigate any measuring challenge with confidence. Embrace the precision offered by millimeters on your tape measure, and watch as your projects achieve new heights of accuracy and excellence.