3/4 on a Tape Measure: Guide to Reading Accurate Measurements
In the world of DIY projects, precision is everything. One of the most underrated yet crucial measurements is the 3/4 inch mark on a tape measure. Understanding how to effectively use the 3/4 on a tape measure can dramatically improve your accuracy and efficiency. This guide will provide you with the ultimate locating hack, helping you avoid common pitfalls and master the art of measuring with confidence. Whether you’re a seasoned carpenter or a weekend DIY enthusiast, mastering the 3/4 on a tape measure will enhance your project outcomes and streamline your workflow.
 The Ultimate Locating Hack for DIYers
Unlocking the potential of the 3/4 on a tape measure can transform your DIY projects. This mark is more than just a fractional indicator; it’s a pivotal reference point that can help you achieve precise measurements every time.
Solving Common Measurement Pain Points
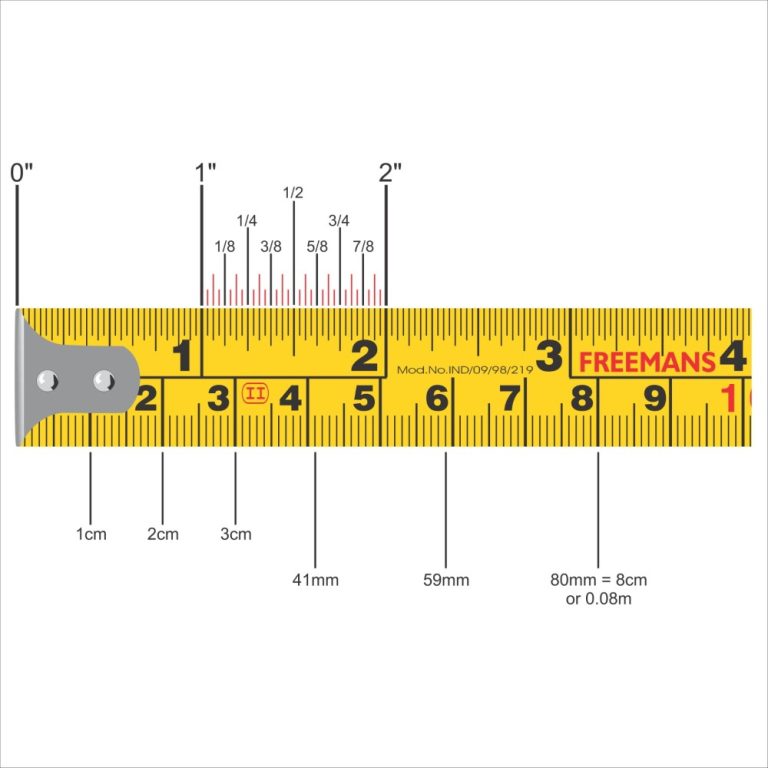
Many DIY enthusiasts struggle with accurately locating the 3/4 inch mark. This confusion often arises from the similarity between 5/8 and 7/8 inch markings, leading to measurement errors that can compromise the integrity of a project. To address this, a simple three-step visual tracking method can be employed.
First, focus on the gear marks that typically accompany the 3/4 inch marker. These gear or toothed markings provide a distinct visual cue, making it easier to identify the correct measurement. Second, use an enlarged image of the tape measure’s gear marks to familiarize yourself with their appearance. This practice helps in quickly distinguishing the 3/4 inch mark from others. Third, learn from common error cases where 5/8 and 7/8 inch marks are frequently confused with 3/4 inches. By understanding these mistakes, you can develop strategies to avoid them, ensuring accuracy in every measurement.
Visual Tracking Method in Action
Implementing the three-step visual tracking method involves consistently referring to the enlarged gear mark images and practicing quick identification during your projects. For instance, when measuring a piece of wood, align the 3/4 inch mark with the starting point of your measurement. This alignment helps in maintaining accuracy, especially when working on repetitive tasks that require the same measurement multiple times.
By integrating this method into your routine, you can significantly reduce measurement errors and enhance the precision of your cuts and fittings. Over time, this practice becomes second nature, allowing you to work more efficiently and confidently.
Common Errors and How to Avoid Them
One of the most common errors is misreading the similar-looking 5/8 and 7/8 inch marks as 3/4 inches. To avoid this, always double-check the gear marks before making a cut or measurement. Additionally, ensure that your tape measure is free from wear and tear, as faded or damaged markings can lead to confusion. Investing in a high-quality tape measure with clearly marked 3/4 inch indicators can also help in minimizing these errors.
 Why 3/4 on Tape Measure is a Carpenter’s Secret Weapon
Carpenters rely heavily on precision, and the 3/4 on a tape measure serves as a critical tool in their arsenal. This mark plays a vital role in framing structures and cutting materials to exact specifications, ensuring that every project is built to last.
The Golden Position of 3/4 Inch in Framing Structures
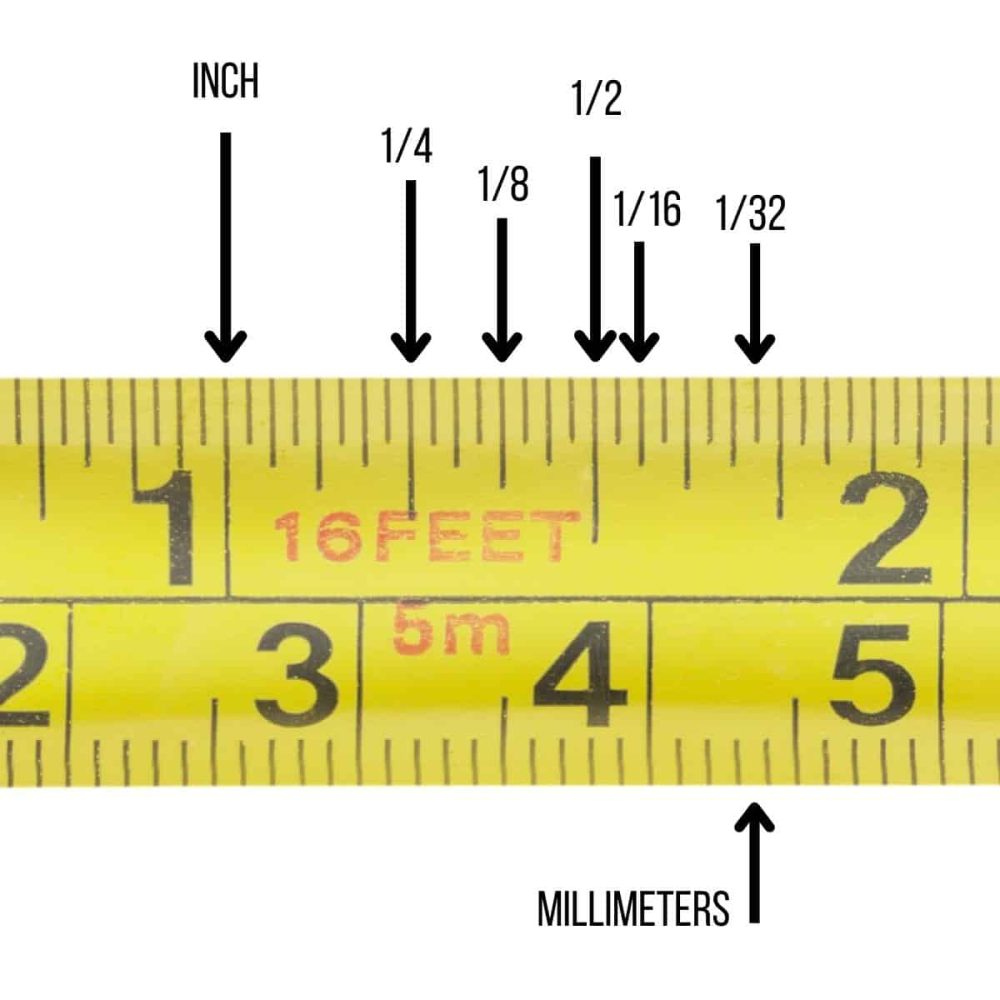
In framing, the 3/4 inch mark is essential for achieving the 16-inch on-center spacing in wall studs. This spacing is a standard in construction, providing the necessary support for walls and ensuring stability. By accurately locating the 3/4 inch mark, carpenters can align studs precisely, avoiding gaps and ensuring that the structure is both strong and aesthetically pleasing.
Furthermore, the 3/4 inch mark aids in cutting boards and panels to the correct length. Accurate cuts are crucial in framing, as even minor discrepancies can result in misaligned joints and weakened structures. By mastering the use of the 3/4 on a tape measure, carpenters can enhance the overall quality and durability of their projects.
The Three-Line Alignment Technique on American Job Sites
One of the secrets carpenters share is the three-line alignment technique, which relies on the 3/4 inch mark for optimal precision. This method involves aligning three specific lines on the tape measure to ensure accurate measurements. First, position the tape measure at the starting point and align the 3/4 inch mark with the designated measurement point. Next, use the other two lines on the tape measure to verify the placement and ensure consistency across multiple measurements. This technique eliminates guesswork, providing a reliable framework for precise carpentry work.
By incorporating the three-line alignment technique into their workflow, carpenters can achieve a higher level of accuracy and efficiency. This method not only streamlines the measuring process but also reduces the likelihood of errors, resulting in superior craftsmanship.
The Role of 3/4 Inch in Board Cutting
Accurate board cutting is fundamental in carpentry, and the 3/4 inch mark plays a significant role in this process. When cutting boards to specific lengths, the 3/4 inch mark serves as a precise reference point, ensuring that each cut is uniform and accurate. This uniformity is crucial in projects that require multiple boards of the same length, such as shelving, cabinetry, and furniture building.
Moreover, the 3/4 inch mark helps in calculating the remaining length after a cut is made. By consistently referencing this mark, carpenters can make adjustments on the fly, enhancing their ability to work with different materials and sizes without compromising accuracy.
 3/4 on Tape Measure Blind Spot? Fix Your Reading Errors Now!
Even the most experienced DIYers can encounter blind spots when reading the 3/4 on a tape measure. These blind spots often result from misreading the markings or relying solely on visual cues without proper alignment.
Addressing Reading Errors with Precision Tools
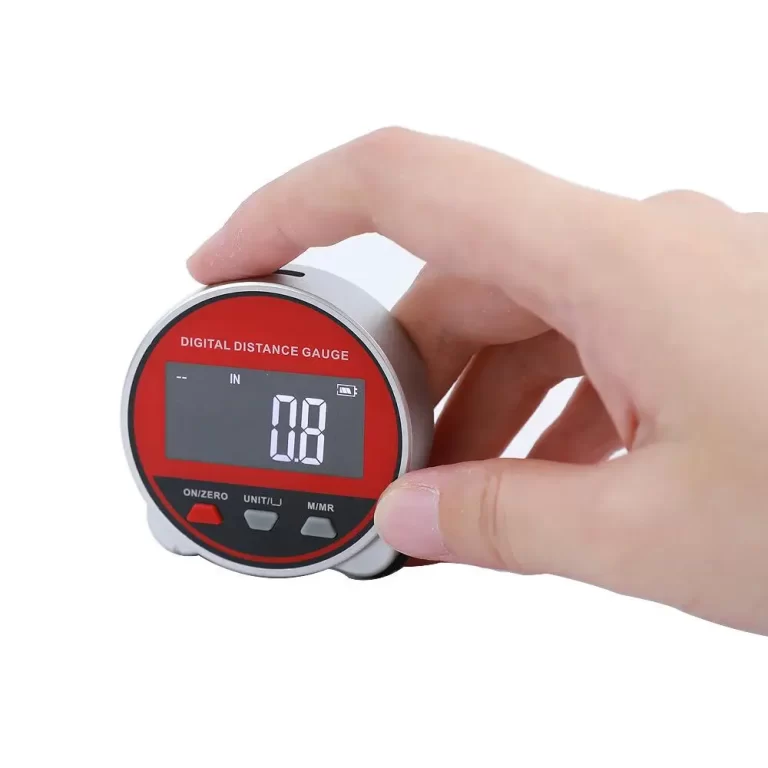
To mitigate reading errors, it’s essential to use precision tools and techniques. These tools enhance your ability to locate the 3/4 inch mark accurately. One effective solution is the “hook compensation calculator.” This interactive tool adjusts measurements based on the tape measure’s hook design. By inputting the specific characteristics of your tape measure, the calculator provides adjusted measurements. It accounts for any discrepancies, ensuring you always get an accurate reading.
Additionally, engaging in error challenge contests can help you identify and correct reading mistakes. By comparing the 3/4 inch markings across 10 different tape measures, you can recognize variations and develop strategies to overcome them. This hands-on approach not only sharpens your measuring skills but also increases your confidence in handling different tape measures with ease.
The Hook Compensation Value Calculator
The hook compensation value calculator is a valuable tool for correcting measurement errors caused by the tape measure’s hook design. Tape measures feature hooks at the end that can slightly extend or retract, affecting the overall measurement. By using this calculator, you can determine the exact compensation needed for your tape measure, ensuring that your 3/4 inch readings are accurate.
To use the calculator, simply input the make and model of your tape measure along with the specific hook design details. The calculator will then provide the necessary adjustments, allowing you to make precise measurements without relying solely on visual cues. This tool is especially useful for projects that demand high accuracy, such as cabinetry, furniture making, and detailed woodworking.
Conducting Measurement Challenges
Measurement challenges are an effective way to enhance your reading accuracy and minimize errors. By comparing the 3/4 inch markings on multiple tape measures, you can identify common discrepancies and learn how to correct them. This practice not only improves your measurement skills but also helps you develop a keen eye for detail.
For example, set up a challenge where you measure a specific length using 10 different tape measures, focusing on the 3/4 inch mark. Record your results and analyze any variations. This exercise highlights potential issues with certain tape measures and teaches you how to adjust your measurements accordingly. By consistently practicing these challenges, you can refine your measuring techniques and achieve greater precision in your projects.
Beyond Framing: 5 Life Hacks Using 3/4 on Tape Measure
The versatility of the 3/4 on a tape measure extends beyond framing and carpentry. This mark can be utilized in various everyday tasks and creative projects, making it an invaluable tool in your DIY toolkit.
Quick Adjustment of Guitar String Height
For musicians, particularly guitar players, the 3/4 inch mark can be used to adjust the string height accurately. Proper string height is essential for comfortable playing and optimal sound quality. By measuring the bridge height from the fretboard and using the 3/4 inch mark as a reference, you can make precise adjustments that enhance your instrument’s performance.
This method ensures that each string is set to the correct height, preventing buzzing and ensuring a smooth playing experience. Whether you’re setting up a new guitar or fine-tuning your current one, the 3/4 on a tape measure provides a reliable reference for achieving the perfect string height.
Calculating Oven Rack Spacing
When organizing an oven, proper rack spacing is crucial for even cooking and maximizing space. The 3/4 inch mark can help you measure the distance between racks accurately, ensuring that they are evenly spaced to accommodate various cookware sizes.
By using the 3/4 inch mark as a guide, you can adjust the racks to optimal positions, enhancing your cooking efficiency and preventing overcrowding. This precision ensures that heat circulates evenly, resulting in better cooking results and a more functional kitchen setup.
Arranging Gallery Walls with Precision
Creating a gallery wall involves precise measurements to ensure that each piece of art is evenly spaced and properly aligned. The 3/4 inch mark on a tape measure can serve as a reference point for spacing the frames consistently.
Start by measuring the distance between each frame, using the 3/4 inch mark to maintain uniform spacing. This approach not only enhances the visual appeal of your gallery wall but also ensures that the arrangement looks balanced and professional. By leveraging the 3/4 on a tape measure, you can achieve a cohesive and aesthetically pleasing display that showcases your favorite artworks effectively.
Setting Up Shelving Units
Accurate measurements are essential when setting up shelving units, whether for storage, display, or organizational purposes. The 3/4 inch mark can help you measure the height and spacing of shelves, ensuring that each level is uniformly aligned.
Use the 3/4 inch mark as a reference. This helps achieve precise measurements for your shelving units. Such precision enhances both functionality and appearance. It ensures that objects placed on the shelves are stable and evenly spaced. This contributes to a neat and organized space.
Tailoring Clothing and Accessories
For those who enjoy sewing or customizing their clothing and accessories, the 3/4 inch mark is invaluable. Whether you’re hemming pants, adjusting sleeve lengths, or adding embellishments, accurate measurements are crucial for achieving a professional finish.
Using the 3/4 inch mark, you can measure and mark fabric with precision, ensuring that your alterations are even and consistent. This accuracy not only improves the overall appearance of your garments but also enhances their fit and comfort. By incorporating the 3/4 on a tape measure into your tailoring practices, you can achieve higher quality results in your sewing projects.
 Is Your 3/4 on Tape Measure Lying? Calibration Survival Guide
Even the most trusted tape measures can develop inaccuracies over time. It’s essential to ensure that the 3/4 on a tape measure is reliable to avoid measurement errors that could compromise your projects.
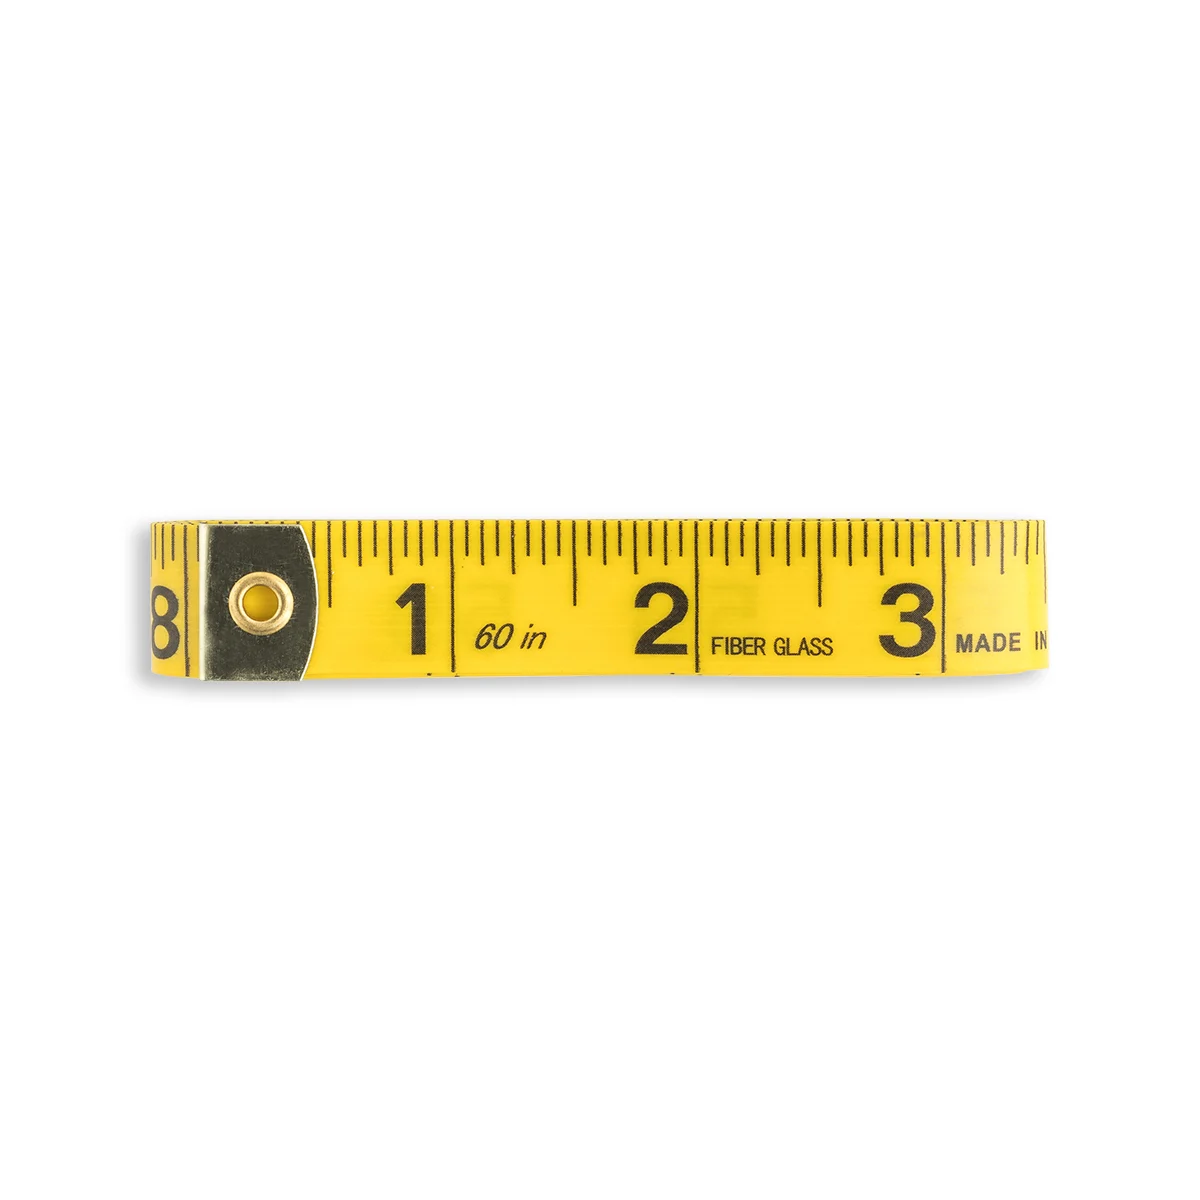
Identifying Millimeter-Level Differences Across Standards
Tape measures from different regions adhere to various standards, such as ASTM in the United States and JIS in Japan. These standards can result in millimeter-level differences in the 3/4 inch mark, affecting measurement accuracy.
To identify these differences, compare the 3/4 inch mark on your tape measure with a known standard. For example, use a precision ruler or a laser calibration tool to measure the actual length of the 3/4 inch mark. By doing so, you can determine if your tape measure aligns with international standards or if it deviates slightly, requiring adjustment.
The Coin Verification Method
A simple yet effective way to verify the accuracy of the 3/4 on a tape measure is the coin verification method. Using a standard coin with a known diameter, such as a quarter, you can compare it against the 3/4 inch mark.
Place the coin alongside the tape measure, aligning one edge with the 3/4 inch mark. Measure the diameter of the coin and compare it to the tape measure’s reading. If the measurement aligns, your tape measure is accurate. If not, you can adjust your measurements accordingly or recalibrate the tape measure to ensure accuracy.
Laser Calibration Techniques
For those seeking the utmost precision, laser calibration techniques offer a reliable solution. Using a laser measurement tool, you can accurately measure the length of the 3/4 inch mark without physical contact, eliminating potential errors caused by tape tension or wear.
To perform a laser calibration, align the laser tool with the starting point of the tape measure and adjust it to measure the exact length of the 3/4 inch mark. Compare this measurement with your tape measure’s reading. If discrepancies are found, you may need to recalibrate the tape measure or use correction factors for your projects.
Recalibrating Your Tape Measure
Recalibrating your tape measure ensures that the 3/4 inch mark remains accurate. Start by identifying any discrepancies using the methods mentioned above. Once identified, adjust the tape measure by aligning it with a known accurate measurement tool.
For tape measures with adjustable markings, use a fine-tipped marker to correct the 3/4 inch mark. Alternatively, apply durable adhesive tape over the existing mark to enhance its visibility and accuracy. Regular recalibration helps maintain the reliability of your tape measure, preventing measurement errors in your projects.
Maintaining Consistent Accuracy Across Different Tape Measures
If you utilize multiple tape measures for your projects, maintaining consistent accuracy across all tools is essential. Begin by calibrating each tape measure individually using the methods outlined previously. Create a calibration log to track the accuracy of each tape measure, noting any adjustments made and the date of calibration.
By maintaining this log, you ensure all your tape measures are reliable. You confirm that their 3/4 inch marks are consistent. This practice enhances your measurement accuracy. It also streamlines your workflow. You can confidently use any tape measure, knowing it meets your precision standards.
Conclusion: Elevate Your Craft with Mastery of 3/4 on Tape Measure
Mastering the 3/4 on a tape measure is a game-changer for DIY enthusiasts and professionals alike. By understanding how to accurately locate and utilize this mark, you can enhance the precision and quality of your projects. From solving common measurement errors and leveraging carpenter secrets to exploring innovative life hacks and ensuring your tools remain calibrated, the 3/4 on a tape measure proves to be an invaluable asset.