How to Measure Bra Size Without Measuring Tape: The Perfect Fit
Finding the perfect bra size can be challenging, especially when you don’t have a measuring tape handy. Understanding how to measure bra size without measuring tape is essential for ensuring comfort and support, whether you’re shopping online or adjusting your wardrobe at home. This comprehensive guide explores various creative and reliable methods to determine your bra size accurately without the need for specialized tools. By following these techniques, you can confidently choose bras that fit well and enhance your comfort and style.
Contents
hide
 Creative DIY Methods for an Accurate Fit
When you lack a measuring tape, you can still determine your bra size using common household items. These creative DIY methods provide reliable alternatives to traditional measuring tools, ensuring you get an accurate fit every time.
Using a String or Shoelace
One of the simplest ways to measure your bra size without a measuring tape is by using a string or shoelace. Here’s how you can do it:
- Wrap the String Around Your Underbust: Hold one end of the string and wrap it snugly around your underbust area, directly beneath your breasts. Ensure the string is level all around to capture the true circumference.
- Mark the Overlap Point: Once the string encircles your underbust, mark the point where the end meets the rest of the string. This mark represents the measurement you need.
- Measure with a Ruler: Lay the string flat on a surface and measure the length up to the mark using a ruler. This measurement is your band size.
- Repeat for Accuracy: To ensure precision, repeat the process a few times and take an average of the measurements.
Using a string or shoelace provides a flexible and easy way to measure your underbust area accurately without a tape measure.
Paper Strip Method
A paper strip can also serve as an effective tool for measuring your bra size without a tape measure. Follow these steps to get an accurate measurement:
- Cut a Paper Strip: Take a strip of paper about 6 inches long and ½ inch wide. This size is manageable and easy to handle.
- Wrap Around Your Ribcage: Wrap the paper strip around your ribcage, just below your bust. Make sure it is snug but not too tight.
- Mark the Overlap: Mark the point where the end of the paper strip meets the rest of it. This mark indicates your underbust measurement.
- Measure the Length: Lay the paper strip flat and measure the length up to the mark using a ruler. This measurement is used to determine your band size.
The paper strip method is simple and effective, providing a quick way to measure your band size without any specialized tools.
Using a Belt or Ribbon
A belt or ribbon can also be repurposed to measure your bra size. Here’s how:
- Select a Flexible Belt or Ribbon: Choose a flexible belt or ribbon that can easily wrap around your body without stretching.
- Wrap Around Your Underbust: Place the belt or ribbon around your underbust area, ensuring it is level and snug.
- Mark the Meeting Point: Mark the point where the end of the belt or ribbon meets the rest of it.
- Measure the Length: Use a ruler or a straight edge to measure the length from the start of the belt to the mark. This gives you your band size.
This method leverages common items like belts or ribbons, making it a convenient option for measuring your bra size without a tape measure.
 Body-Based Estimation Techniques for Different Shapes
Different body shapes require tailored estimation techniques to ensure a perfect bra fit. Understanding how to measure bra size without measuring tape involves recognizing and adapting to your unique body contours.
For Hourglass Figures
Hourglass figures typically have a well-defined waist and balanced bust and hips. Here’s how to measure bra size without a tape measure for this body type:
- Identify the Underbust Point: Locate the area directly beneath your bust where your ribcage naturally tapers.
- Use Your Hand for Estimation: Place your hand around the underbust area, using your palm width to gauge the circumference. Typically, the underbust measurement is about two hand widths wider than your actual ribcage.
- Estimate the Band Size: Based on the hand width estimation, determine your band size. For example, if your hand spans approximately 8 inches, your band size might be around 34.
- Determine the Cup Size: Compare the difference between your band measurement and your bust measurement. Hourglass figures often require a medium to large cup size, such as B or C, depending on the exact difference.
By leveraging body-based estimation techniques, hourglass figures can achieve a comfortable and supportive bra fit without the need for a measuring tape.
For Apple-Shaped Bodies
Apple-shaped bodies carry more weight around the midsection, which can affect bra sizing. Here’s how to measure bra size without measuring tape for apple-shaped individuals:
- Focus on the Bust: Apple-shaped bodies tend to have a fuller bust, so measuring the bust accurately is crucial.
- Use Fingers for Estimation: Place your fingers around your back to estimate the band size. Typically, the band size for apple shapes is adjusted to provide adequate support.
- Estimate the Cup Size: Apple shapes usually require larger cups to accommodate the fuller bust. Use your fingers to gauge the difference between the bust and underbust measurements, translating this into cup sizes.
- Ensure Proper Support: Apple-shaped individuals benefit from bras with strong support features, such as wide straps and underband support, to ensure comfort and stability.
These techniques help apple-shaped bodies accurately estimate their bra size without relying on a tape measure, ensuring they find bras that provide both comfort and support.
For Pear-Shaped Figures
Pear-shaped figures have hips that are wider than their shoulders, and their bras need to provide lift and support. Here’s how to measure bra size without measuring tape for pear-shaped individuals:
- Highlight the Bust Area: Emphasize the measurement around the fullest part of your bust.
- Hand Width Approximation: Use the width of your hand to estimate the circumference of your bust. Typically, pear-shaped individuals may need to add an extra hand width for comfort and adjust the band size accordingly.
- Estimate the Cup Size: The difference between the bust and underbust measurements will help determine the cup size. Pear shapes often require medium to large cups, such as C or D, to provide adequate coverage and lift.
- Prioritize Supportive Features: Look for bras with padded cups, side support, and adjustable straps to enhance comfort and shape for pear-shaped bodies.
By adapting body-based estimation techniques, pear-shaped individuals can accurately determine their bra size without a measuring tape, ensuring a flattering and comfortable fit.
 Comparing Home-Made Methods and Their Accuracy
When how to measure bra size without measuring tape is essential, understanding the accuracy of different home-made methods is crucial for achieving the best fit. Let’s compare various techniques and evaluate their reliability.
Paper Strip Method vs. String Method
Both the paper strip method and the string method are popular for measuring bra size without a tape measure. Here’s a comparison of their accuracy:
- Paper Strip Method: This method is straightforward and easy to execute. By accurately marking the overlap and measuring it with a ruler, you can achieve consistent results. However, paper strips can sometimes stretch or tear, potentially affecting precision.
- String Method: The string method offers greater flexibility and can be easily adjusted to fit snugly around the underbust area. It provides a more precise measurement as the string can conform better to the shape of the body. However, it requires careful handling to avoid twists and ensure the string lies flat.
Overall, the string method tends to be slightly more accurate due to its flexibility and ease of adjustment, making it a preferred choice for precise measurements.
Using Existing Bras vs. DIY Methods
Another common approach is to use an existing bra to determine your size. Here’s how it stacks up against other DIY methods:
- Using Existing Bras: This method involves measuring the band and cup size of a well-fitting bra. While convenient, it relies on having a bra that already fits correctly, which may not always be the case. Additionally, different brands may have slight variations in sizing, potentially leading to discrepancies.
- DIY Methods (Paper/String): DIY methods are more flexible and can be adapted to account for variations in sizing standards. They allow for personalized measurements based on current body changes, providing a more tailored fit.
While using an existing bra can be quick and useful, DIY methods offer greater adaptability and accuracy, especially when multiple measurements are needed or when existing bras do not fit well.
Accuracy of Body-Based Estimation Techniques
Body-based estimation techniques, such as using hand width or visual assessments, offer a more intuitive approach but can vary in accuracy based on individual perception and consistency. Here’s what to consider:
- Pros: These techniques are quick and do not require any tools, making them highly accessible. They also allow for adjustments based on body shape and personal comfort.
- Cons: The accuracy depends heavily on the individual’s ability to estimate correctly. Without proper technique, there may be significant deviations from the actual size, leading to ill-fitting bras.
To enhance the accuracy of body-based estimation techniques, combining them with other methods, such as using a string or paper strip, can provide a more reliable result.
Troubleshooting Common Measurement Issues
When determining how to measure bra size without measuring tape, several common issues can arise. Identifying and troubleshooting these problems ensures accurate measurements and a comfortable fit.
Handling Slippery Fingers
Slippery fingers can cause the measuring tool to slide, resulting in inaccurate measurements. Here’s how to manage this issue:
- Dry and Clean Hands: Ensure your hands are dry and clean before measuring. Moisture can cause the string or paper strip to slip.
- Use Non-Slip Materials: Opt for non-slip materials like rubber bands or textured ribbon instead of smooth string or paper, which can provide better grip.
- Adjust Grip: Hold the string or tape measure firmly but gently to prevent slipping without compressing your skin.
By maintaining a secure grip and using appropriate materials, you can prevent slipping and achieve more accurate measurements.
Dealing with Irregularly Shaped Fingers
Irregularly shaped fingers, such as those with prominent knuckles or tapered bases, can complicate measurements. Here’s how to address this challenge:
- Measure at Multiple Points: Take measurements at different points around your finger to find the most comfortable fit. Focus on the base where the band will sit.
- Use Adaptable Tools: Flexible tools like string or ribbon can better conform to irregular shapes compared to rigid items like paper strips.
- Consider Multiple Measurements: Once multiple measurements are taken, average them to determine the most accurate size.
By accommodating irregular shapes through multiple measurements and adaptable tools, you can ensure a comfortable and accurate bra fit.
Avoiding Overly Tight or Loose Measurements
Overly tight or loose measurements can result in discomfort or poorly fitting bras. Here’s how to avoid this:
- Ensure Proper Tension: When wrapping the string or paper strip, ensure it is snug but not too tight. A slightly loose fit allows for comfortable movement.
- Check for Squeezing: Avoid squeezing your fingers while measuring, as this can lead to an underestimated size. Aim for a relaxed and natural wrap.
- Test the Fit: After converting your measurements to a bra size, try on the bra and make any necessary adjustments. Ensure the band sits comfortably without digging in or slipping.
Maintaining balanced tension and testing the fit can help you avoid common sizing errors and achieve a well-fitting bra.
 Converting Estimated Measurements to Bra Sizes
After determining your measurements using a tape measure alternative, the next step is to convert these estimates into standard bra sizes. This process involves understanding different sizing systems and applying accurate conversion techniques.
Understanding Different Bra Size Standards
Different regions and brands use various bra size standards, making it essential to understand these differences for accurate conversion. Here’s a breakdown of the most common sizing systems:
- US/Canada: Uses numbers for band size (e.g., 32, 34) and letters for cup size (A, B, C, etc.).
- UK/Ireland: Similar to the US system but may have slight variations in band and cup sizing.
- Europe: Primarily uses numerical sizing, combining band and cup measurements differently (e.g., 75B).
- Australia/New Zealand: Similar to the UK system with some regional variations.
Familiarizing yourself with these standards helps ensure you select the correct size when shopping internationally or across different brands.
Using Conversion Charts
Conversion charts are invaluable tools for translating your estimated measurements into standard bra sizes. Here’s how to use them effectively:
- Identify Your Band and Cup Measurements: Based on your estimated measurements, determine both the underbust and bust measurements.
- Refer to the Appropriate Chart: Use a conversion chart specific to your region or the brand you’re purchasing from. Locate your underbust measurement to find the corresponding band size.
- Match the Bust Measurement: Determine the cup size by finding the difference between your bust and band measurements. This difference typically translates to a specific cup size on the chart.
For example, if your underbust measurement is 32 inches and your bust measurement is 34 inches, the difference is 2 inches, corresponding to a B cup in the US sizing system.
Calculating Band and Cup Sizes
Here’s a step-by-step guide to calculating your band and cup sizes based on your estimated measurements:
- Calculate Band Size: Add 4 to your underbust measurement if you’re using the US sizing system. For example, if your underbust is 30 inches, your band size will be 34.
- Determine Cup Size: Subtract your band measurement from your bust measurement. Each inch difference typically corresponds to a cup size (1 inch = A, 2 inches = B, etc.). So, a 2-inch difference equates to a B cup.
- Adjust for Different Standards: Depending on the sizing system, you may need to adjust your calculations. Refer to specific conversion charts to ensure accuracy when switching between systems.
By following these steps, you can accurately convert your estimated measurements into standard bra sizes, ensuring a perfect fit.
Dealing with Brand Variations
Different brands may have slight variations in their sizing, making it essential to account for these differences during conversion. Here’s how to navigate brand-specific sizing:
- Check Brand-Specific Charts: Many brands provide their own sizing charts on their websites. Compare your measurements against these charts to find the best fit.
- Read Reviews and Feedback: Customer reviews often provide insights into whether a brand’s sizing runs large or small. Use this information to adjust your estimated size accordingly.
- Consider Trial and Adjustment: If possible, try on bras from different brands and sizes to determine which fits best. Online retailers with easy return policies can facilitate this process.
Understanding and accommodating brand variations ensures that your converted bra size translates into a comfortable and supportive fit, regardless of where you purchase your bra.
Additional Techniques for Confirming Your Bra Size
While measuring bra size without a measuring tape is effective, supplementing this method with additional techniques can further ensure accuracy and confidence in your size selection.
Using Printable Bra Size Charts
Printable bra size charts available online can serve as a supplementary tool to confirm your measurements. Here’s how to use them:
- Download and Print a Chart: Find a reliable bra size chart online and print it to scale.
- Compare Your Measurements: Align your estimated measurements with the chart’s guidelines to verify your size.
- Cross-Check with DIY Methods: Use the chart in conjunction with your DIY measurements to confirm consistency and accuracy.
Printable charts provide a visual reference that can help you double-check your measurements and ensure you’ve selected the correct bra size.
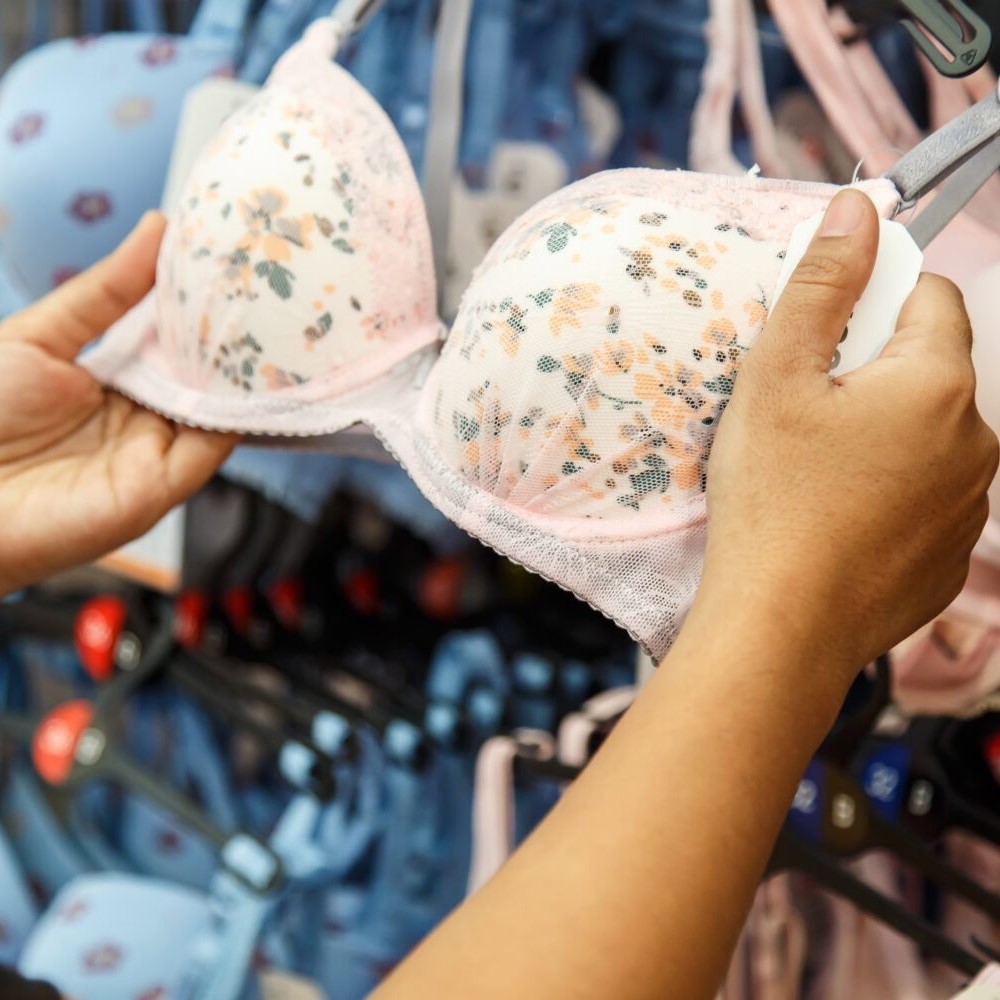
Comparing with Existing Bras
Using an existing well-fitting bra can help you determine your size more accurately. Here’s how to compare:
- Select a Comfortable Bra: Choose a bra that fits you well and accurately represents your size.
- Measure the Existing Bra’s Dimensions: Use a ruler to measure the band length and cup depth of the bra.
- Match to Standard Sizes: Compare these measurements to standard size charts to identify your bra size.
- Adjust According to Brand Variations: Remember that different brands may have slight size variations, so use this comparison as a starting point and make adjustments as needed.
This comparative approach can validate your DIY measurements and provide additional confidence in selecting the right bra size.
Consulting Online Size Calculators
Online size calculators are convenient tools that assist in determining your bra size based on your estimated measurements. Here’s how to use them:
- Input Your Measurements: Enter your estimated underbust and bust measurements into the calculator.
- Select Your Region: Choose the regional sizing standard relevant to your purchase.
- Review the Recommended Size: The calculator will provide your bra size based on the input measurements.
- Verify with Other Methods: Cross-reference the calculator’s results with other measurement techniques to ensure consistency.
Online calculators offer a quick and easy way to convert your measurements into a standardized bra size, enhancing the accuracy of your sizing process.
Conclusion
Understanding how to measure bra size without measuring tape empowers you to achieve a perfect fit with ease and confidence. By utilizing creative DIY methods, adapting to different body shapes, and leveraging technology, you can accurately determine your bra size without the need for specialized tools. Whether you’re using a string, paper strip, or innovative apps, these techniques ensure you find bras that offer the right support and comfort. Remember to consider factors such as body shape, consistency in measurement methods, and seasonal variations to maintain accuracy over time. Embrace these strategies to enhance your bra-buying experience, ensuring that every bra you wear fits beautifully and supports you flawlessly. With this knowledge, you can confidently select the perfect bra size, enhancing both your comfort and style in everyday life.