A Guide to Reading a Tape Measure: Mastering the Basics
In the realms of DIY projects, construction, tailoring, and various other fields, reading a tape measure accurately is a fundamental skill that ensures precision and success. Whether you are a seasoned professional or a novice enthusiast, understanding how to effectively read a tape measure can significantly enhance the quality of your work. This comprehensive guide delves into the intricacies of tape measures, offering detailed insights and practical tips to help you master this essential tool. By the end of this article, you will not only be proficient in reading a tape measure but also confident in applying this knowledge to a wide range of projects.
Contents
hide
 The Anatomy of a Tape Measure
Understanding the Basic Components
To effectively read a tape measure, it is crucial to first understand its basic components. A typical tape measure consists of a flexible metal or fiberglass tape housed within a durable case. The tape itself is marked with a series of lines and numbers that indicate various units of measurement. Additionally, a lock mechanism is often present to hold the tape in place once extended.
- The Blade: The actual tape that extends and retracts, usually made of steel or fiberglass for durability.
- The Case: The housing that protects the tape and provides a handle for ease of use.
- Markings and Measurements: Lines and numbers on the blade that indicate units such as inches, feet, centimeters, and millimeters.
- The Hook: The small metal end at the tip of the tape that allows it to latch onto edges for accurate measurements.
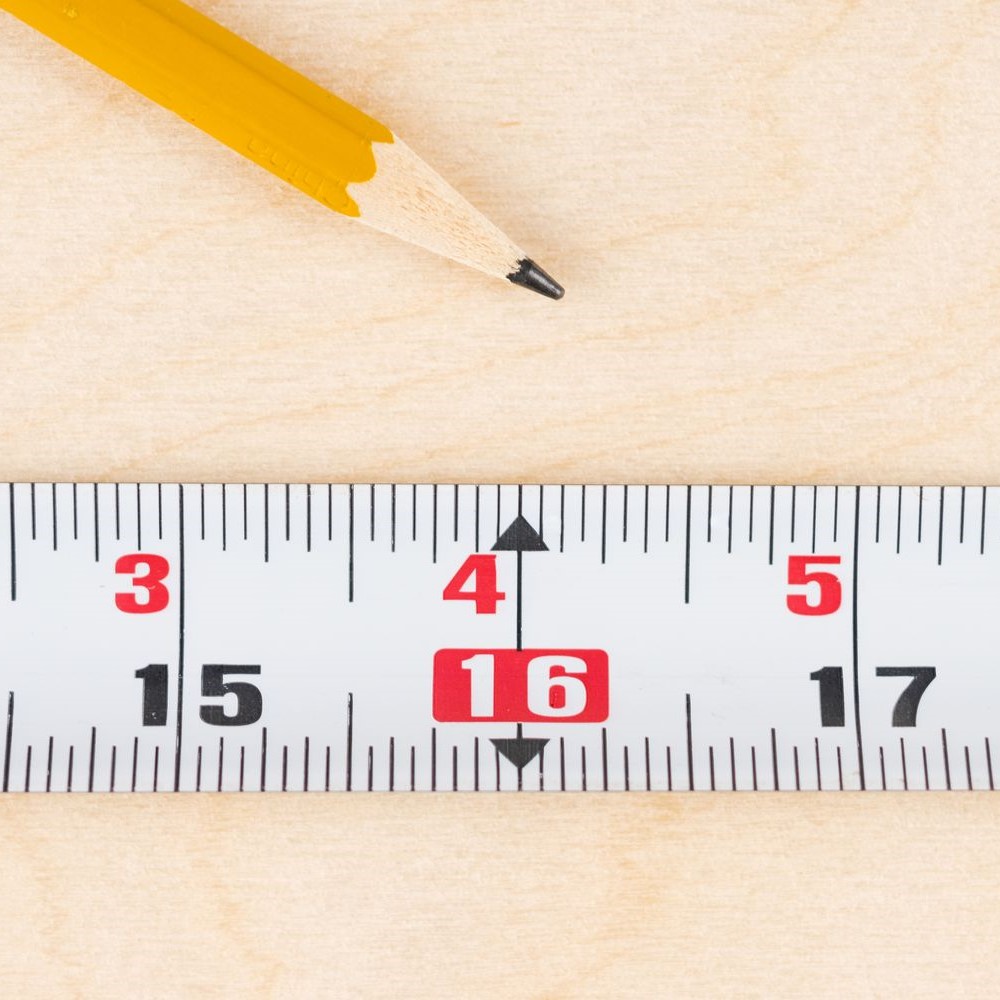
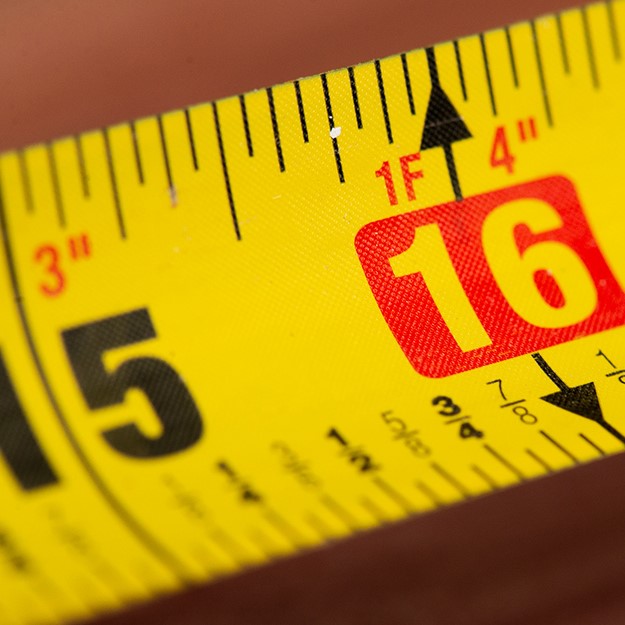
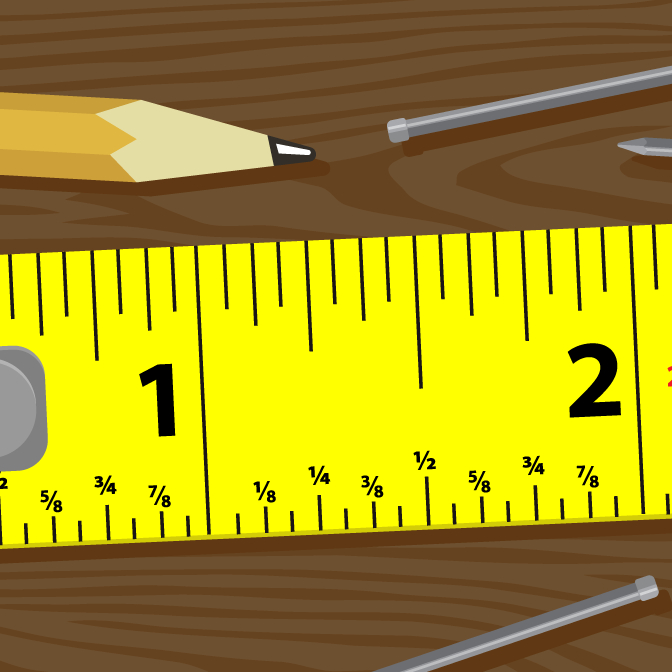
Decoding the Measurement Marks
Tape measures are designed to display measurements in both imperial and metric units. Navigating these markings is essential for precise reading.
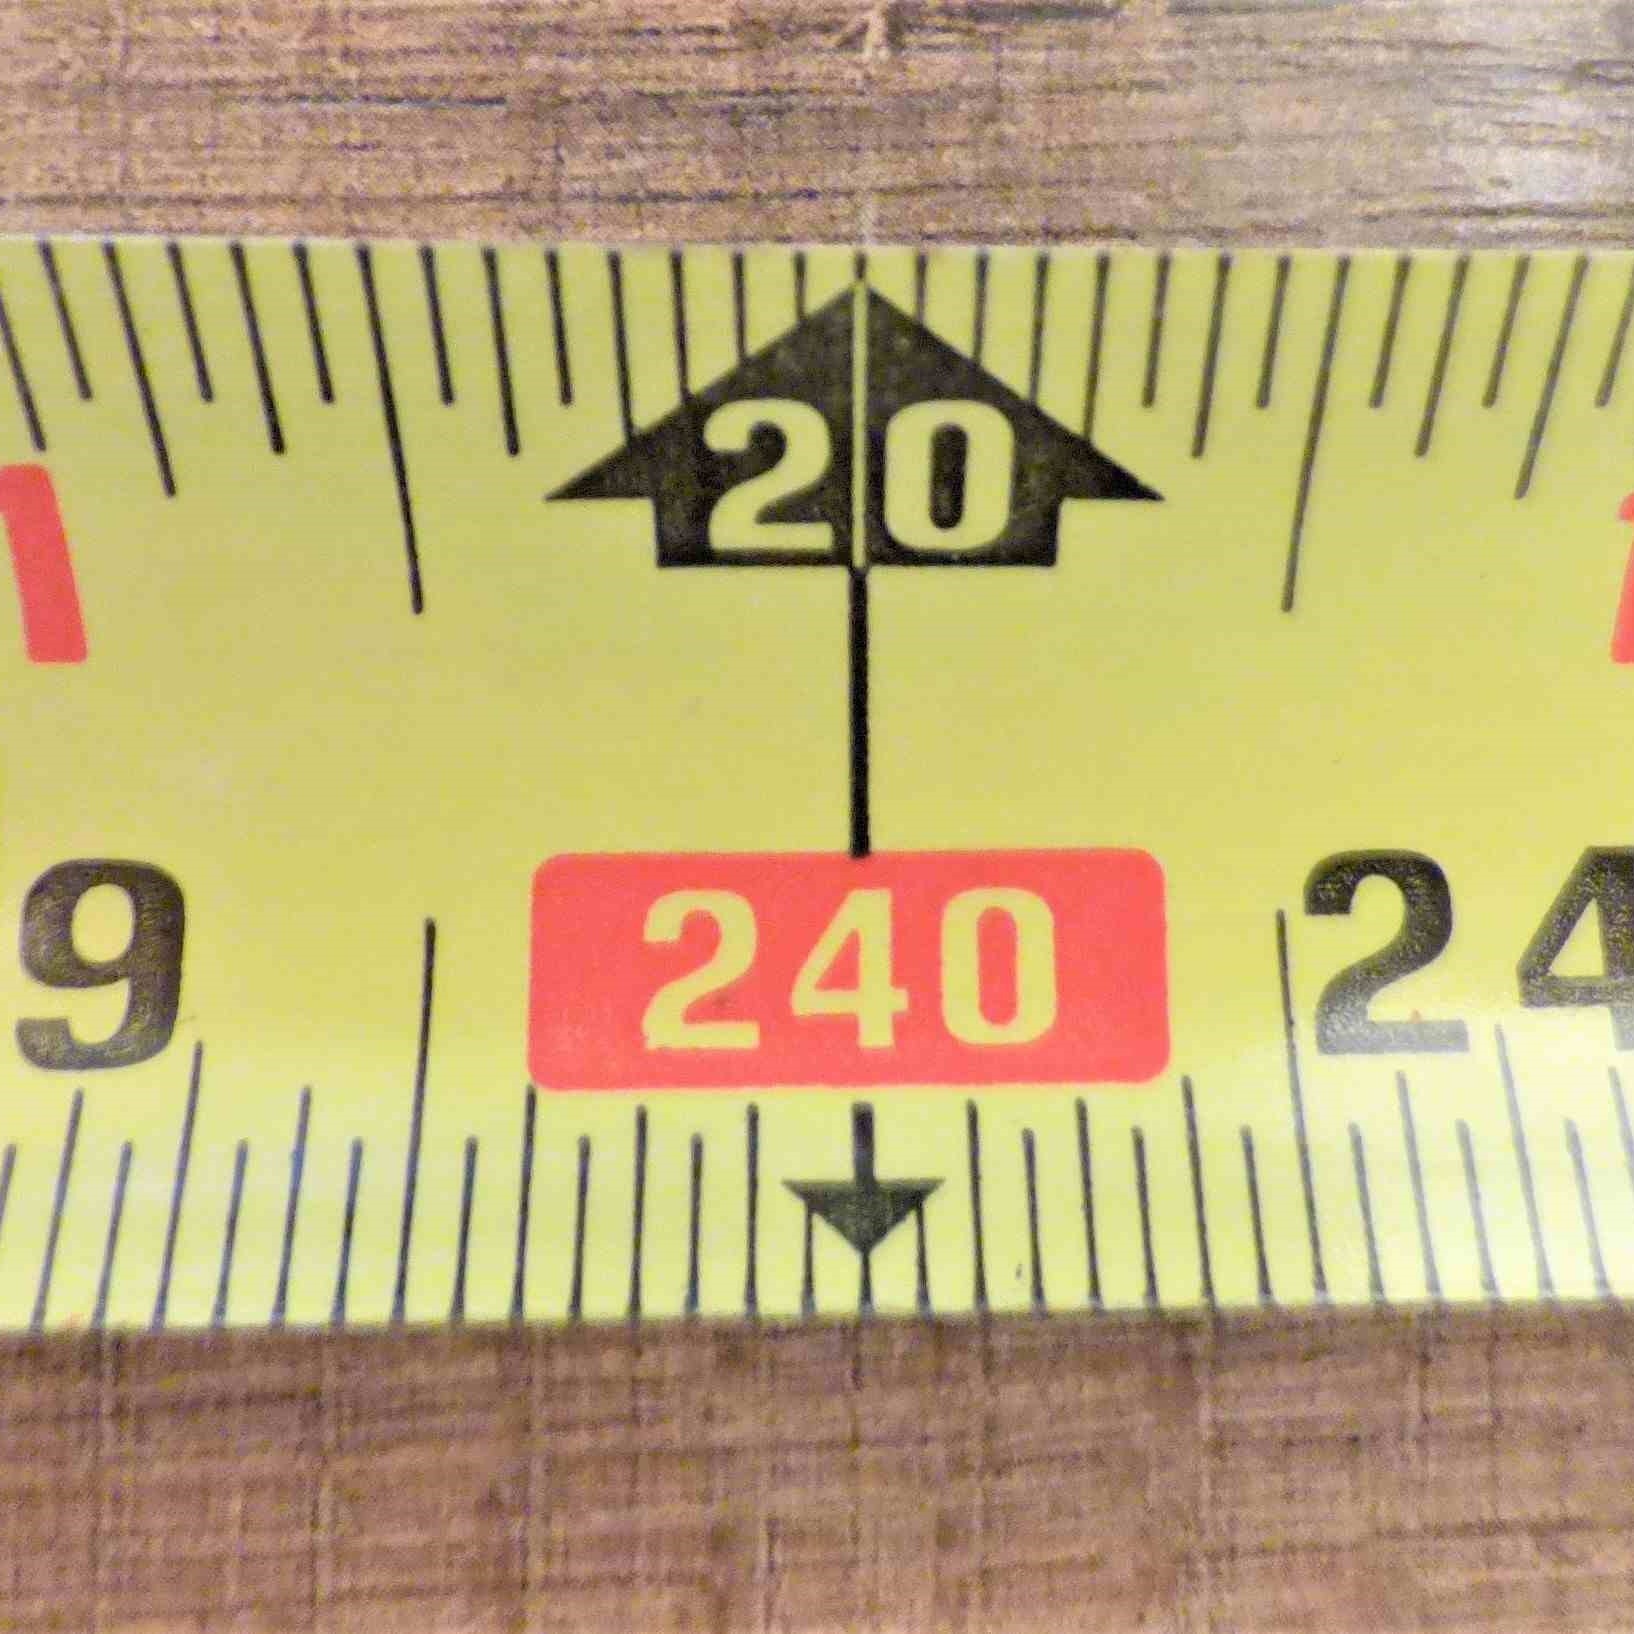
- Inch Markings: The longest lines represent whole inches. Smaller lines denote fractions of an inch, typically halves, quarters, eighths, and sixteenths.
- Centimeter Markings: Clearly labeled numbers represent each centimeter, with smaller lines indicating millimeters.
- Dual Measurements: Many tape measures feature both imperial and metric units side by side, allowing for easy conversion and versatility in various projects.
By familiarizing yourself with these markings, you can seamlessly interpret measurements, whether working on a construction site or crafting a garment.
 Techniques for Accurate Measurement
The Hook Technique
One of the most common methods for ensuring accurate measurements is the hook technique. This involves using the metal hook at the end of the tape measure to anchor it precisely at the starting point.
- Position the Hook: Place the hook on the edge of the object you are measuring.
- Apply Tension: Gently pull the tape to create a slight tension, ensuring the hook remains in place.
- Read the Measurement: Ensure that the hook is aligned with the zero mark on the tape to avoid adding or subtracting any length.
Using the hook technique consistently can significantly reduce errors and improve the reliability of your measurements.
Measuring Stretchable Materials
When dealing with materials that can stretch or compress, such as fabrics or certain types of wood, it is essential to account for potential variations.
- Hold the Tape Steady: Prevent the tape from stretching by holding it firmly at both ends.
- Avoid Excessive Tension: Apply just enough tension to keep the tape taut without causing it to elongate.
- Double-Check Measurements: Measure twice to confirm accuracy, especially when precision is critical.
By carefully handling stretchable materials, you can maintain the integrity of your measurements and ensure the quality of your work.
Measuring Inside and Outside Spaces
Different techniques are required when measuring inside or outside spaces to ensure accuracy.
- Inside Measurements: For interior dimensions, such as the width of a doorway or the depth of a shelf, ensure the tape measure is held straight and flush against the surface to avoid gaps.
- Outside Measurements: When measuring the exterior of objects, such as the height of a table or the length of a window frame, allow the tape to curve slightly around the object to follow its contours accurately.
Adapting your measurement approach based on the context helps in capturing precise data, essential for fitting and assembly tasks.
 Common Measurement Challenges and Solutions
Overcoming Parallax Errors
Parallax errors occur when the tape measure is not aligned properly with the measurement point, leading to inaccurate readings.
- Solution: Always ensure that your eye is directly in line with the marking on the tape measure. This alignment minimizes the risk of misreading the measurement and enhances accuracy.
Dealing with Uneven Surfaces
Measuring uneven or irregular surfaces can be challenging, as the tape may not lie flat or straight.
- Solution: Use a flexible tape measure that can conform to the contours of the surface. Additionally, take multiple measurements from different angles to account for irregularities and determine the most accurate measurement.
Avoiding Tape Snags and Twists
Snags and twists in the tape can distort measurements and cause frustration.
- Solution: Carefully extend and retract the tape measure, ensuring it remains smooth and free of kinks. When not in use, coil the tape properly to prevent damage and maintain its functionality.
By addressing these common challenges with practical solutions, you can maintain the reliability of your measurements and enhance the efficiency of your projects.
Advanced Techniques for Professional Measurements
Using the Square and Tape Measure Together
Combining the use of a square with your tape measure can improve the precision of your measurements, especially in construction and carpentry.
- Set the Square: Position the square at the corner of the material you are measuring.
- Align the Tape: Extend the tape measure along the square’s arms to capture accurate length and width measurements.
- Record Both Dimensions: Take note of the measurements from both the square and the tape to ensure consistency.
This method eliminates potential errors caused by angles and provides a comprehensive understanding of the dimensions involved.
Taking Diagonal Measurements
Diagonal measurements are crucial for ensuring that structures and angles are square, preventing future alignment issues.
- Measure from Corner to Corner: Extend the tape measure diagonally across the space or object.
- Compare Diagonals: For rectangular spaces, the diagonals should be equal if the corners are square.
- Adjust as Necessary: If the diagonals are not equal, adjust the structure to achieve proper alignment.
Using diagonal measurements as a check can help maintain the structural integrity of your projects, ensuring they are built correctly from the start.
Scaling Measurements for Larger Projects
In large-scale projects, scaling measurements can simplify the process and reduce the need for constant re-measuring.
- Determine a Scale Factor: Decide on a scale that will be easy to work with, such as 1 inch representing 1 foot.
- Convert Measurements: Multiply or divide the actual measurements by the scale factor to obtain scaled-down dimensions.
- Use Scaled Drawings: Create drawings based on the scaled measurements to guide your project accurately.
Scaling measurements allows for easier handling and visualization of large projects, enhancing both planning and execution phases.
Choosing the Right Tape Measure for Your Needs
Evaluating Tape Measure Features
Different tape measures come with various features tailored to specific tasks. Assessing these features can help you select the best tool for your requirements.
- Length: Choose a tape measure length based on the nature of your projects. Common lengths range from 12 feet for general use to 100 feet for extensive construction tasks.
- Blade Material: Consider the durability and flexibility of the blade materials. Steel blades offer robustness, while fiberglass blades provide flexibility for unique measurements.
- Lock Mechanism: A reliable lock mechanism ensures that the tape stays in place during measurements, enhancing accuracy and ease of use.
- Measurements Display: Select a tape measure with clear and easy-to-read markings, ideally with both imperial and metric units for versatility.
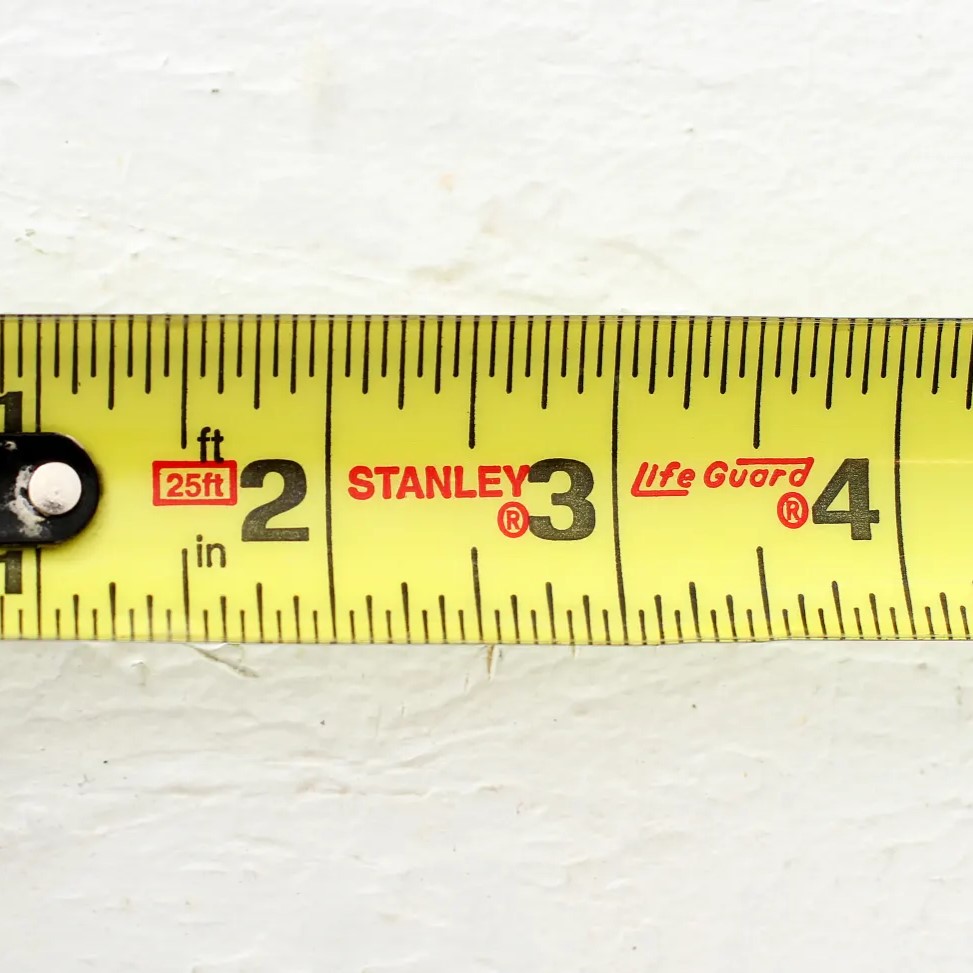
Top Brands and Models
Several reputable brands offer high-quality tape measures, each with distinct advantages.
- Stanley: Known for their durability and precision, Stanley tape measures are a favorite among professionals.
- Komelon: Offering innovative features such as SmartGrad technology, Komelon tape measures provide enhanced readability and functionality.
- Milwaukee: Renowned for their robust construction, Milwaukee tape measures are ideal for heavy-duty applications.
- Crown: Combining affordability with reliability, Crown tape measures are perfect for both beginners and experienced users.
By selecting a tape measure from a trusted brand that aligns with your specific needs, you can ensure long-lasting performance and accurate measurements.
Price vs. Quality
When choosing a tape measure, it’s essential to balance price and quality. While more expensive models often offer enhanced durability and additional features, there are also cost-effective options that provide reliable performance.
- High-End Models: These typically feature superior materials, advanced markings, and longer lifespans, making them suitable for frequent use in demanding environments.
- Budget-Friendly Options: Ideal for occasional use or smaller projects, budget-friendly tape measures still offer essential functionalities without breaking the bank.
Assess your usage frequency and project requirements to determine the best value for your investment, ensuring you get the most out of your tape measure.
 Practical Applications of Reading a Tape Measure
Construction and Carpentry
In construction and carpentry, precise measurements are paramount. Accurate reading of a tape measure ensures that structures are built correctly and fit together seamlessly.
- Framing: Measure and cut lumber to exact lengths for building frames and supports.
- Installation: Accurately measure spaces for installing windows, doors, and other fixtures.
- Blueprints: Translate blueprint dimensions onto the physical site using precise tape measure readings.
Mastering tape measure skills in these applications enhances the quality and safety of construction projects.
Home Improvement and DIY Projects
Home improvement and DIY enthusiasts rely heavily on tape measures for a variety of tasks.
- Furniture Building: Measure and cut materials to create custom furniture pieces that fit perfectly in your space.
- Decorating: Accurately measure wall spaces, furniture dimensions, and other elements to create balanced and aesthetically pleasing arrangements.
- Repairs: Ensure that repairs, such as fixing cabinets or installing shelves, are done with precise measurements for optimal functionality.
By effectively reading a tape measure, DIY projects become more manageable and successful, leading to satisfying and professional-looking results.
Fashion and Tailoring
In the fashion and tailoring industry, precise measurements are essential for creating well-fitted garments.
- Body Measurements: Accurately measure various parts of the body to design clothing that fits perfectly.
- Fabric Cutting: Ensure that fabric pieces are cut to the correct dimensions, minimizing waste and ensuring proper garment construction.
- Pattern Making: Use precise measurements to create patterns that translate accurately into finished clothing items.
Proficiency in reading a tape measure in these contexts ensures that garments are comfortable, stylish, and tailored to individual needs.
Landscaping and Outdoor Projects
Landscaping and outdoor projects often require meticulous measurements to achieve desired results.
- Garden Layouts: Measure garden beds, pathways, and other elements to create well-organized and aesthetically pleasing outdoor spaces.
- Fencing and Gates: Ensure that fences and gates are accurately measured and installed for stability and functionality.
- Deck Building: Measure and cut materials precisely to construct sturdy and visually appealing decks.
Accurate measurements in landscaping contribute to the overall beauty and functionality of outdoor areas, enhancing both the environment and enjoyment.
Enhancing Precision with Additional Tools
Combining Tape Measures with Levels
Using a tape measure in conjunction with a level can improve the accuracy of your measurements, especially for tasks requiring horizontal or vertical precision.
- Measure the Distance: Use the tape measure to determine the length or height needed.
- Check Alignment: Use the level to ensure that the measured distance is perfectly horizontal or vertical.
- Adjust Accordingly: Make any necessary adjustments based on the level’s feedback to maintain precision.
This combination ensures that your measurements are not only accurate but also properly aligned, crucial for the structural integrity of projects.
Incorporating Squares and Angle Finders
Squares and angle finders complement tape measures by ensuring that angles and corners are precise.
- Position the Square: Align the square with the corner or angle you are measuring.
- Measure with the Tape: Use the tape measure to confirm that the angles are correct and that the measurements are consistent.
- Adjust as Needed: Make adjustments based on the measurements to achieve the desired precision.
These tools work together to provide a comprehensive measurement approach, enhancing the overall accuracy of your projects.
Utilizing Digital Tape Measures
For those seeking modern solutions, digital tape measures offer enhanced features and precision.
- Digital Displays: Provide easy-to-read measurements, reducing the likelihood of misinterpretation.
- Memory Functions: Store measurements for future reference, improving efficiency and convenience.
- Bluetooth Connectivity: Some models allow for wireless data transfer, integrating seamlessly with digital project plans.
Digital tape measures combine traditional functionalities with advanced technology, offering a versatile and user-friendly option for precise measurements.
Tips for Maintaining Your Tape Measure
Regular Cleaning and Inspection
Keeping your tape measure clean and well-maintained ensures its longevity and accuracy.
- Wipe Down After Use: Use a dry cloth to remove dirt, dust, and debris after each use.
- Inspect for Damage: Regularly check for bent hooks, frayed tapes, or broken locks that could affect performance.
- Lubricate Moving Parts: Occasionally apply a light lubricant to the retracting mechanism to ensure smooth operation.
Maintaining your tape measure in good condition prevents wear and tear, preserving its accuracy and functionality over time.
Proper Storage Practices
Storing your tape measure correctly can extend its lifespan and prevent damage.
- Store in a Dry Place: Keep the tape measure away from moisture to prevent rust and corrosion.
- Protect the Blade: Ensure the blade is fully retracted before storing to avoid accidental bends or kinks.
- Use a Protective Case: Maintain the tape measure in its original case or a protective pouch to shield it from environmental factors and physical damage.
Proper storage safeguards your tape measure, ensuring it remains a reliable tool for all your measurement needs.
Calibration and Accuracy Checks
Periodically checking the calibration of your tape measure ensures it remains accurate.
- Compare with a Standard: Use a known accurate measuring tool to compare measurements.
- Check for Consistency: Extend the tape fully and check if the measurements align with the standard tool.
- Adjust if Necessary: If discrepancies are found, consider recalibrating or replacing the tape measure to maintain precision.
Regular calibration checks help maintain the trustworthiness of your measurements, essential for high-stakes projects.
Common Mistakes to Avoid When Reading a Tape Measure
Misinterpreting Fractional Measurements
Misunderstanding fractional measurements can lead to significant errors.
- Solution: Familiarize yourself with fractional markings by practicing reading different fractions of an inch. Use visual aids or conversion charts until you become comfortable with the fractions commonly used in your projects.
Forgetting to Account for the Hook
The hook at the end of the tape measure can affect the overall measurement if not accounted for correctly.
- Solution: Always ensure that the hook is aligned with the zero mark when starting your measurement. Be mindful that some tape measures are designed with the hook measuring a specific distance, which can vary between brands.
Not Holding the Tape Measure Straight
Allowing the tape measure to bend or curve can distort the measurement.
- Solution: Hold the tape measure straight and taut against the object you are measuring. Use both hands for better control, ensuring that the tape lies flat and accurate during the measurement process.
Avoiding these common pitfalls can greatly enhance the accuracy and reliability of your measurements, ensuring successful outcomes for your projects.
Conclusion
Mastering the skill of reading a tape measure is a valuable asset that transcends various fields, from construction and DIY to fashion and landscaping. By understanding the anatomy of a tape measure, employing accurate measurement techniques, and utilizing advanced tools, you can achieve precision and confidence in all your measurement tasks. Moreover, maintaining your tape measure and avoiding common mistakes ensures its reliability and longevity, making it an indispensable tool in your arsenal. Embrace the knowledge and techniques outlined in this guide, and elevate your projects with the precision that comes from mastering the art of reading a tape measure.