Mini Lathe: Hobbyists and DIY Enthusiasts
Contents
hide
Introduction to Mini Lathes
Mini lathes have revolutionized the world of hobby machining and small-scale manufacturing. These compact powerhouses bring the capabilities of full-sized metal lathes to home workshops, garages, and small businesses. With their smaller footprint and lower cost, mini lathes make metalworking accessible to a wider range of enthusiasts and professionals. The versatility of these machines allows users to create intricate parts, repair metal objects, and bring creative projects to life. From turning custom chess pieces to fabricating replacement parts for vintage machinery, mini lathes open up a world of possibilities.
As technology advances, modern mini lathes now come equipped with features like variable speed control, digital readouts, and even computer numerical control (CNC) capabilities. This evolution has made them increasingly popular among hobbyists, model makers, jewelers, and small-scale manufacturers. The compact size of mini lathes also makes them ideal for educational settings, allowing students to learn metalworking skills without the need for large, industrial-grade equipment. Despite their small size, these machines can handle a wide range of materials, including metals, plastics, and even some woods, making them incredibly versatile tools for any workshop.
Key Features and Components of Mini Lathes
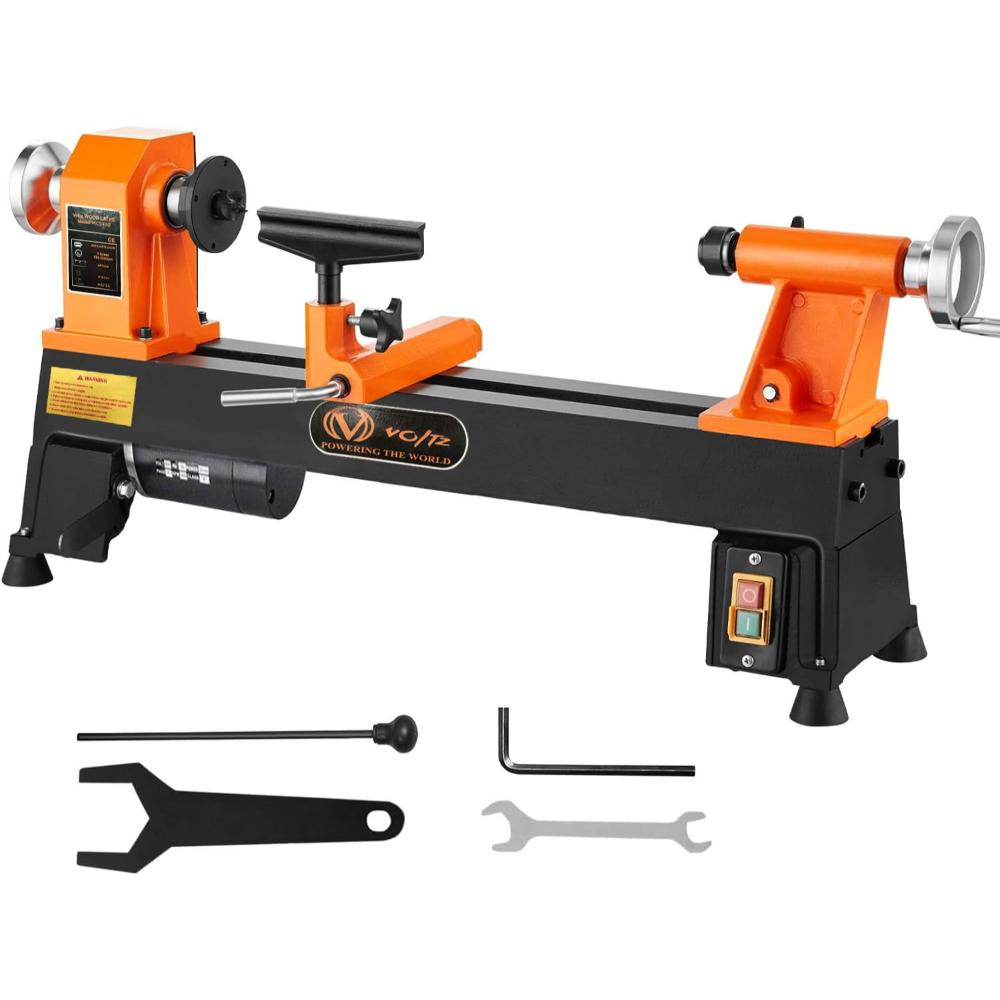
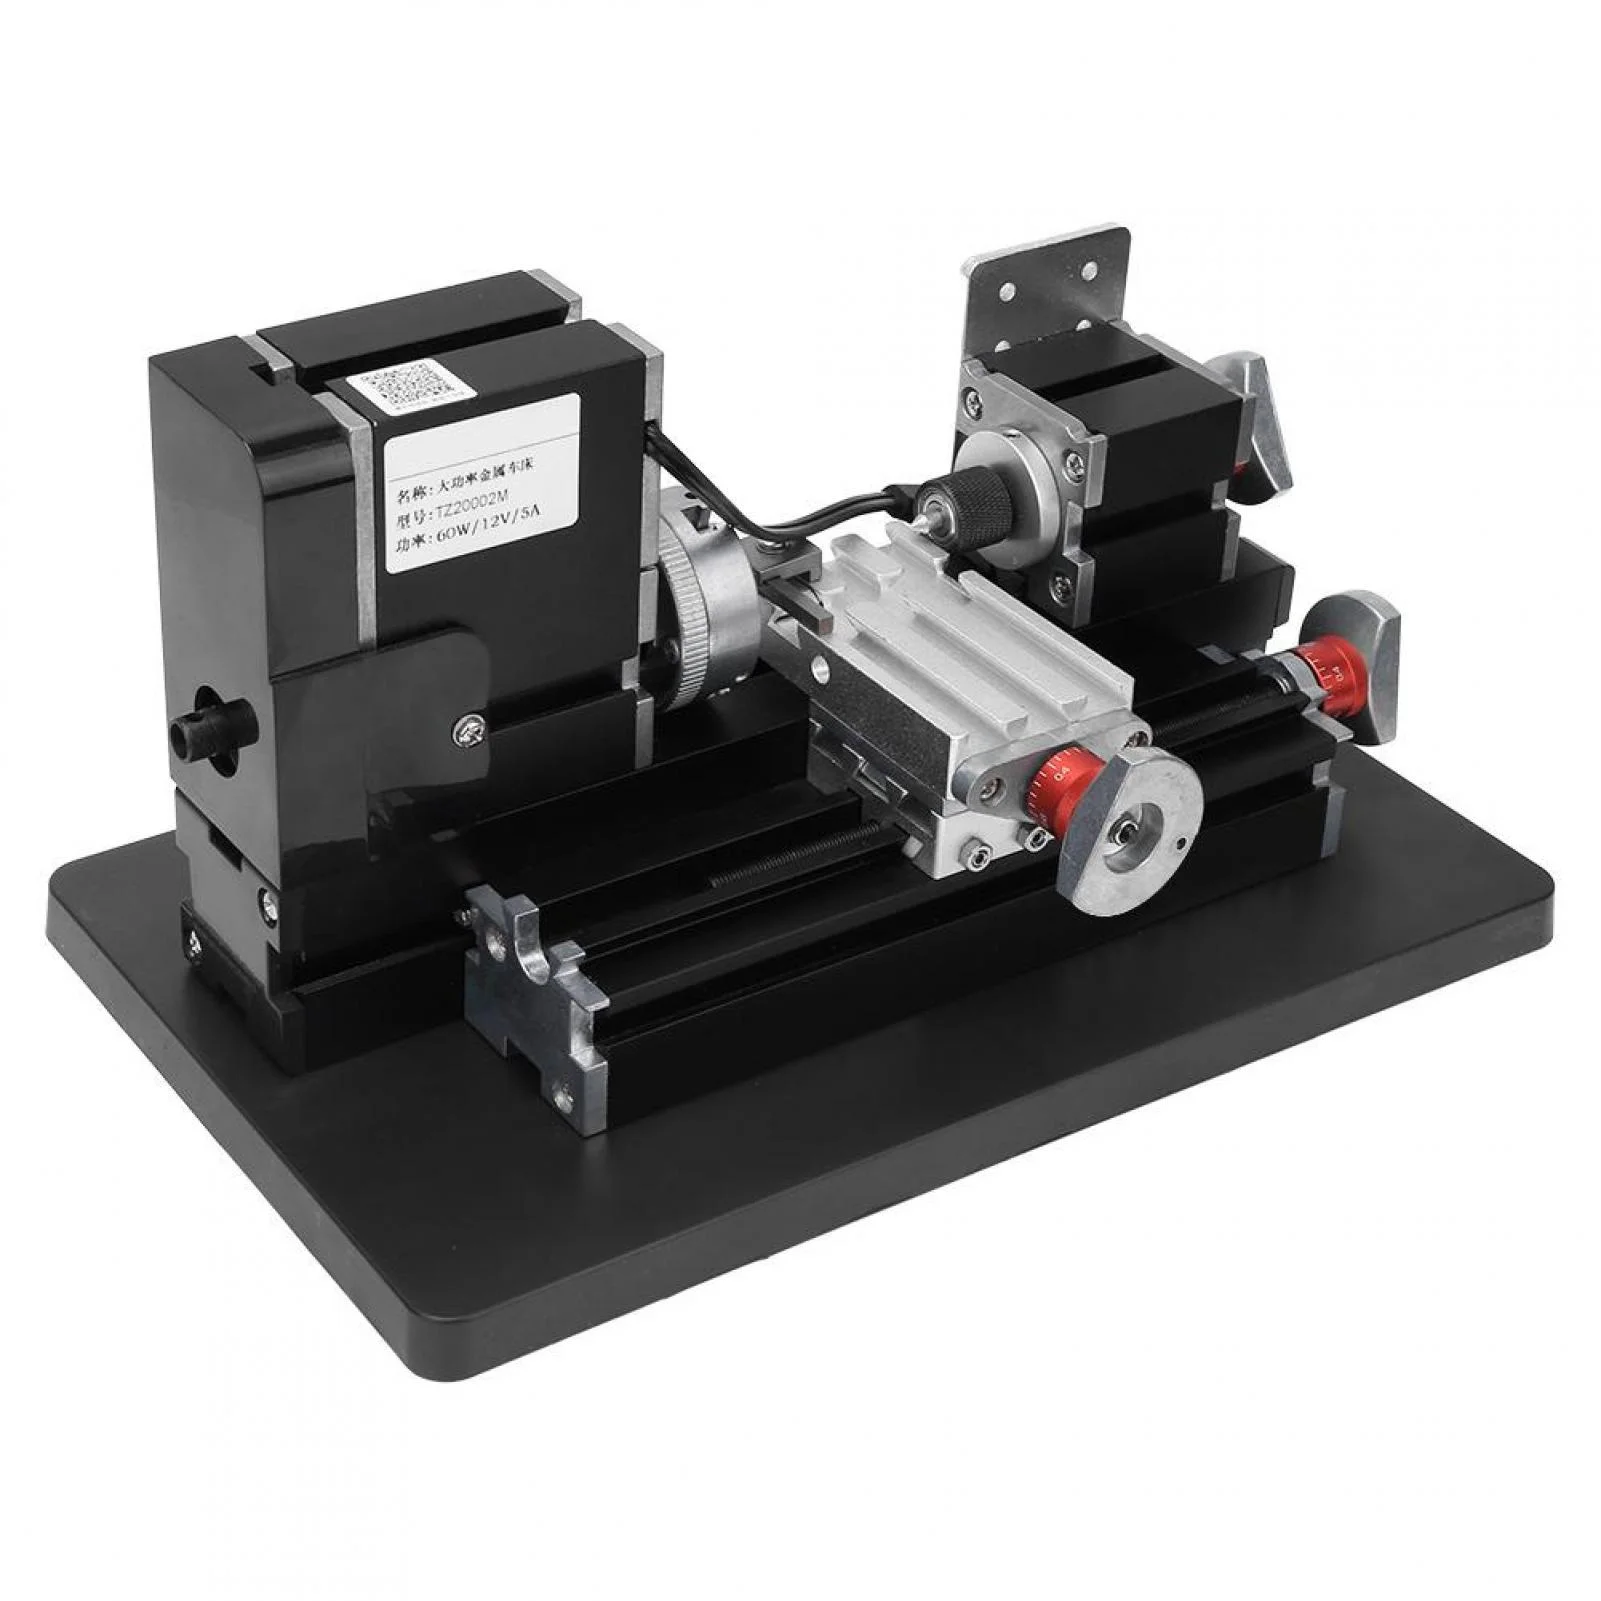
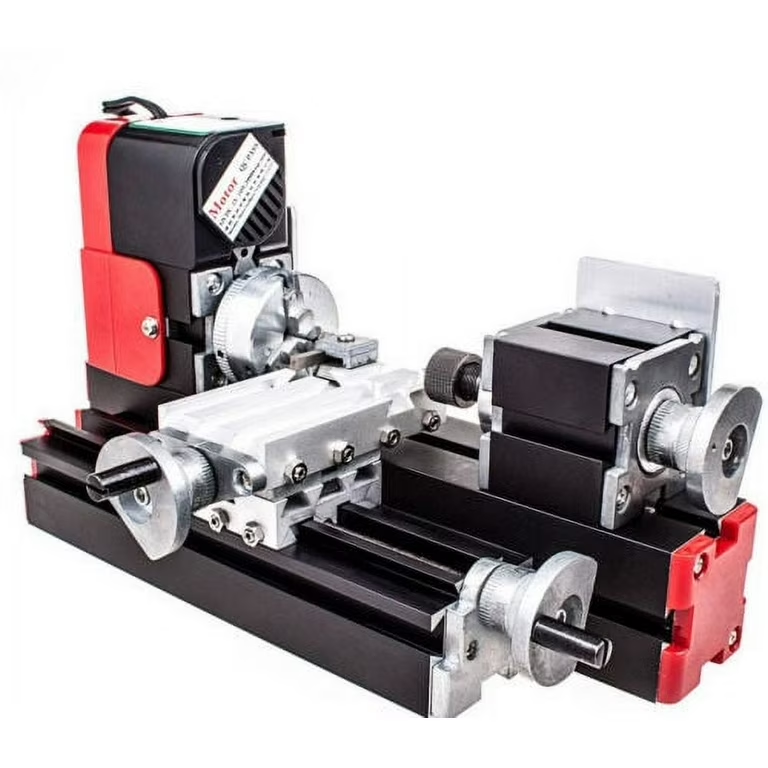
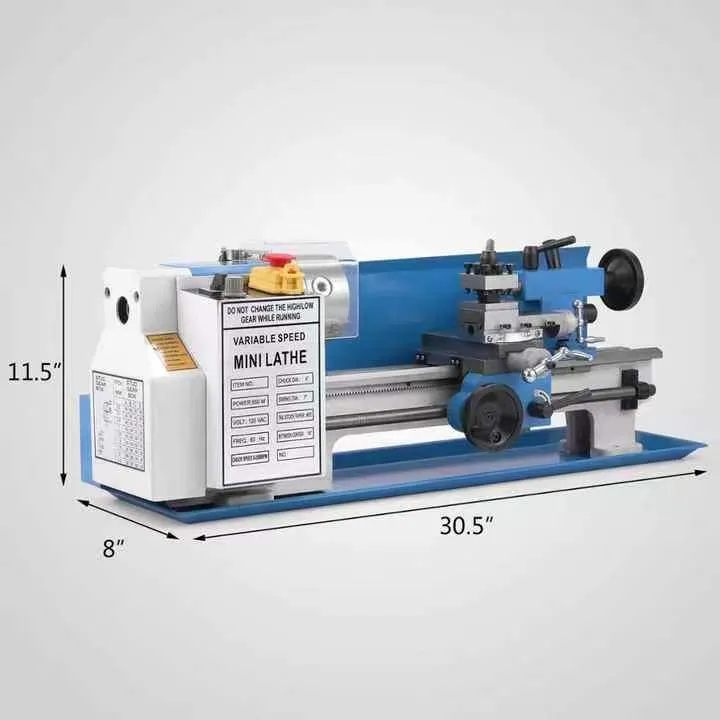
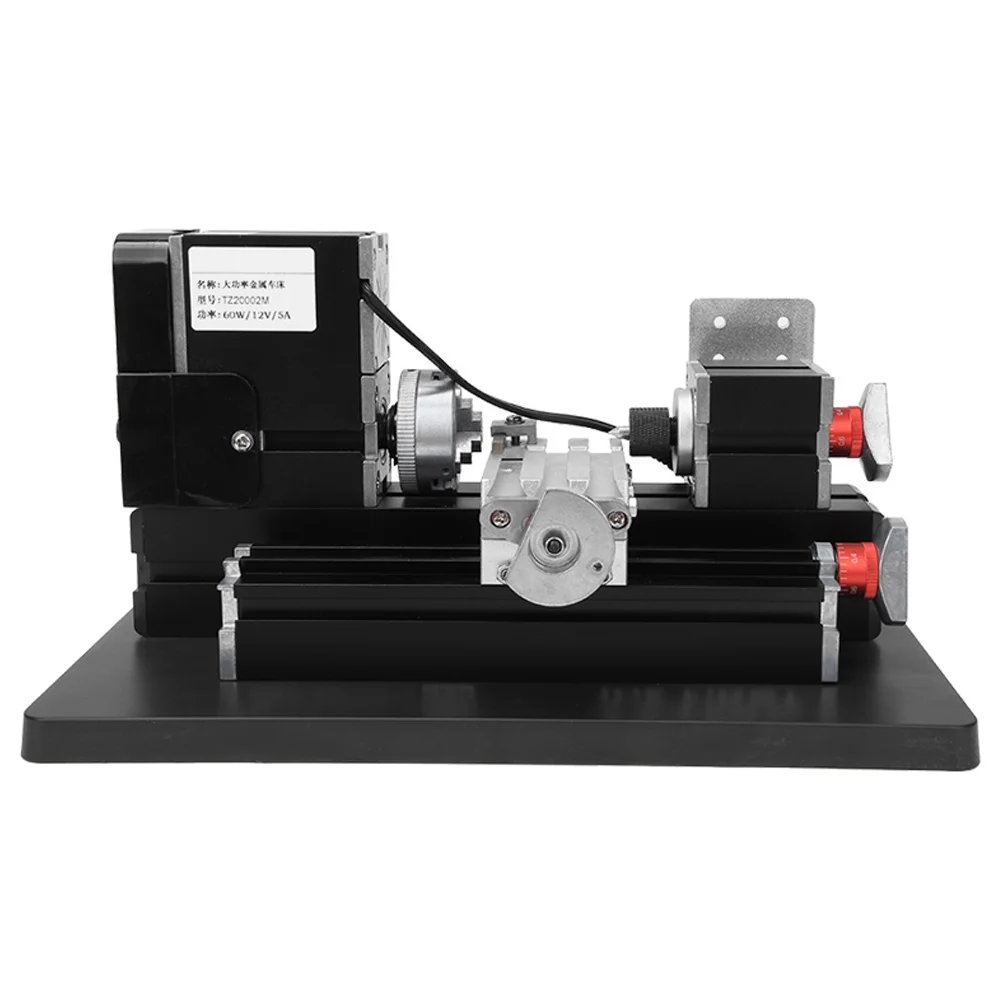
Understanding the key features and components of mini lathes is essential for anyone looking to purchase or use one. The headstock houses the spindle and motor, providing the rotational force needed for turning operations. Most mini lathes come with a variable speed motor, allowing users to adjust the spindle speed for different materials and cutting operations. The tailstock, located opposite the headstock, supports long workpieces and can hold drilling or boring tools. Between these two components lies the bed, which provides a stable platform for the carriage and cross-slide.
These elements allow for precise movement of the cutting tool along the workpiece. The chuck, typically a three-jaw self-centering type, secures the workpiece firmly in place during operation. Many mini lathes also feature a compound slide, which allows for angled cuts and tapers. Tool posts hold cutting tools securely and can often be quickly changed for different operations. Additionally, modern mini lathes may include digital readouts for precise measurements, coolant systems to manage heat during cutting, and even basic CNC controls for automated operations. Understanding these components helps users make informed decisions when choosing a mini lathe and enables them to utilize the machine to its full potential.
Choosing the Right Mini Lathe for Your Needs
Selecting the perfect mini lathe requires careful consideration of several factors. First, consider the types of projects you plan to undertake. Different mini lathes offer varying levels of precision, power, and capacity. The swing over bed measurement indicates the maximum diameter of workpiece the lathe can handle, while the distance between centers determines the maximum length. For hobbyists working on small projects, a lathe with a 7×12 or 7×14 capacity often suffices. However, those tackling larger projects might opt for models with 8×16 or even 9×20 capacities.
Motor power is another crucial factor, with most mini lathes ranging from 1/3 to 3/4 horsepower. More powerful motors allow for heavier cuts and working with harder materials. The speed range of the lathe is also important, with wider ranges offering more versatility for different materials and operations. Additionally, consider the construction quality of the lathe. Cast iron beds provide better vibration dampening and stability compared to aluminum alternatives. The availability of accessories and upgrades should also factor into your decision, as these can greatly expand the capabilities of your mini lathe. Lastly, don’t forget to consider your budget and the space available in your workshop. By carefully weighing these factors, you can choose a mini lathe that will serve your needs for years to come.
Setting Up Your Mini Lathe Workshop
Creating an efficient and safe workspace for your mini lathe is crucial for enjoyable and productive machining. Start by selecting a sturdy workbench or dedicated lathe stand that can support the weight of the machine and absorb vibrations. Ensure the lathe is securely bolted down to prevent movement during operation. Proper lighting is essential for accurate work, so install bright, adjustable task lighting around the lathe. Organize your tools and accessories within easy reach, using pegboards, tool chests, or custom-built storage solutions. A nearby sharpening station for lathe tools will help maintain cutting efficiency.
Consider installing a small compressor and air line for cleaning chips from the lathe and workpieces. Proper chip management is crucial, so set up a chip tray or use magnetic sweepers for easy cleanup. Safety should be a top priority, so include personal protective equipment (PPE) such as safety glasses, hearing protection, and appropriate work gloves in your setup. A first aid kit and fire extinguisher should also be readily accessible. If possible, dedicate a separate area for measuring and layout work to keep these precision tools away from metal chips and cutting fluids. By thoughtfully arranging your mini lathe workshop, you’ll create a safe and efficient space that enhances your machining experience and productivity.
Essential Tools and Accessories for Mini Lathe Users
Equipping your mini lathe with the right tools and accessories greatly expands its capabilities and improves your machining experience. Start with a set of high-speed steel (HSS) cutting tools, including left-hand, right-hand, and neutral turning tools, as well as boring bars and parting tools. Carbide-tipped tools offer longer life and can handle harder materials but are more expensive. A good set of drill bits, center drills, and a drill chuck for the tailstock are essential for creating holes in workpieces.
Invest in quality measuring tools such as calipers, micrometers, and dial indicators to ensure accuracy in your work. A tailstock die holder and tap holder allow for thread cutting operations. Four-jaw independent chucks and faceplate attachments expand your workholding options beyond the standard three-jaw chuck. Steady rests and follow rests support long or slender workpieces during turning operations. For more advanced work, consider acquiring a quick-change tool post system, which allows for rapid tool changes and improved rigidity.
Collet chucks and 5C collets provide excellent concentricity for smaller workpieces. Don’t forget consumables like cutting fluids, lubricating oils, and abrasives for finishing work. As you gain experience, you may want to add specialized tools like knurling tools, internal threading tools, or even a milling attachment to further expand your mini lathe’s capabilities. By building up your toolkit over time, you’ll be prepared to tackle a wide range of machining projects with confidence and precision.
Mastering Basic Lathe Operations
Developing proficiency in basic lathe operations forms the foundation for all future machining projects. Facing operations, which create a flat surface perpendicular to the workpiece axis, are often the first step in many turning projects. This operation establishes a reference surface and ensures the workpiece is square. Turning, the process of reducing the diameter of a workpiece, is the most fundamental lathe operation. It involves moving the cutting tool along the length of the rotating workpiece to create cylindrical shapes.
Proper feed rates and cutting depths are crucial for achieving smooth finishes and maintaining tool life. Drilling on the lathe utilizes the tailstock to create precise holes along the workpiece’s centerline. Center drilling before standard drilling operations helps ensure accuracy and prevents drill wandering. Boring operations enlarge existing holes to precise diameters and can create internal features. Parting, or cutting off, separates the finished workpiece from the stock material. This operation requires careful attention to cutting speed and tool alignment to prevent binding.
Tapering creates angled surfaces and can be accomplished using the compound slide or by offsetting the tailstock. Threading operations, both external and internal, allow for the creation of screws, bolts, and threaded holes. Each of these operations requires practice to master, but they form the basis for more complex machining tasks. As you become comfortable with these basic operations, you’ll develop a feel for how different materials behave and how to achieve the best results with your mini lathe.
Advanced Techniques and Projects
As your skills with the mini lathe grow, you can tackle more advanced techniques and complex projects. Precision boring for press-fit assemblies requires careful measurement and control of cutting parameters. Creating custom tooling, such as specialized cutting tools or workholding devices, showcases the mini lathe’s versatility. Knurling adds textured patterns to cylindrical surfaces, improving grip or appearance. Ball turning attachments allow for the creation of perfect spheres, useful for both decorative and functional parts.
Eccentric turning, where the workpiece rotates off-center, enables the creation of camshafts and other non-concentric parts. Thread chasing by hand, while challenging, allows for the repair of damaged threads or the creation of custom thread forms. Multi-start threads, common in quick-release mechanisms, can be produced with careful setup and indexing. For the more adventurous, rose engine turning creates intricate, repeating patterns on flat or curved surfaces, often seen in high-end watch making.
Combining turning operations with milling attachments opens up possibilities for creating complex parts with both round and flat features. Micro-machining techniques push the limits of the mini lathe’s precision, creating tiny parts for model engineering or scientific instruments. These advanced techniques not only expand the range of projects you can undertake but also deepen your understanding of machining principles. As you master these skills, you’ll find yourself able to tackle increasingly complex and rewarding projects, limited only by your imagination and patience.
Maintenance and Troubleshooting
Proper maintenance ensures your mini lathe remains accurate and reliable for years to come. Establish a regular cleaning routine, removing chips and wiping down surfaces after each use. Lubricate all sliding surfaces and oiling points according to the manufacturer’s recommendations. Check and adjust gibs periodically to maintain smooth, play-free movement of the carriage and slides. Inspect belts for wear and proper tension, replacing them when necessary. Keep the chuck jaws clean and lightly oiled to prevent rust and ensure smooth operation.
Regularly check the alignment of the headstock and tailstock, adjusting as needed to maintain accuracy. Sharpen or replace cutting tools promptly to ensure clean cuts and prevent undue stress on the lathe. When troubleshooting issues, start by checking the basics: Is everything tightened properly? Are gibs adjusted correctly? Is there adequate lubrication? Common problems like chatter can often be resolved by reducing cutting depth, increasing spindle speed, or improving workpiece support.
Poor surface finishes might indicate dull tools, incorrect speeds and feeds, or lack of rigidity in the setup. Inaccurate dimensions could point to wear in the leadscrew or misalignment of the lathe components. Unusual noises or vibrations warrant immediate investigation, as they could indicate bearing problems or loose components. Keeping a log of maintenance activities and any issues encountered helps track the lathe’s performance over time. By staying proactive with maintenance and developing good troubleshooting skills, you can keep your mini lathe in top condition and minimize downtime.
Expanding Your Skills: From Manual to CNC
The journey from manual machining to computer numerical control (CNC) represents a significant leap in capabilities for mini lathe users. Many modern mini lathes come with the option to retrofit CNC controls, opening up new possibilities for precision and automation. The transition to CNC involves learning G-code programming, the standard language for CNC machines. While it may seem daunting at first, many CAD/CAM software packages can generate G-code automatically from your designs.
CNC capabilities allow for the creation of complex profiles, precise repetition of parts, and even the production of 3D contours that would be challenging or impossible to achieve manually. The consistency and speed of CNC operations make it ideal for small production runs or creating multiple identical parts. However, the shift to CNC doesn’t negate the value of manual skills. Understanding manual operations provides a solid foundation for CNC work, as it gives you insight into cutting forces, tool selection, and workpiece behavior.
Many machinists find that a hybrid approach, combining manual and CNC techniques, offers the best of both worlds. As you explore CNC capabilities, consider starting with simple conversational controls before moving to full G-code programming. This gradual approach allows you to build confidence and understand the principles of CNC machining. Whether you choose to embrace CNC fully or use it as a complement to manual skills, expanding into this area can significantly enhance your mini lathe’s capabilities and open up new project possibilities.
The Future of Mini Lathes in the Digital Age
The evolution of mini lathes continues as technology advances, bringing new features and capabilities to these compact machines. Increased integration of digital readouts and touch-screen interfaces makes operation more intuitive and precise. Wireless connectivity allows for direct transfer of designs from computers or tablets to the lathe, streamlining the workflow. Advancements in motor technology, such as brushless DC motors, offer improved efficiency and finer speed control. The incorporation of IoT (Internet of Things) sensors enables predictive maintenance, alerting users to potential issues before they become critical.
Virtual and augmented reality training programs are emerging, offering new ways to learn and practice lathe operations safely. As 3D printing technology matures, hybrid machines that combine additive and subtractive manufacturing in one compact unit are becoming reality. These developments are making mini lathes more accessible and versatile than ever before. The growing maker movement and renewed interest in small-scale manufacturing are driving innovation in mini lathe design and capabilities. As these trends continue, we can expect to see even more advanced features, improved ease of use, and greater integration with other workshop technologies. The future of mini lathes looks bright, promising exciting possibilities for hobbyists, educators, and small businesses alike.